Recap
Last episode, we learned more about SPI (Serial Peripheral Interface) and how to use it with the AVR Butterfly’s 4 Mbit DataFlash. I ended that article with the promise that this time we would use the Butterfly DataFlash in a data logger application. However, then reality smacked me up side the head and I realized that we were getting into fairly complex stuff without having discussed some of the background concepts we will need to understand to keep from getting too confused.
A data logger uses just about everything that a microcontroller can do. We will be using the DataFlash to log the data, the hardware SPI to talk to the DataFlash, the USART to talk with a PC, one of the timers for a real time clock, the ADC for light, temperature, and voltage sensors, and other things that escape me at the moment. The point is that without some higher level of organization, this project will get out of hand. So, instead, let's begin to build resources that we will use later to make that promised data logger.
I Left It Around Here Somewhere ...
Up to now, we’ve been pretty much dealing with only a few things at a time. For instance, when we examined AVR memory we divided it up into five articles where we learned about each type of memory and wrote some code that let us use each type. In the last two articles, we learned to access external memory in the Butterfly’s Atmel DataFlash using the SPI bus (with hardware and software versions — and as a side benefit, we built a new light chaser LED project that had nothing to do with memory). So now, with all these great simple projects under your belt, you can easily recall all that you learned and immediately write the code — right? Well, if you can, you’ve got a better memory than I do.
I wrote the stuff and can’t rewrite it from memory, and to make matters worse, I often can’t even find where I left the working code. Smiley’s Workshop is like a typical real workshop: It is very messy. In a real workshop, you’ll be puttering along with a project and remember that you need to use a widget similar to one you built a few month’s ago, so you go looking for it and hours later you find it under a pile of other widgets gathering dust in a corner. [And, yes the laws of nature work here — it really is the last place you’d think to look.] So you dust it off, build a copy of it, attach it to your project, and then realize AGAIN that for the next step you need another widget just like one you built several months ago. And darned, if you didn’t see it when you were looking just now ... but where? And off you go again.
AVR_Toolbox
What we really need is a well organized toolbox for all our stuff. Please note that I said ‘we’ — yes, you and me! Because of the miracle of the Internet, we will be able to use the same toolbox.

FIGURE 1. AVR_Toolbox.
The AVR_Toolbox (metaphorically shown in Figure 1) is an open source project hosted on Google Code [http://code.google.com/p/avrtoolbox] where you will be able to access all sorts of AVR tools discussed in Smiley’s Workshops. Anyone can download the code and since this is a “we” project, if you want to participate (and aren’t crazy), I’d be happy (even grateful) for your help. I especially need feedback on typos and bugs, so if you see any problems, be sure and post something in the ‘issues’ page. AVR_Toolbox is a work in progress and always will be. We expect to get better with time; likewise, we expect our tools to get better.
Documenting With Doxygen
Doxygen [www.stack.nl/~dimitri/doxygen] is a software documentation system that helps you write comments in your source code that can be scanned to produce documents in a variety of formats; most relevant here are HTML (shown in Figure 2) and Windows Help files (.html and .chm). Doxygen can do a lot of stuff and the AVR_Toolbox documentation is only one way to do things — one way that might evolve over time as we learn more about it.
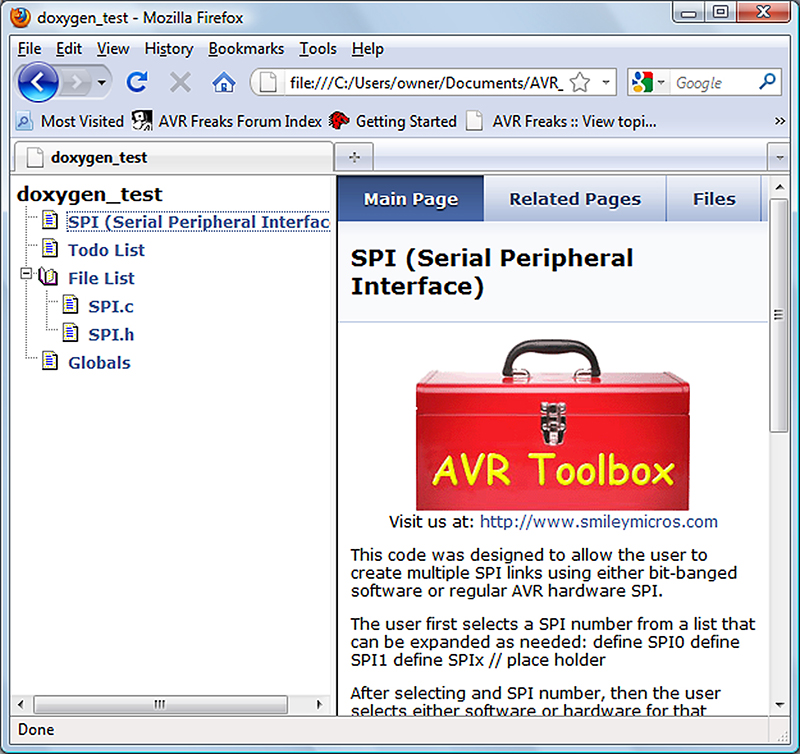
FIGURE 2. Doxygen generated HTML main page.
One good reason to use doxygen is that it allows us to keep the documentation in one place tied directly to the source code. If we change the code, we’ve got the documentation right there in the code, making it easy to change it also. If you keep your documents in a separate manual and you make a change in the code, you’ll write a note to yourself to remember to change the manual and then (if you’re like me) you’ll lose the note. With doxygen, you can even keep a to-do list directly linked to the code (shown in Figure 8).
Since we discussed the SPI in our last installment, we will convert those functions into a library that we will document with doxygen to illustrate the principles involved. First, we create the documentation for our main page using the doxygen \mainpage directive:
/*!    <br />
\image html AVR_Toolbox.gif
<center>Visit us at: [url=http://www.smileymicros.com]http://www.smileymicros.com[/url] </center>
\mainpage SPI (Serial Peripheral Interface)
This code was designed to allow the user to create multiple SPI links using either bit-banged software or regular AVR hardware SPI.
The user first selects a SPI number from a list that can be expanded as needed:<br />
#define SPI0<br />
//#define SPI1<br />
//#define SPIx // place holder
After selecting and SPI number, then the user selects either software or hardware for that number:<br />
//#define SPI0_SOFT<br />
#define SPI0_HARD
The user accesses the following functions:\n<br />
void spi0_init_master(void);\n<br />
uint8_t spi0_master_rw8(uint8_t to_slave);\n<br />
uint16_t spi0_master_rw16(uint16_t to_slave);\n
Which are alia’s for the software or hardware version.
This code was tested for SPI0 in both software and hardware modes on the ATmega169, ATmega328, and ATmega644 (TODO)
\todo 1. Test it for the ATmega644.<br />
\todo 2. Retest with the Arduino board.<br />
\todo 3. Improve the comments before letting this puppy loose!
\author Joe Pardue<br />
\date October 29, 2010<br />
*/
Doxygen will find this section and turn it into an html file that looks like Figure 2.
The first thing to notice about the code is that the section we want doxygen to look at is delimited with /*! and */. Most of the doxygen commands use a backslash (‘\’) character such as \mainpage. There are many doxygen commands, but we will only use a small subset of them to keep things simple. [The source code file is in the Workshop30.zip available in the downloads at the end of this article.]
Using Doxygen
After you install doxygen, you will find doxywizard.exe in the bin file. This application provides a GUI front-end for doxygen that helps simplify using it. Open it and fill out the project information as shown in Figure 3. In our case, we will be creating html documentation for the SPI functions in doxygen_test [in Workshop30.zip].
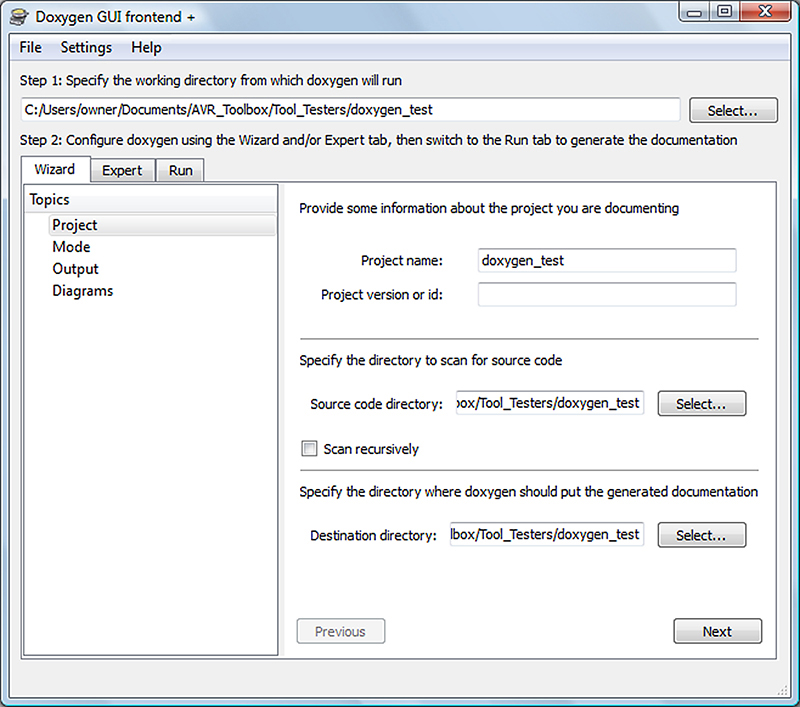
FIGURE 3. Doxywizard project.
Click Next and set the mode as shown in Figure 4.
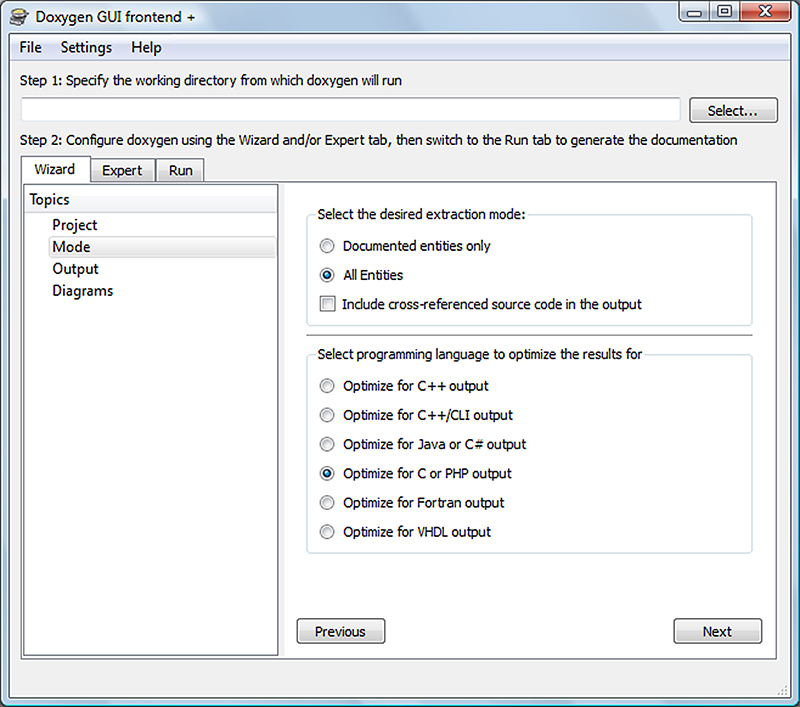
FIGURE 4. Doxywizard mode.
Click Next again, and set the output as shown in Figure 5.
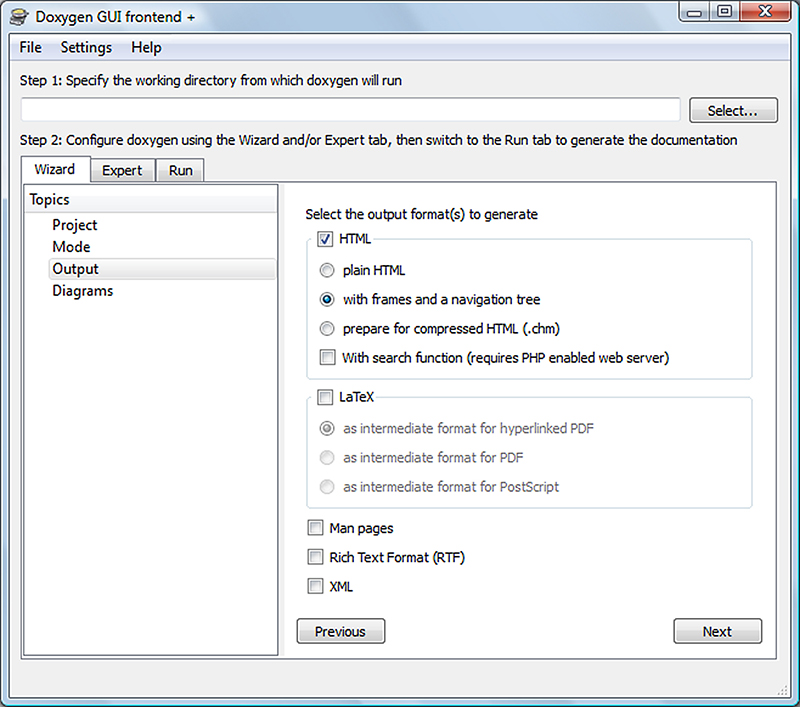
FIGURE 5. Doxywizard output.
Click Next, but skip the Diagrams and you get what you see in Figure 6 where you will click on the ‘Run doxygen’ and doxygen will generate your html files.
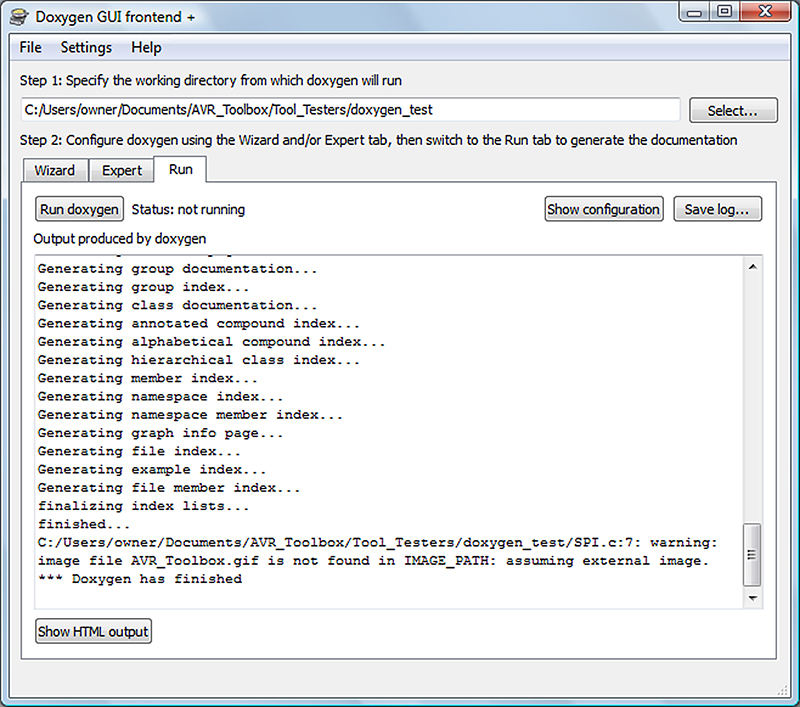
FIGURE 6. Doxywizard run.
Clicking on ‘Show HTML output’ will open your default browser with the files as shown in Figure 2. After you have finished playing with doxygen and are ready to close it, it will ask if you want to save the configuration file ‘Doxyfile’ — which you do. So, save it along with the rest of your project and then if you want to change anything, the next time you run doxygen you can use the File menu to open the existing Doxyfile, and save time filling in the wizard boxes.
Looking At The Doxygen Generated Output
Quite frankly, I was shocked the first time I ran through this because the doxygen generated output document looks surprisingly good. It makes you want to go back to the code and spiff it up a bit just so it won’t be embarrassed to be seen with such classy documentation. You’ve seen the main page in Figure 2, so play with it a bit to see what you’ve really got. In the frame on the left, click on the SPI file and you’ll see the functions listed as shown in Figure 7.
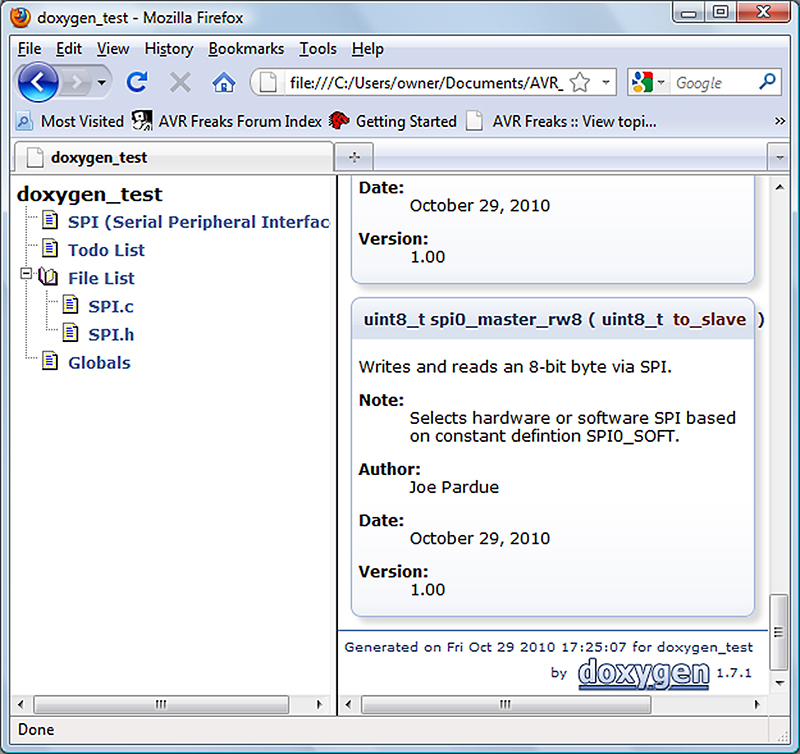
FIGURE 7. Doxygen generated SPI function.
Click on the Todo List and you’ll get what’s shown in Figure 8.
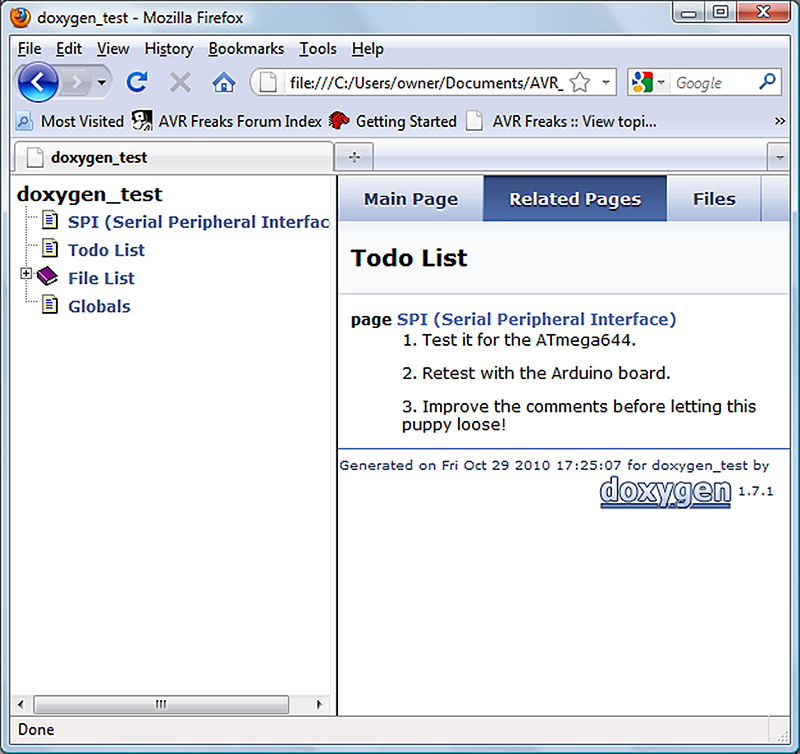
FIGURE 8. Doxygen generated Todo list.
As we progress with developing our AVR Tools library, we will add a few more doxygen features to the process, keeping in mind that our goal is to make the code documenting process as simple and easy as possible so we will use it, but with just enough features to make the output really useful.
Converting To The HTML Help .chm File
You will notice that the HTML output is about 40 files and that you need to click on index.html to open the browser to access them. You can convert these files into a single compressed HTML (.chm) file (such as the typical Microsoft Help file shown in Figure 12).
Set Doxygen to prepare the HTML output for compressed HTML (.chm) by selecting what’s shown in Figure 9, then run it to create the file.
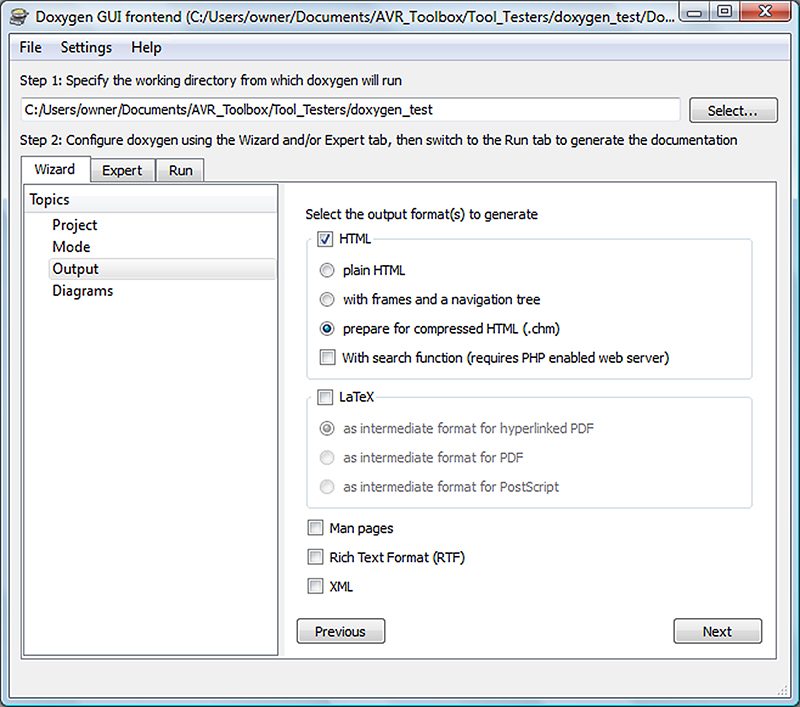
FIGURE 9. Doxywizard output compressed HTML.
Download Microsoft HTML Help Workshop from http://msdn.microsoft.com/en-us/library/ms669985.aspx. Open HTML Help Workshop and click ‘File\Open,’ then browse to select the index.hhp generated by Doxygen which will fill out the IDE as shown in Figure 10.
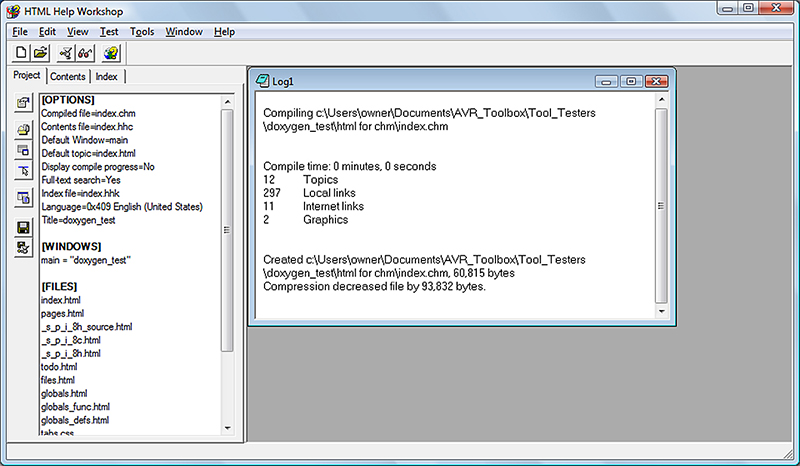
FIGURE 10. HTML Help Workshop.
Click on the ‘Compile HTML file’ button as shown in Figure 11.
FIGURE 11. Compile HTML file.
The results will be index.chm. Change the name to doxygen_test.chm and click on it to reveal the help file shown in Figure 12.
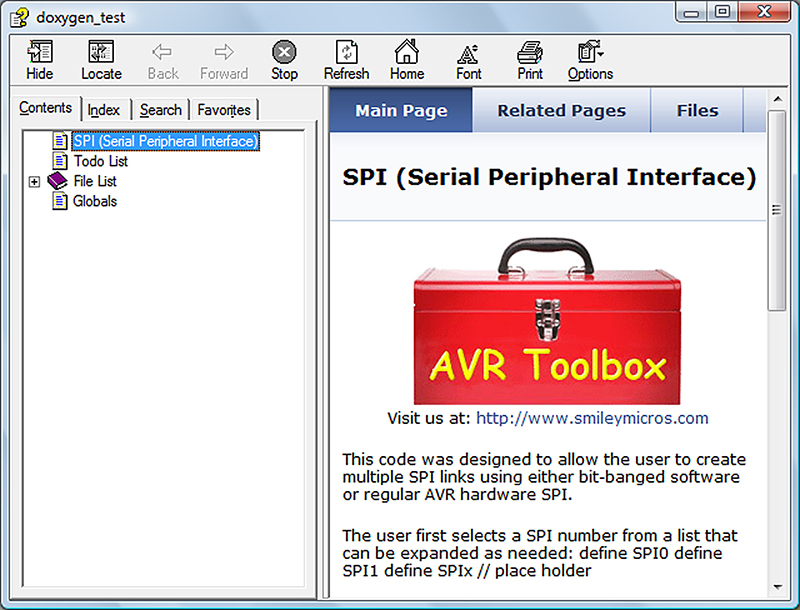
FIGURE 12. Doxygen_test compressed HTML Help file.
You will probably want to expand this to full screen. This has the same information in it as the HTML files generated earlier, but it is now all in one file (half the size of the original html) and the Help format provides some search options not available viewing the HTML version in a browser.
You now have one simple way to generate documents for your source code and you have an introduction to a tool (doxygen) that has many other features you may want to explore.
Libraries
It might seem logical to keep a bunch of related functions in a single text file like we do with SPI.c that we used for our doxygen test. However, there is a problem with this in that when we write a program that only uses a few of the SPI functions, if we include the entire SPI.c file, the compiler will create a single object module for it and all the functions whether used or not will get linked into our program, increasing our code size unnecessarily. We don’t want that. We want to keep the code as small as possible and only link to the functions we will use. In order to do this, we will put each function into a separate file and compile each function into an object module that we will then put in a library. The linker will scan the library to find only the functions that are used in the code. Since we are going to be using the AVR Butterfly for our data logger, we will use a Butterfly specific subset of the SPI functions discussed last episode, and put them into a special Butterfly SPI library.
Let’s do this cookbook style. First, we extract the SPI functions that we want to use with the Butterfly into four separate .c files: spi0_init_master.c, spi0_master_rew16.c, spi0_master_rw8.c, and spi0_SS.c. Then, we add them to an AVRStudio project SPI_Library as shown in Figures 13 and 14.
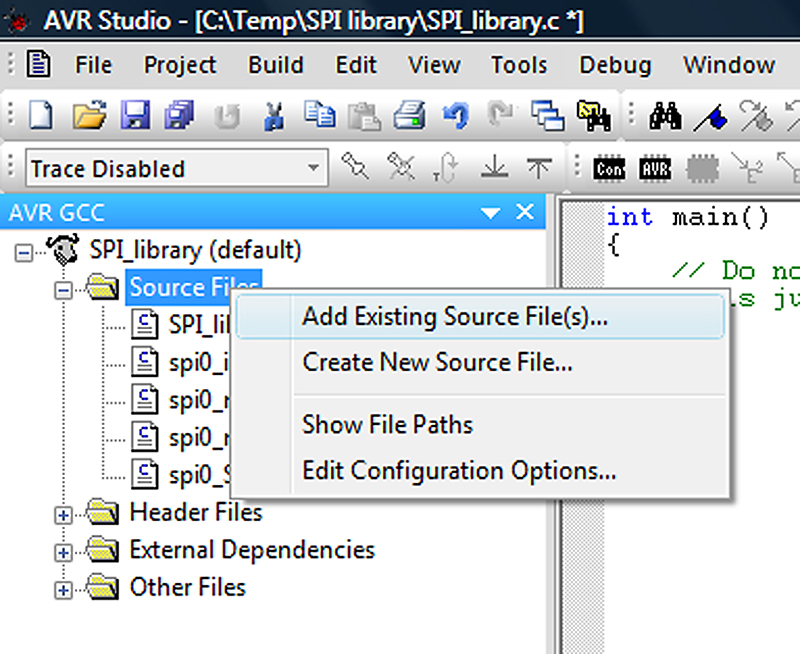
FIGURE 13. Add the .c files.
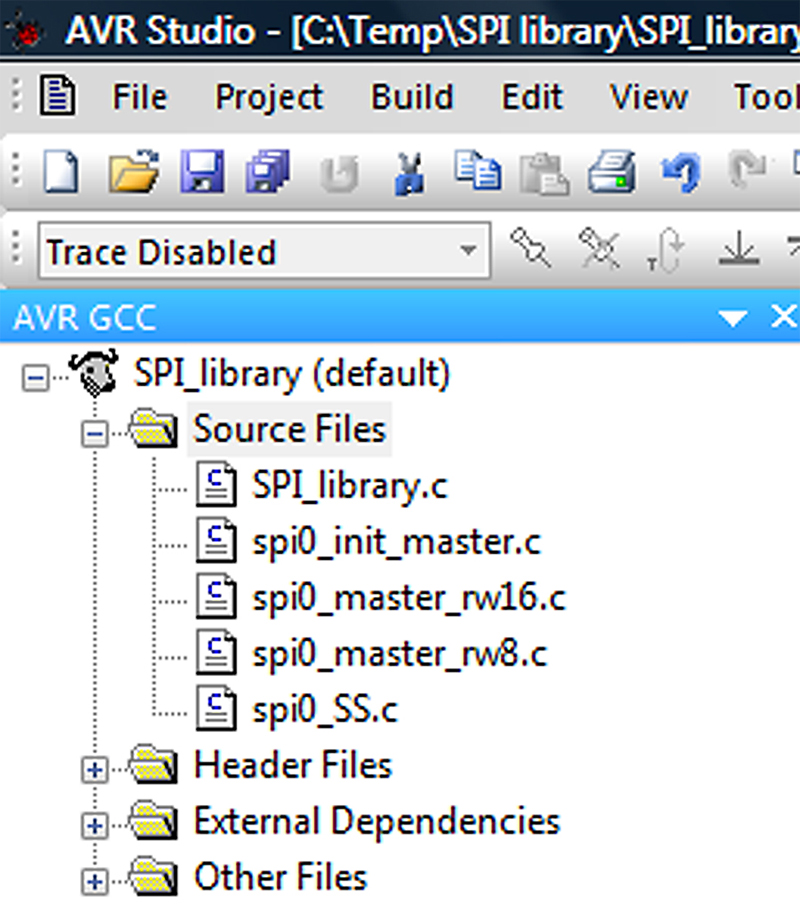
FIGURE 14. Individual functions as .c files.
Next, we add the main.c file that, in this case, does nothing:
int main()<br />
{<br />
 // Do nothing since this program<br />
 // is just to create the objects<br />
}
Run the compiler and you will generate the object modules for each of the .c files that will be located in the \default directory as shown in Figure 15.
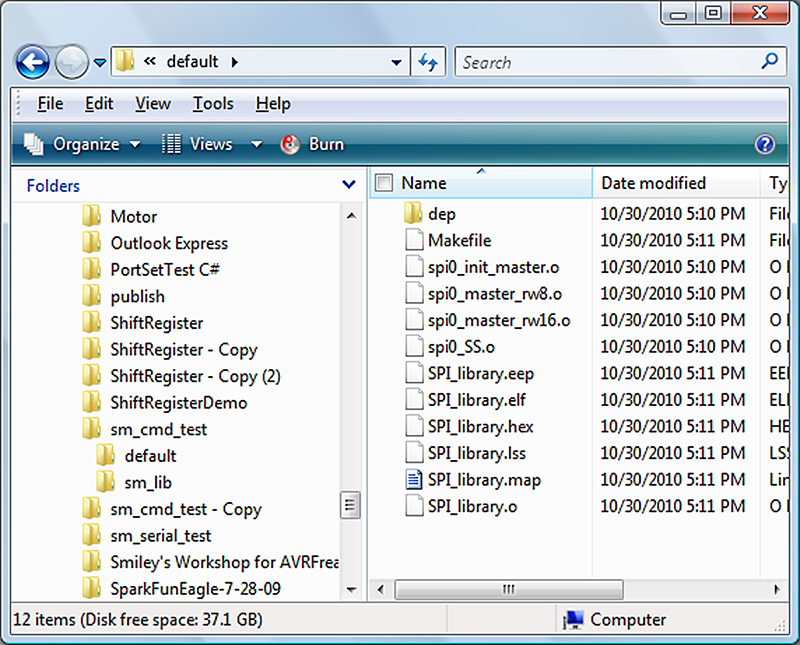
FIGURE 15. Verify that you’ve created the objects.
You will find the library builder — avr-ar.exe — in the WinAVR bin directory (in my case, C:\WinAVR-20090313\bin\avr-ar.exe). To use this, you must first find the ‘Command Prompt’ by browsing to the Windows Accessories directory as shown in Figure 16, then open it as shown in Figure 17.

FIGURE 16. Find the Command Prompt.

FIGURE 17. Run avr-ar in the Command Prompt.
The library creation program requires a long and difficult to type command line. Don’t try to type your commands into the Command Prompt since (if you are like me) you will never get it right. Use Notepad to input the command string shown below, then copy and paste it to the cmd window. Assuming that our object files are in ‘C:\SPI_library\,’ the following string will create our library:
avr-ar rcs<br />
C:\SPI_library\libButterflySPI.a<br />
C:\SPI_library\default\spi0_init_master.o<br />
 <br />
C:\SPI_library\default\spi0_master_rw8.o<br />
C:\SPI_library\default\spi0_master_rw16.o<br />
C:\SPI_library\default\spi0_SS.o
NOTE that this must all be on one line and is shown here on several lines since it would be too wide otherwise. Make sure there is a single space between each item. Copy and paste it as shown in Figure 17. Push the ENTER button on your keyboard and if it runs okay, you don’t get any messages, so you’ll want to look in the SPI_library directory and make sure that libButterflySPI.a is really there.
Using libButterflySPI.a
Let’s test this by copying the DataFlashTest project from our last workshop to a new SPI_Library_Test directory so that we can test known good code with the new library [source is in Workshop30.zip]. This works pretty much like last episode’s DataFlash program except that in the SPI subdirectory, we delete the SPI.c file and copy/paste libButterflySPI.a to replace it. Next, we open the AVRStudio Project menu and select the Project Options. Click on the libraries icon to open the window shown in Figure 18.

FIGURE 18. Project Options.
In the upper part of this window, click on the little folder icon (left of the red X) and navigate to the SPI folder. It will show SPI\ in the upper text box and it will also locate the libButterflySPI.a file and show it in the ‘Available link Objects:’ list. Highlight the library, then click the ‘Add Object’ button to add it to the ‘Link with these objects’ list. Click okay and compile the project. It should compile okay and function exactly like it did when you used the SPI.c file. So it works the same, what did we gain with all this rigmarole? The main thing, as mentioned above, is that now the project will only use (compile in) the functions that you actually need and not clutter things up with unnecessary functions.
Wrap-Up
Now we know a good way to document our software and a way to create libraries. We can document and create libraries for all those Butterfly goodies that we’ll want to use in our data logger. If you just can’t wait and want to get a good leg up on C and the AVR (while helping support your favorite magazine and technical writer), buy my C Programming book and Butterfly projects kit through the Nuts & Volts webstore. Next time — if all goes well — we will continue with AVR_Toolbox by making it an open source project. NV
Downloads
Smileys Workshop30 Download