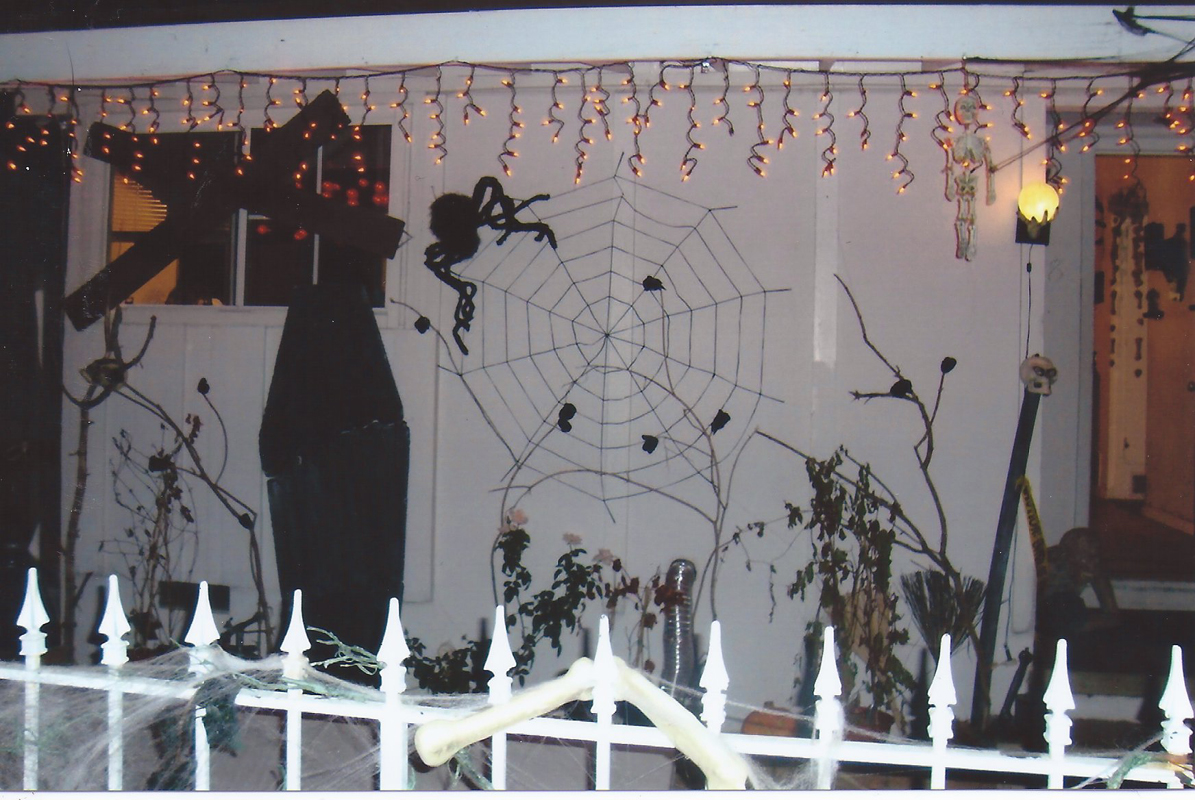
I find Halloween is always a fun time of the year. In my neck of the woods, it seems more money is spent on Halloween decorations than almost any other holiday. My friends, Veronica and Don Chaney are a good case in point. It's their favorite time of the year and they go all-out decorating their house (Figure 1). I like to tease Don during the holiday by showing Veronica the latest and greatest decorations — to Don’s (or actually his wallet's) dismay. I often get poked right back by him when he bugs me to build a couple of new automated creatures to add to their monster menagerie.
FIGURE 1.
Normally, I go into hiding at that point, but this year my friend, Vern Graner (full disclosure: he works for this magazine and is a Halloween nut too!) was showing me a couple of Halloween videos and one by Widgetwerks (see Resources) really caught my eye.
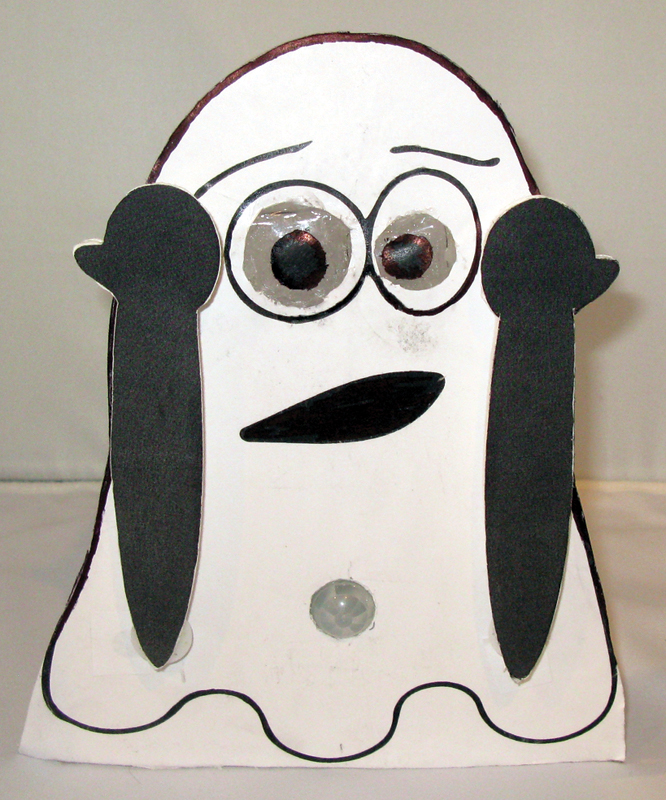
There was a little ghost that would use its hands to alternately cover, then reveal its eyes like as with the classic children’s game of “Peek-a-Boo.” It was cute. Okay, it was adorable! However, what was really impressive was that it was done with industrial rotatory pneumatic actuators, solenoid valves, and a PLC. Being in the business of building packaging and production line machinery, I could tell the equipment used in the video was a bit pricey.
Vern and I discussed the project, and decided the same motions could be easily accomplished with a couple of standard servo motors and a simple microcontroller for probably $50 or less. After I added a PIR motion sensor, a sound playback board, and some LEDs for eyes, I presented Veronica and Don with their new ghost.
So, if it’s way past time for you to add to your creepy collection of little Halloween horrors, it’s time to build your own Peek-a-Boo Ghost!
Hardware Required
I wanted the ghost to be as simple as possible to make, while also being economical to acquire. I started with a trip to the dollar store and picked up quarter inch white foam board and paste glue
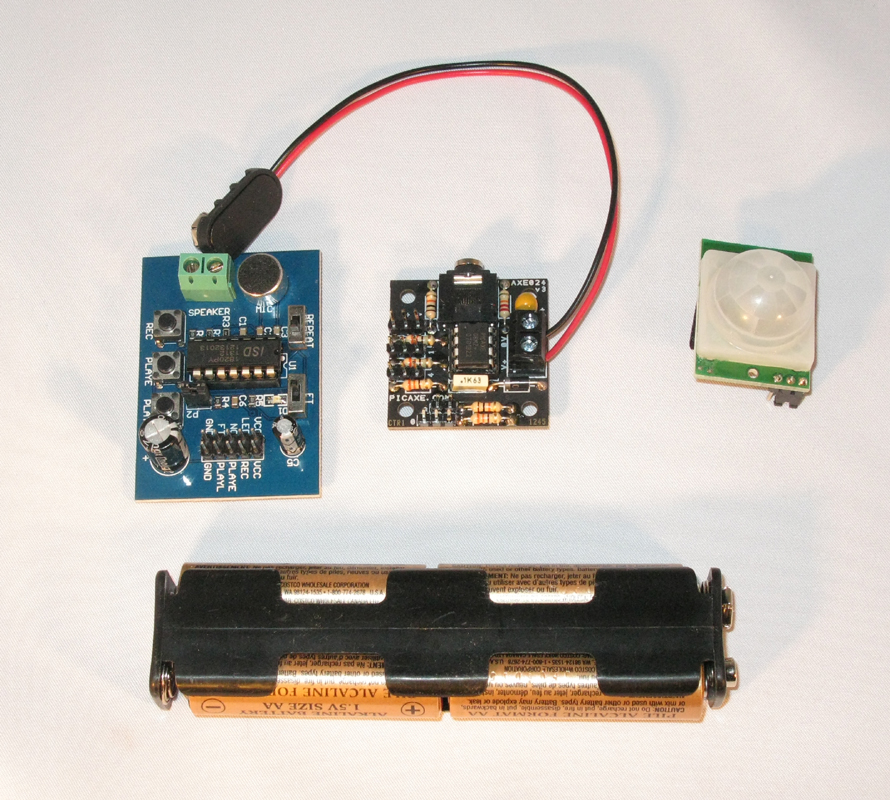
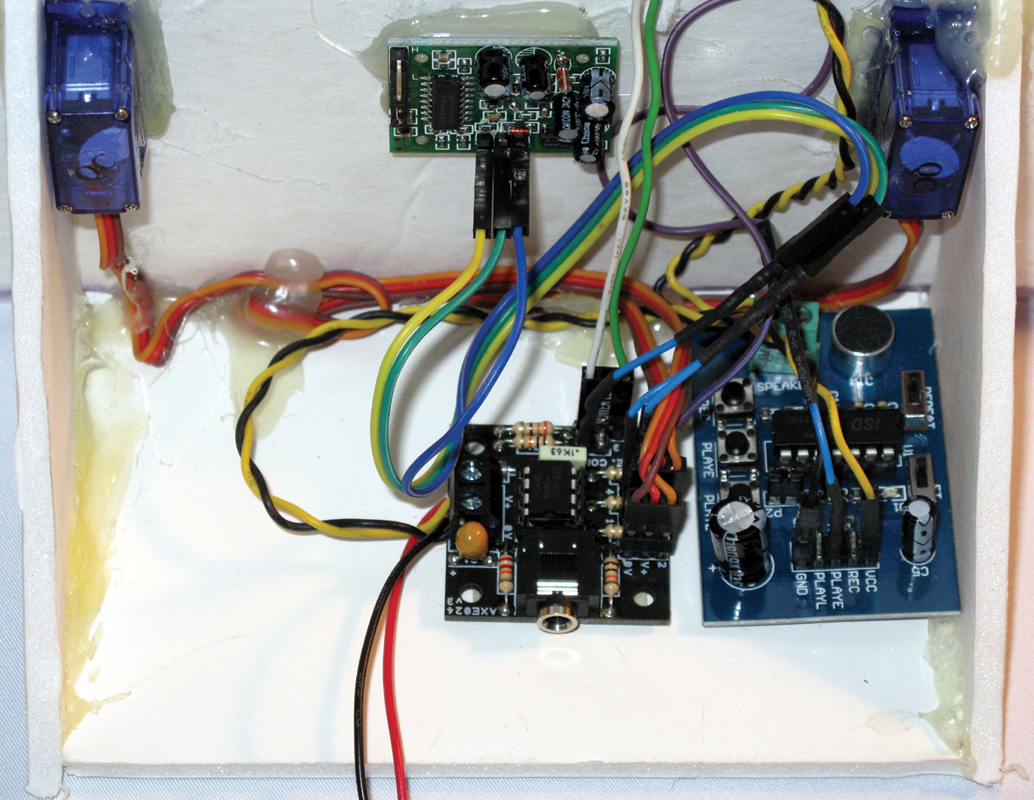
sticks. There are other craft things you can pick up like cutting blades, colored pens, and LED lights to complete your Peek-a-Boo. The dollar store has a bunch of cool modifiable stuff on the racks for inexpensive experimenting (plus, it’s all just a buck!). I picked up the other electronics (such as the PICAXE-08M2 servo control board and Parallax IR sensor). For sound, I chose an inexpensive sound card based around the ISD1802 chip I purchased from elecfreaks.com (Figure 2).
FIGURE 2. The voice card, PICAXE, and PIR sensor shown together.
The servos are typical nine gram micro R/C types I happened to have on hand. The wiring I used to connect everything up was standard servo extension wires I was able to excavate from my junk box (see Parts List).
Tools Needed
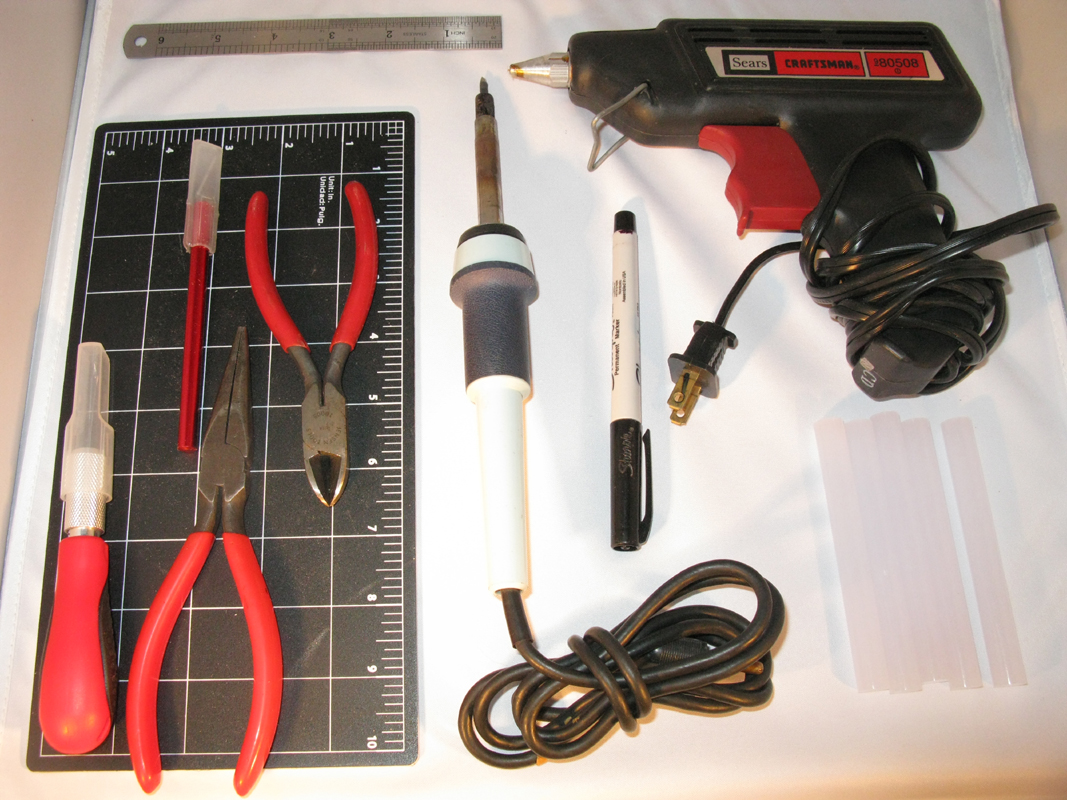
The tools I used are common ones that you can find in any craft store. You’ll need a sharp hobby knife and cutting board or backing. (Remember, we don’t want to scratch up Mom’s kitchen table!) A hot melt glue gun will be needed to attach the components to the foam board. Don’t forget the “usual suspects” in the electronics tool set such as diagonal cutters, needlenose pliers, soldering iron, etc., like the ones in Figure 3.
FIGURE 3. Tools to have handy.
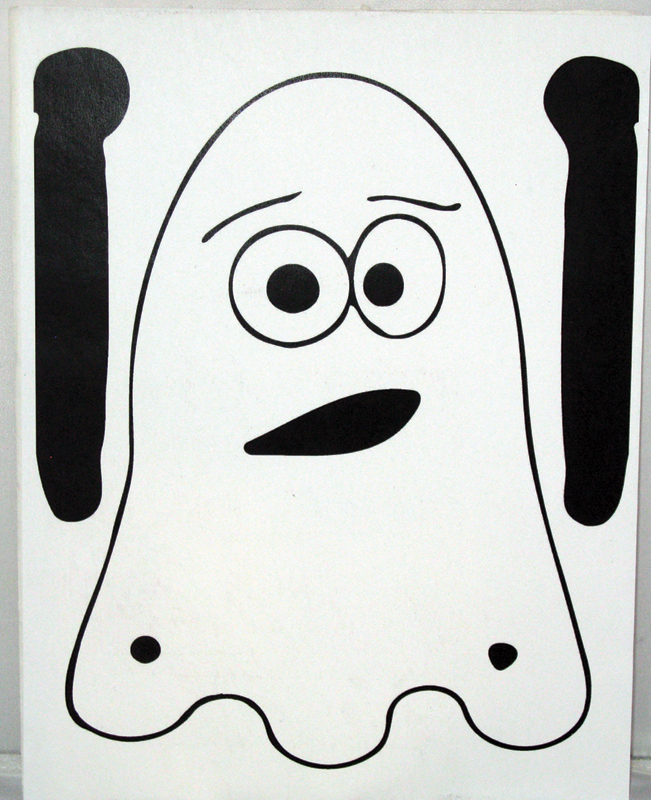
The Art
You can download the image of the Peek-a-Boo Ghost at the article link in PDF format. Use your inner artist to take a crack at it. There are many ghosts, goblins, and witches to choose from on the Web. The nice thing about using the PDF we provide is you can make it as small or large as you want. I’m going small with the first one (11.5 x 8), but if you go to your local office supply chain, you can get them printed as large as you like.
The Build
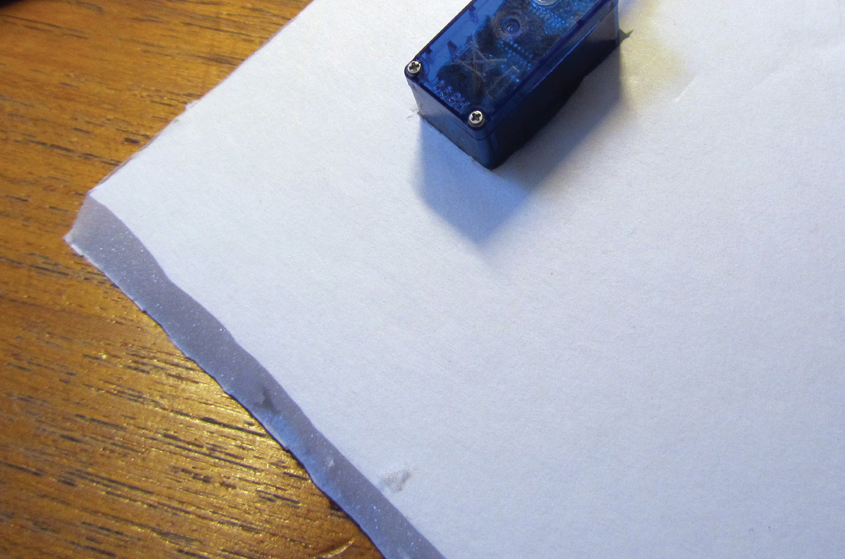
I started by gluing the printed paper Peek-a-Boo (try saying that three times fast!) to the foam board. Use generous amounts of glue stick to attach the paper so it doesn’t come off. Use a straight edge to smooth out the wrinkles and to secure the paper (Figure 4). You want to make sure that the paper sticks in the areas of the outline to be cut. The paper will drag and tear if you don’t. (No big deal if it does tear. Dab a little glue on the tip of your finger and smooth it over the paper. The glue stick dries clear.)
FIGURE 4. Peek-A-Boo glued onto foam core board.
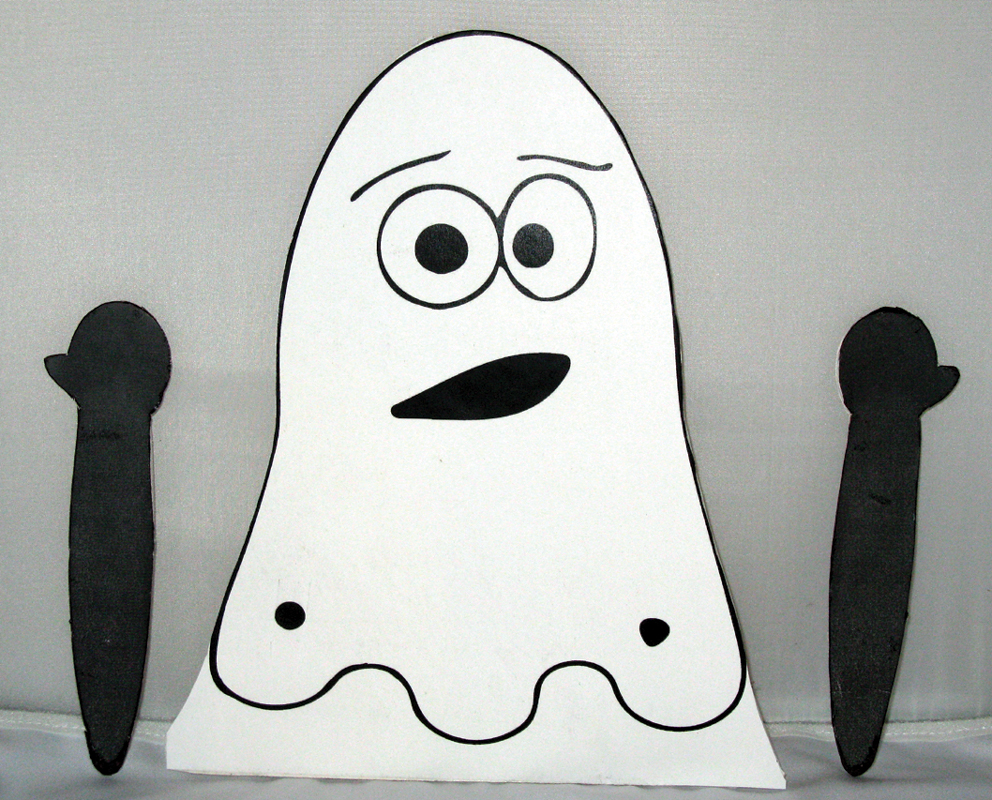
After it dries, cut along the outside of the black line of the Peek-a-Boo, but leave the bottom because it is used as the base of the stand for the ghost. Go ahead and cut out the arms and the stands as well (Figure 5). Set them aside until we come to the final assembly.
FIGURE 5. Peek-A-Boo main components cut out.
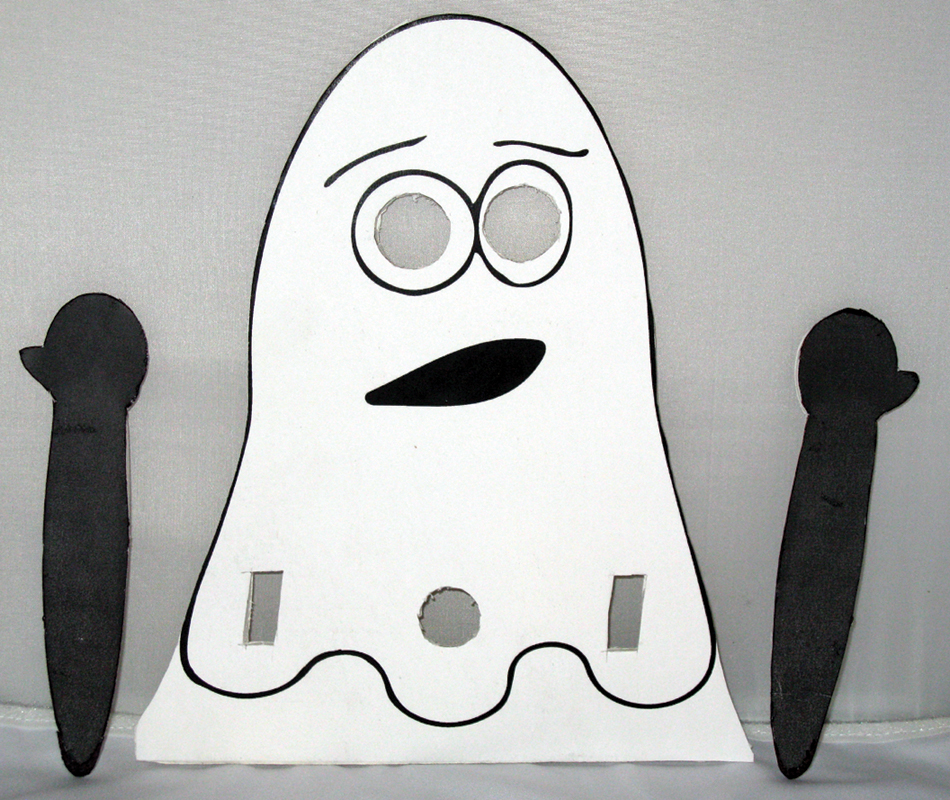
At this time, gather up your IR sensor, servos, and LEDs. Outline your servos over the small black circles drawn in the lower left and right hand of the ghost pattern. Make sure that the output shaft of the servo is directly behind the black circles. Draw the outline of the servos and cut out squares. Here’s where you can have a little fun.
FIGURE 6. Holes cut out for eyes, servos, and PIR.
The IR sensor I chose has a white dome as part of it. At first, I was looking at this thing and thinking, “Where am I going to put this?” Two words: belly button! (But hey, that’s me.) You could put it in the middle of its forehead. It’s up to you. The eyes are the same when it comes to location. Place them where you like in the eye area.
Glueing Pieces Together
SAFETY FIRST! You are working with HOT GLUE! Please use caution when handling a hot glue gun and wear appropriate eye protection. Glue comes out at around 250 degrees and sticks to whatever it touches — especially fingers.
Depending on the servos you choose, the top of the servo may fit on the back side of the ghost. If not, place it on the front. Hot glue the arm servos in place and let it cool. On the backside of the ghost, hot glue the IR sensor in place. Be careful not to get any glue on the plastic lens because it may either melt the lens or possibly block the IR from reaching the sensor.
Hot glue the LED eyes into place. I’ve been playing with some party ice cubes with LEDs in them that I picked up at the dollar store. They are easy to modify for the project and it’s kind of cool to watch the ghost cycle through the different colors.
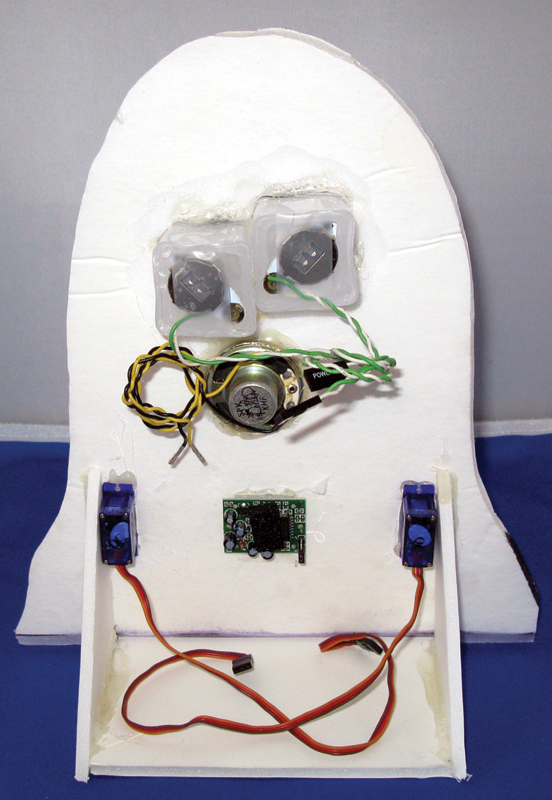
When you have all the pieces glued in place, the back of your ghost should look similar to what you see in Figure 7.
FIGURE 7. All components glued in place on the back of the ghost.
To build the stand, bevel the bottom of the ghost at about a 45 degree angle (Figure 8). This will leave an even and clean look when the Peek-a-Boo is resting on the ground.
FIGURE 8. A 45 degree bevel is cut on the bottom edge.
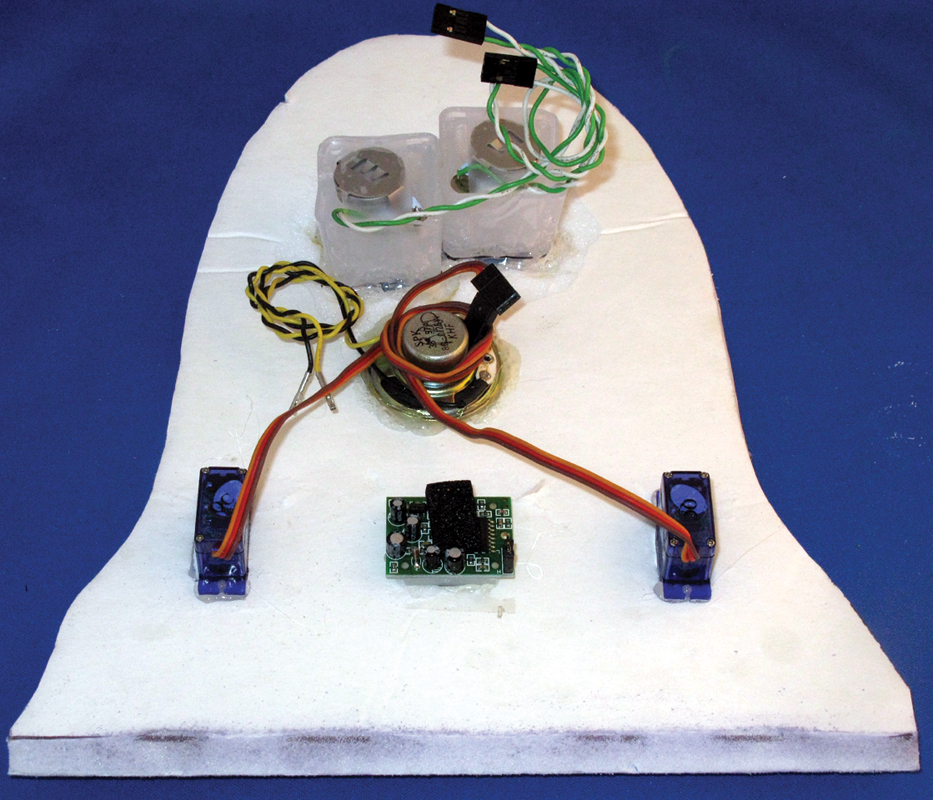
Glue the stand as shown in Figure 9. The stand helps with a couple of things. First, it keeps the ghost upright, and second it’s a neat place to hide the electronics. Also, the weight of the batteries and electronics keep the ghost from tipping forward. Now that we’re done building our ghost, let’s get him wired up and moving!
FIGURE 9. Stand glued in place, showing installation of the eyes, servos, and PIR sensor.
Hardware Description
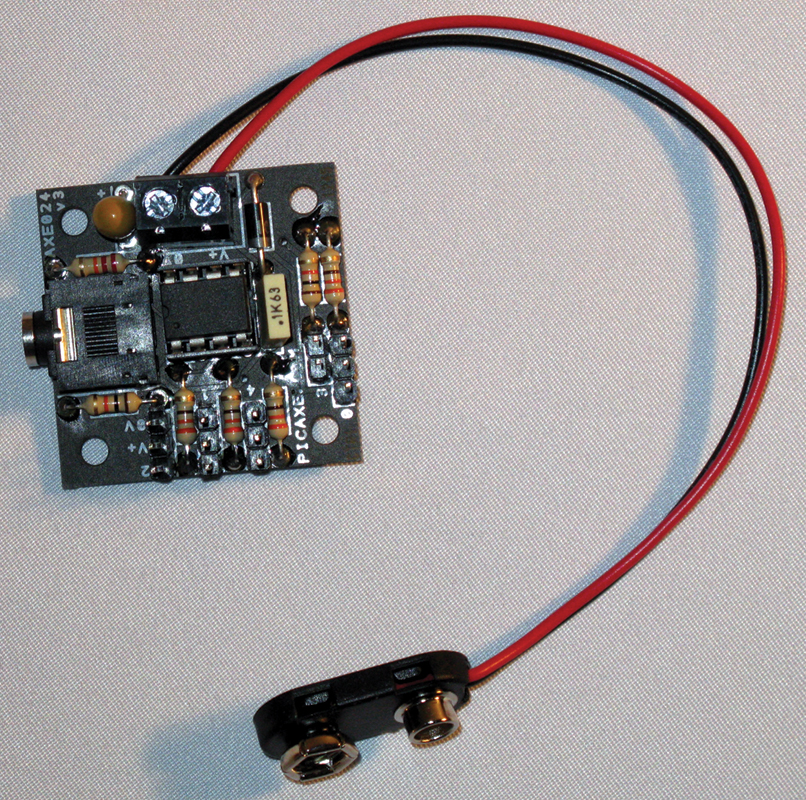
The processor I’ve chosen is the PICAXE-08M2 mounted on a servo driver board kit (Figure 10). It is an inexpensive four-output version with one input carrier board which is a perfect fit for this project. The board has four “servo” style three-pin connectors. The servos connect to ports 0 and 1, the sound board to port 2, and the LEDs to port 4. Servo extension cables work perfect here. I used some leftover PC parts to connect the LED eyes and to provide a speaker for the sound board.
FIGURE 10. The PICAXE-08M2 servo driver board.
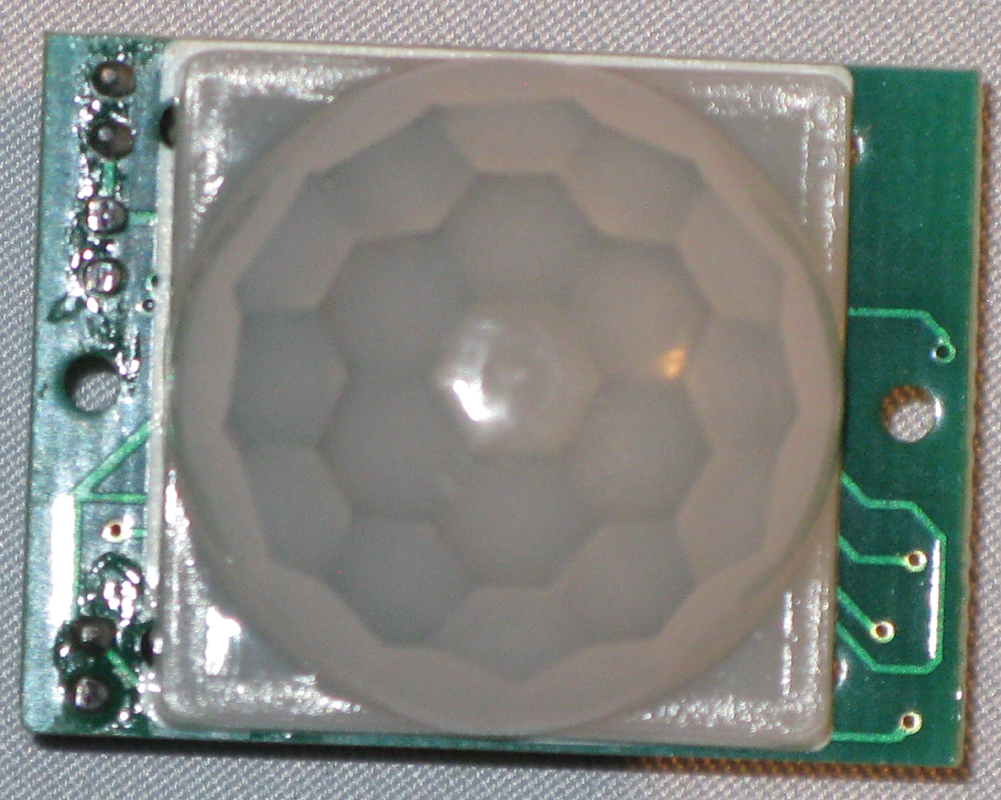
The Parallax model #555-28027 (Figure 11) is a passive infrared motion sensor. It’s a simple discrete TTL/CMOS output device that can detect motion up to 20 feet. It’s an easy device to connect to the board using either a female to female servo extension or simple .100 experimenter’s jumpers. The pin configuration is the same as a servo with a ground pin, positive pin, and output signal. I connected this sensor to port 3.
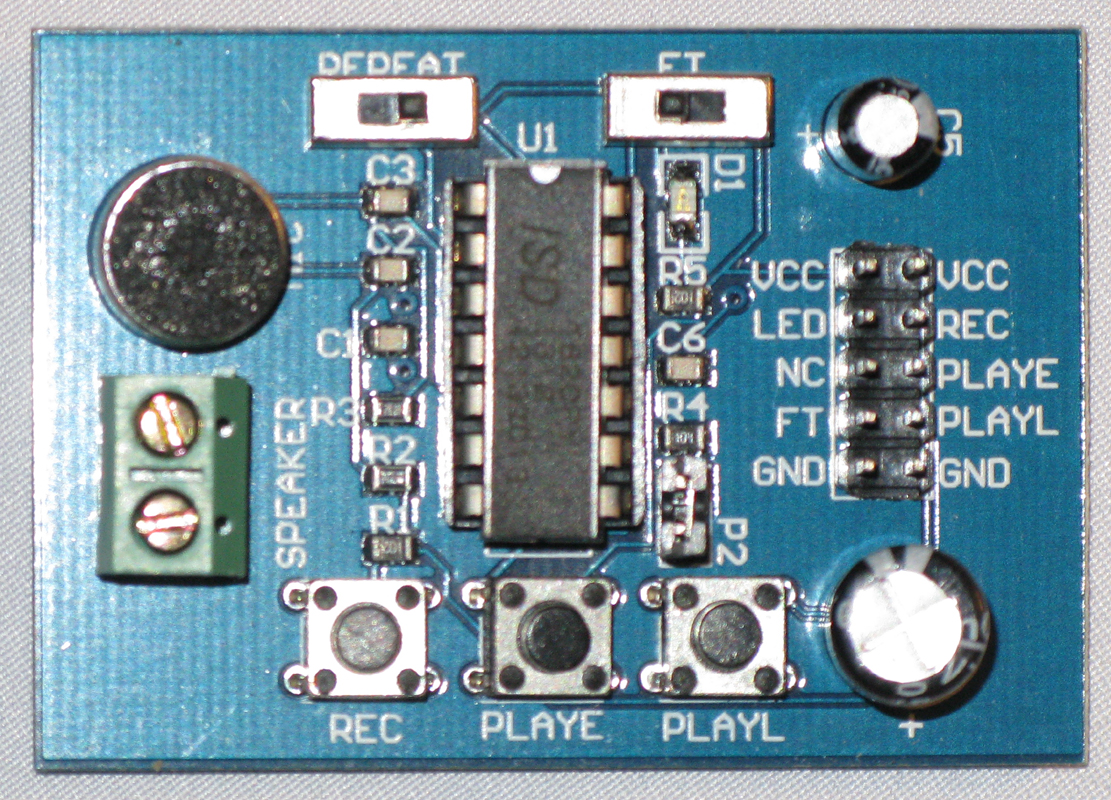
The last item to hook up is the LC Technology sound playback card (Figure 12). This is a cool little easy-to-use device that allows you to record up to 10 seconds of audio using the built-in microphone.
FIGURE 12. The LV technology video card.
There’s a complete description of the board features and interfacing details online, but for our purposes I just connected VCC, ground, and PlayE. The PlayE is a “one shot” activation signal from an external source. The PICAXE board takes this pin from LOW to HIGH, then back to LOW to cause the entire recording to play. Once I had power connected, it was simple enough to record myself saying “Peek A BOOOOoooo!” in a high squeaky voice. I then used the convenient onboard buttons to play back the audio to make sure it worked. Though the board can directly drive the small speaker, in my opinion, you will likely need to run the output to an additional small amplifier if you plan to use your ghost in a loud area.
To finish up, I hot glued the PICAXE board down with the programming jack facing backwards for easy access. I then glued the sound board right next to it. Lastly, I used some dabs of glue to hold the servo wiring in place. When you finish wiring everything up, it should look something like Figure 13.
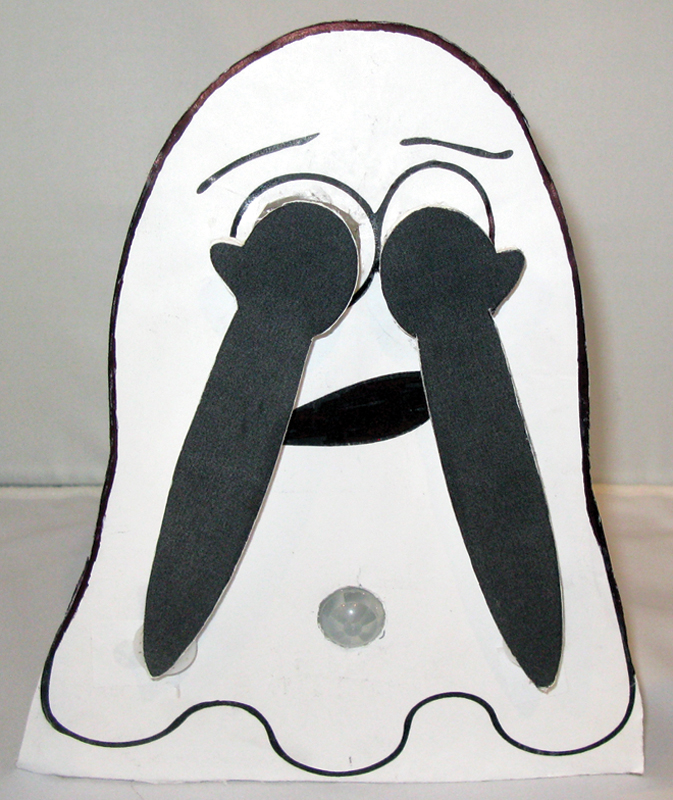
FIGURE 14B. Finished Peek-A-Boo with eyes covered.
Software and Programming
To program the Peek-a-Boo, I use the PICAXE Editor 6 Integrated Development Environment (IDE). It’s a simple to-use program that comes with an editor, simulator, and flowchart designer. The original flowchart editor has been replaced with another PICAXE product called Logicator. All their software and manuals for their current hardware and software are made available as a free download from their website (see Resources).
To program the PICAXE, your computer needs to have a DB9 or DB25 serial connector. If you don’t have one of these original serial connectors on your computer (and let’s face it, most modern machines no longer provide these ports), you can use a USB-to-serial adapter or adapter cable. Revolution UK (the makers of the PICAXE) sell a PICAXE-specific USB-toserial cable that has the 3.5” male plug on it to match most PICAXE carrier boards. This cable is available from many places, including resellers such as RobotShop, but I was able to “roll my own” by following Tommy Tyler’s instructions in a previous article, “Building Your Own PICAXE Download Cable.”
Peek-A-Boo Code
The Peek-a-Boo code is relatively simple in operation. I set up program constants at the top of the code to make it easy to adjust values that you will need to alter for your specific setup as shown here:
‘*** Program Constants
symbol servo_delay = 5
‘ Delay to slow down servo motion (30ms default)
symbol servo_min = 120
‘ \Set these values based on your servos
symbol Servo_MAX = 180 ‘ /
symbol reset_PIR = 5000
‘ 5k milliseconds is 5 seconds
symbol True = 1 ‘ \
symbol False = 0
‘ /Used for comparisons
This is where I set the minimum and maximum positions for the servos. I also set a PIR delay to keep the ghost from immediately retriggering if the person who set it off is still standing in front of it when the motions are complete. For program initialization, I set the position of the two servos, LED eyes, and sound board to TTL low so everything will be off before the Peek-a-Boo detects the presence of a warm body. The program has one main function and one subroutine. The main function contains a loop that waits for the PIR signal to go high. When the PIR goes high, it calls the WAVE_ARMS subroutine that starts the sound board trigger and causes the LED eyes to turn on. The WAVE_ARMS function has three for/next loops that cause the servos to go into motion. The one outer loop is used to set the number of arm cycles (one cycle being from eyes covered to eyes uncovered). The two inner loops are used to seek the arm servos.
The first of the inner loops counts from ServoMIN to ServoMAX, causing the servos to move the arms to uncover the eyes. The second inner loop counts from ServoMAX to ServoMIN by using the “STEP -1” parameter on the FOR statement. This causes the servos to move the arms to cover the eyes again. At the end of the outer loop, the program drops to the PIR wait portion to avoid retriggering. After the delay has expired, the LEDs are turned off and the program returns to the main function where it waits for the next motion detection trigger. You can add some variety if you like by creating different motion functions and counters in the program to get a variety of movements from your Peek-a-Boo. For example, you might want to try and make a routine that will make him “shiver” his arms when they are covering his eyes or make a routine that causes him to slowly uncover just one eye so he appears to “peek” out at you. There’s a lot of capability in this cute little build!
So, there you have it — a simple and inexpensive Halloween project that you can build in a couple of hours over a weekend alone or with the kids (Figure 14A/B) Enjoy! NV