An inexpensive kit that delivers a wealth of polyphonic sound.
Looking for a way to jump-start your boy band or girl band venture with a little techno-pop vibe? Or, maybe you’re just looking for a way to inject some synthesized sound into your next online video without resorting to an app for that. Do the kids want to learn about electronics, but they want to build something from My Generation and not yours?
Well, the answer to these requirements can be met with a kit from Zeppelin Design Labs. Remarkably, the same kit addresses all three of these peculiar requests. Glen van Alkemade and Brach Siemens are the “Twin Sons of Different Mothers” brains behind Zeppelin Design Labs in Chicago, IL. What they’ve created is nothing short of brilliant.
What is this darling product, you ask? It’s a build-it-yourself/do-it-yourself (DIY) miniature eight-bit, polyphonic, digital music synthesizer kit. Derived squarely from the circuitry roots that are deeply entrenched in the pioneering work of American synthesizer maestro, John Simonton of PAiA fame, and the legendary analog 1980s Pro-One synthesizer from Sequential Circuits, this offering from Zeppelin Design Labs is much more than just a kit. This is a piece of American synthesizer music history (see Figure 1) that has been garnished with a little bit of Arduino on top.
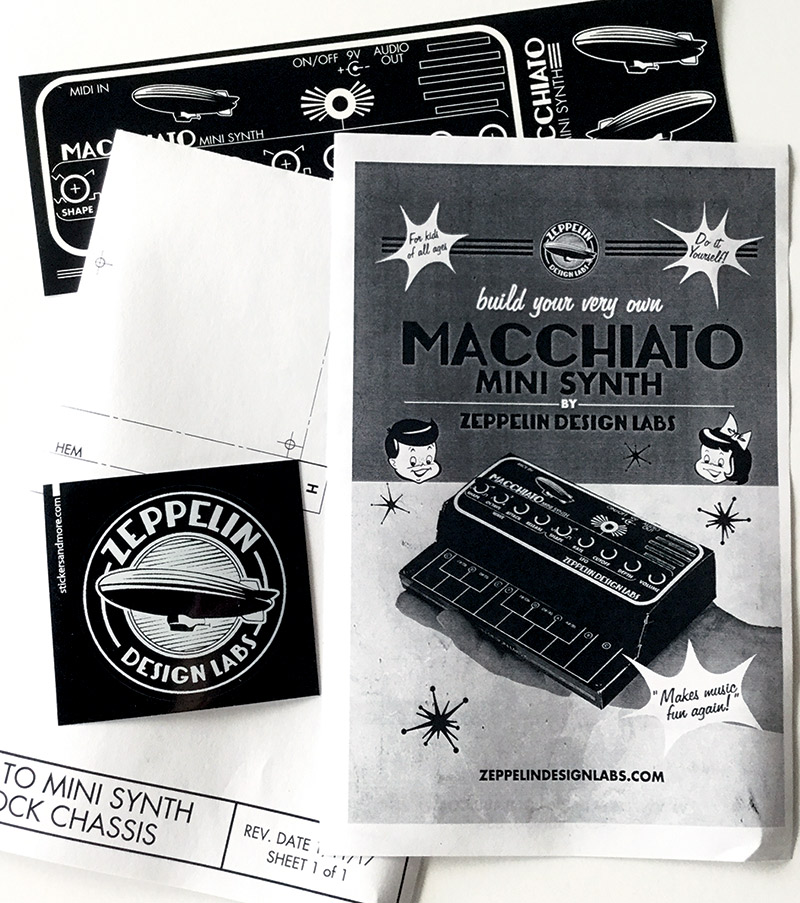
FIGURE 1. There are some great decals included in the kit.
Sounding more like an overpriced coffee drink, this Zeppelin Design Labs synthesizer kit is called the Macchiato Mini Synth, and it’s priced at the mouth-watering low price of $39. Before you can even buy this kit, however, you are deluged with options galore: a kit as shown in Figure 2 or assembled (ready-to-use); plastic cabinet kit or plastic cabinet assembled (ready-to-use), or DIY cardboard cabinet; and 9V power supply or 9V battery. From our assembly insight, you can’t go wrong with buying the kit, foregoing the cabinet, and eschewing the 9V power supply.
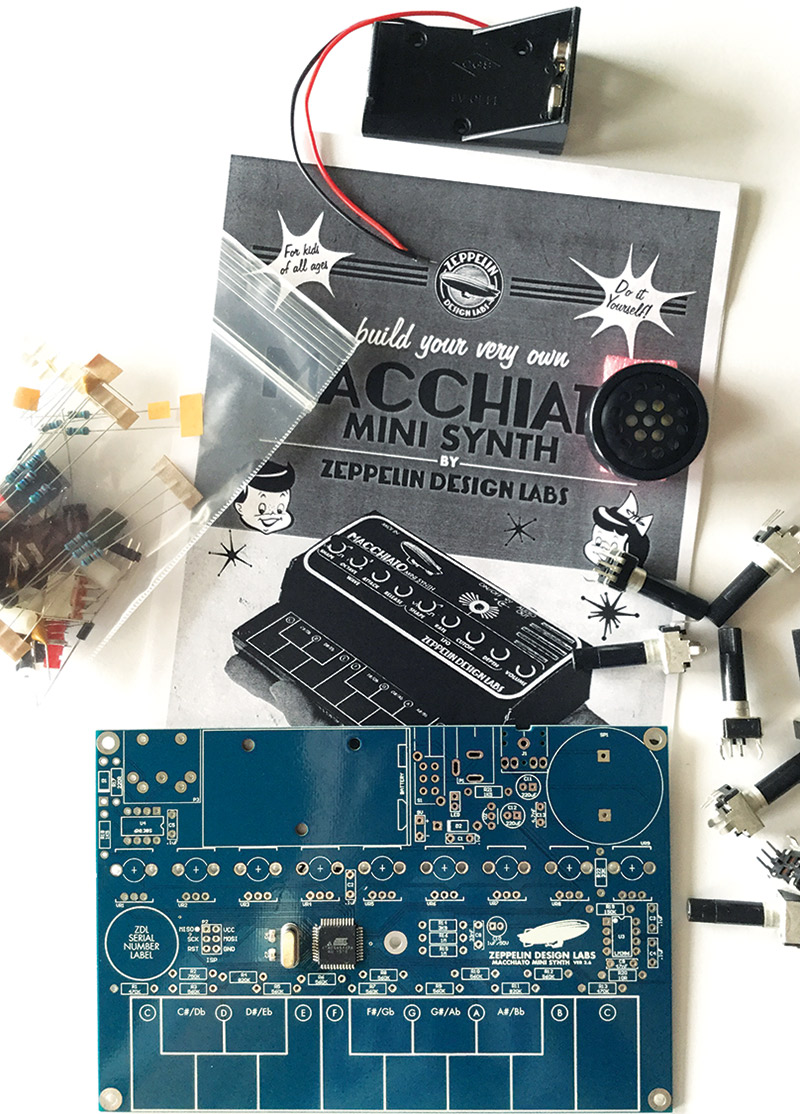
FIGURE 2. Ready, set, build! Set aside at least 3-1/2 hours for building this kit.
A Jump to the Left
This is A Time Warp straight back to the days of Popular Electronics — a big bright blue printed circuit board (PCB; see Figure 3) that is thoroughly documented with a white silkscreen layer packed into a zipper-lock plastic bag. Stuffed into this bag with the PCB is another smaller bag brimming with parts and passive components.
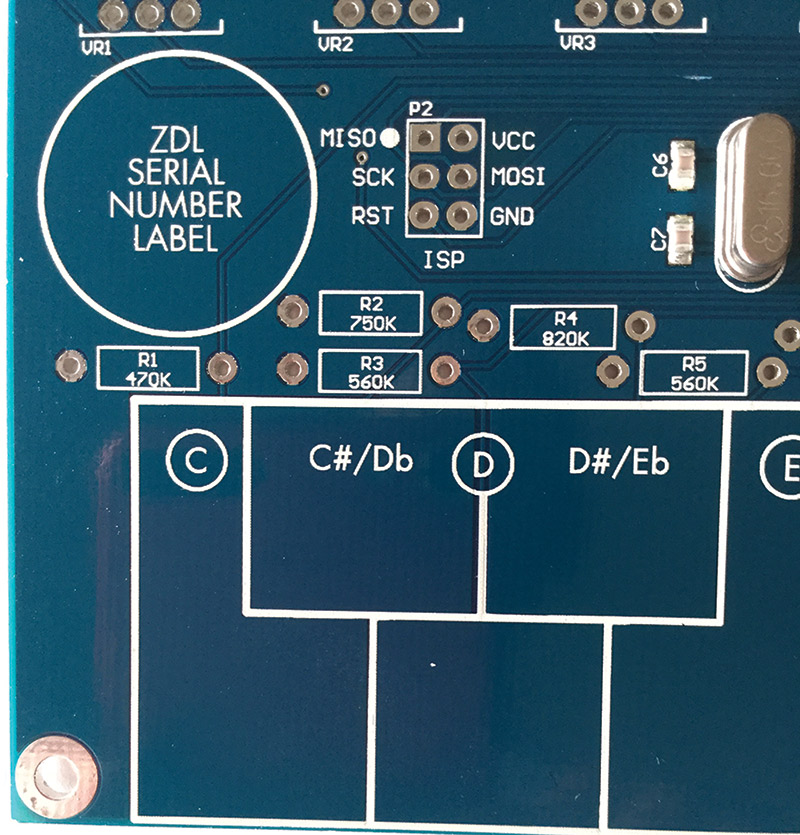
FIGURE 3. It’s a thick blue PCB that measures 4 x 6 inches.
Thankfully, Zeppelin Design Labs didn’t Remain in Light from the 1970s too long. The Macchiato Synth kit is equipped with an Arduino Atmel ATmega644PA microcontroller, along with a 16 MHz crystal and two support capacitors that are all in surface-mount device (SMD) packages.
Whoa, there! You said this kit was for kids. What Nimrod would think that inexperienced kids could solder SMD packages? That’s where Zeppelin Design Labs is one step ahead. These SMD components as shown in Figure 4 are already soldered to the PCB. This is a thoughtful touch that enables modern technology to be efficiently employed within a DIY kit concept.
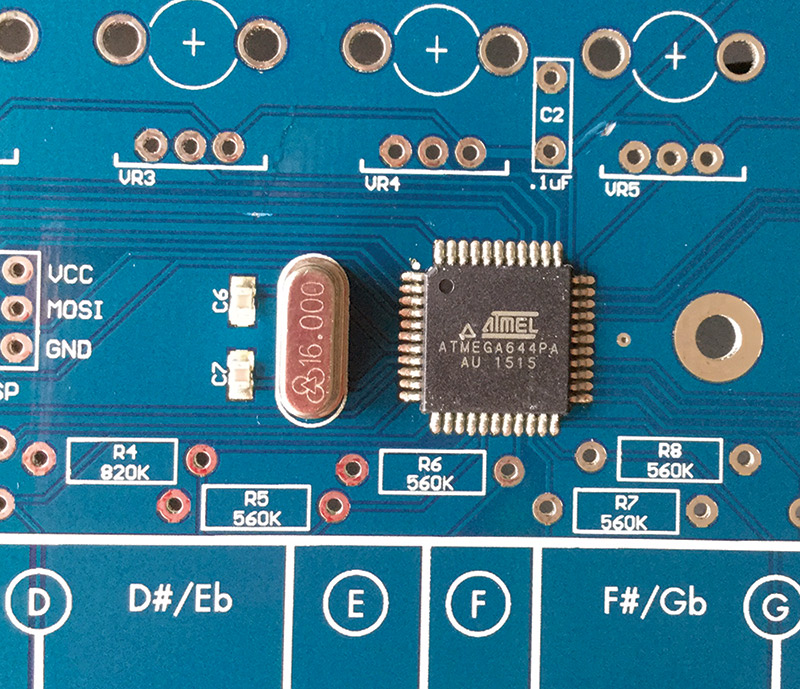
FIGURE 4. These tough-to-handle SMD parts are already soldered into place.
Another sign that these modern DIY kit times are a changin’ is the use of online assembly documentation. Oh sure, there is the obligatory follow-along assembly video, but with yet another pleasant twist. Rather than drag the 3-1/2 hour long assembly process out into a lengthy (and generally boring) step-by-step/part-by-part monologue, the Mini Synth kit assembly video zips along in a time-compressed format that is finished in under five minutes. (Thank you!)
Furthermore, the Reference Manual, Quick-Start Guide, Assembly Manual, and DIY cabinet building template are all available online from the Zeppelin Design Labs website. Best of all (like much of today’s technology), the software driving the Mini Synth is open source firmware.
Based on the Mozzi Sound Synthesis Library for Arduino by Tim Barrass, this firmware takes the simple beeps and buzzes that are native to the Arduino and transforms them into wave shapes, generators, and envelopes to give you great eight-bit digital sound.
Being open source means that you are free to modify and distribute your own version of the firmware. This also means that the wizards at Zeppelin Design Labs can enhance the Macchiato firmware and add future features like mods and patches to its musical instrument digital interface (MIDI) and multi-note polyphony (e.g., more than two-note).
MIDI of the Road
Speaking of MIDI, while the Macchiato kit is currently able to respond to Note and Velocity information via an attached MIDI controller, Marshall Taylor at SparkFun Electronics has created a GitHub repository that contains Arduino code for MIDI splitting, testing, and bending that could be used for experimenting with the Synth kit. You can locate his code at github.com/marshalltaylorSFE/ArduinoSynthMidiFilter.
Can Touch This
Meanwhile, back at the kit ... there are two additional features that make the Macchiato Mini Synth more than just a sum of its parts. For one, what good is a synthesizer without a keyboard, right? Well, Teenage Engineering has made a formidable product line of “pocket-sized” synthesizers as shown in Figure 5 with nary a keyboard in sight. Ranging from $50-$90, these calculator-looking devices claim a “wall of sound,” but this ain’t Phil Spector, baby. Sure, they might be fun to fiddle around with, but two-note polyphony, U Can’t Touch This.
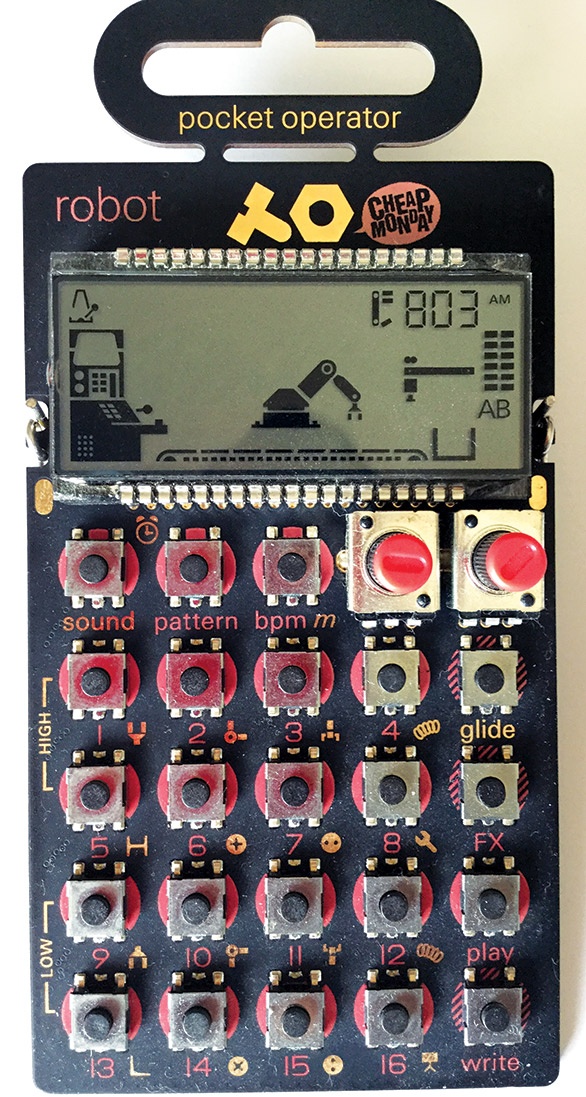
FIGURE 5. The Teenage Engineering “Robot” synthesizer.
The Mini Synth comes with a one octave keyboard and it’s hiding right in plain sight. Unlike a conventional keyboard with ebonies and ivories that you can tickle, this dirigible kit has a “wunder-weapon” capacitive touch keyboard that is built smack dab into the PCB (see Figure 6). It works great, but there are a couple of caveats.
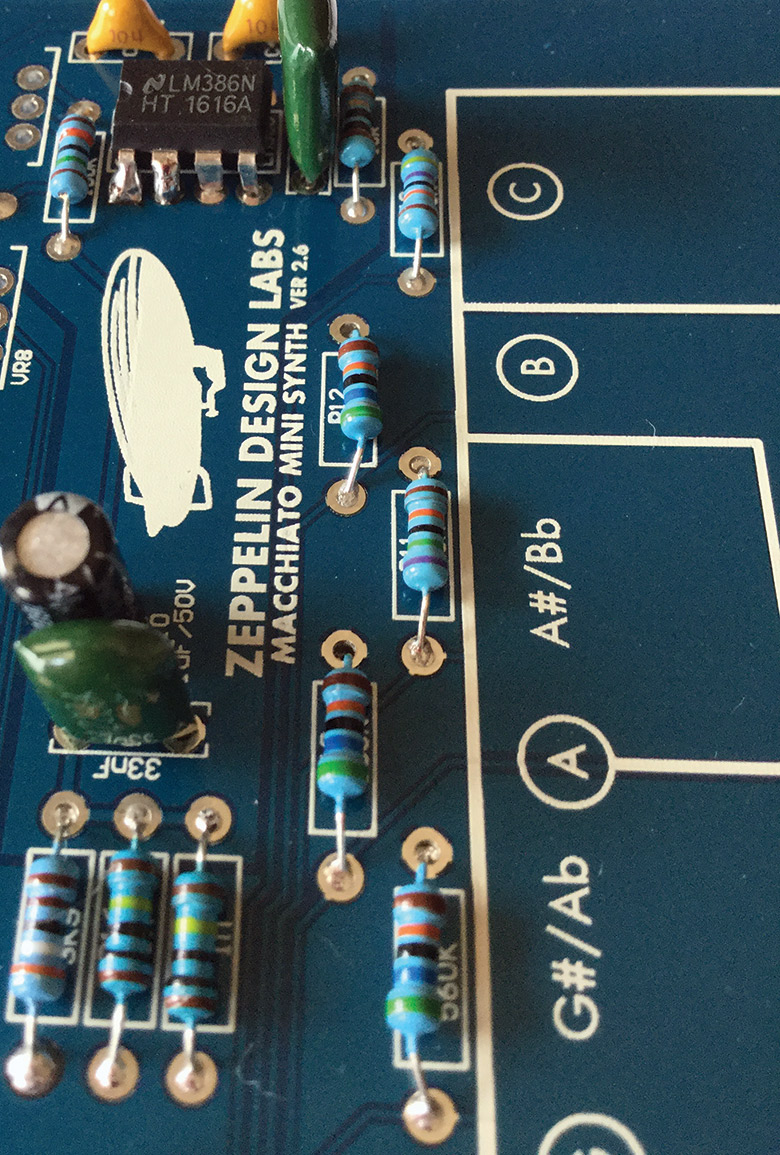
FIGURE 6. The capacitive touch/one octave keyboard is along the right-hand edge of the PCB in this photo.
Straight from the Zeppelin Design Works Quick-Start Guide, you can play a low note “drone” along with an accompanying melody by tapping on the lower note key and then playing the melody as a staccato. This playing tip can be enhanced by adding a long decay.
The second caveat continues along this drone action by setting a similar low octave drone, but then switching to a higher octave and playing a melody. We mention these points as “caveats” because we were unable to achieve satisfactory results during our testing.
Naturally, practice makes perfect and these two keyboard tricks could be added to your playing arsenal with apt application of deft digit dexterity.
Dial-A-Song
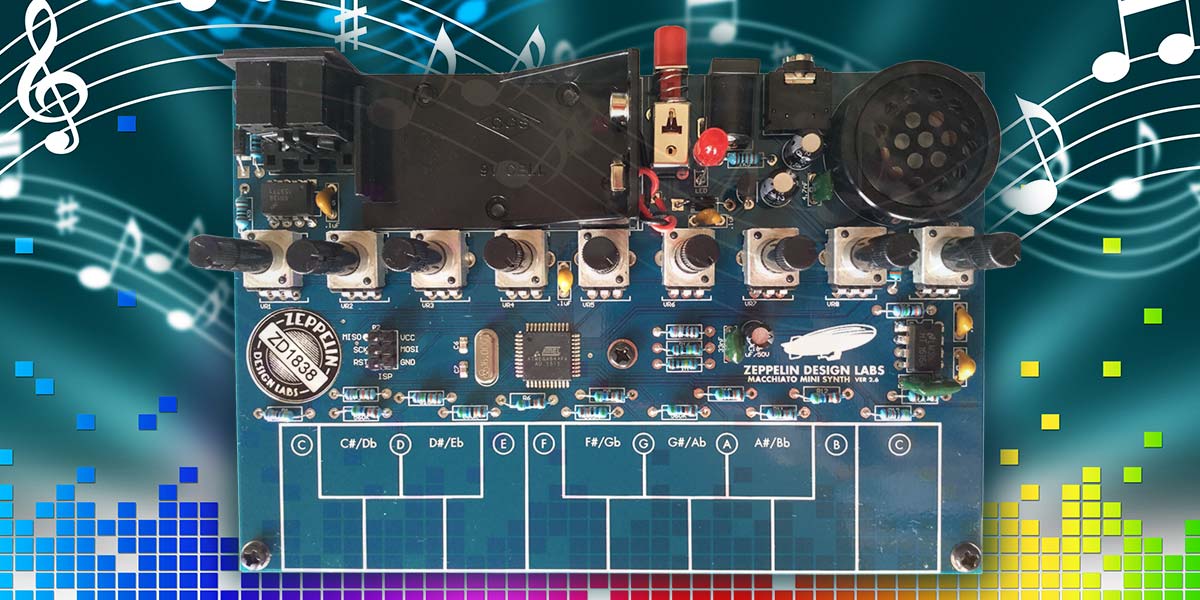
While the capacitive touch keyboard might be a giant feature of the Macchiato Mini Synth, the nine adjustable potentiometers just might steal the show. As you can see in Figure 7, lined up in an easily accessible row above the keyboard, these nine pots are anything but stock current adjusters.
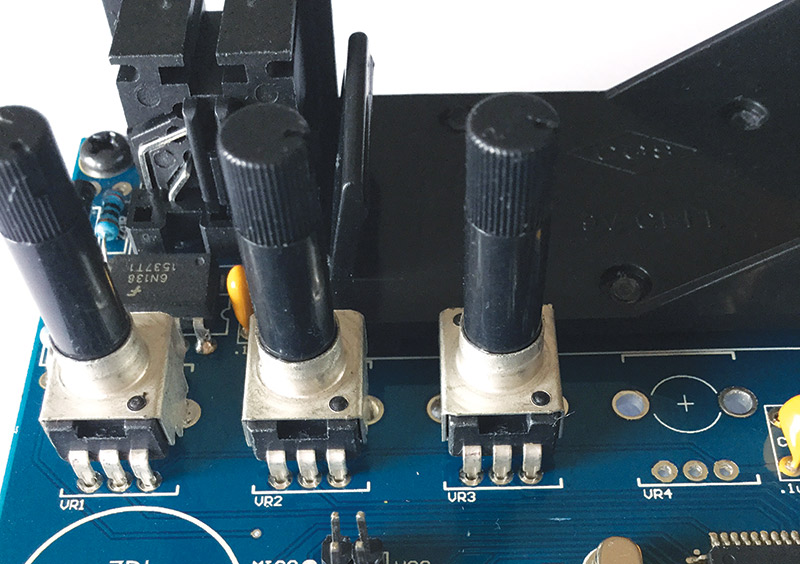
FIGURE 7. The first three potentiometers have been soldered into place.
First off, these fancy pots don’t require knobs for operation — the knob is built right into the shaft. How often is “getting the shaft” such a good thing, right? Well, uglying up the design aesthetic with a bunch of “chicken head” knobs would certainly make this synth less appealing.
Second of all, these pots control the generation of the circuit’s waveforms and its low frequency oscillator (LFO) and low pass filter (LPF). There are nine controls that you can apply to the Macchiato Mini: (from left to right) wave shape (sine, triangle, sawtooth, and square); octave (1-4); attack; release; LFO shape (sine, triangle, sawtooth, square); LFO rate; LFO cutoff frequency; LFO depth; and overall system volume.
Those first four parameters (pots 1-4) are for waveforms, whereas the next four (pots 5-8) are for the LFO and LPF. Pot number 9 is the volume control.
We Built This City
Before you can Rock the Casbah, you must build the kit. Putting the Macchiato kit together is a relatively easy task, albeit with a couple of minor niggles (see Figures 8-10). The biggest nuisance is the use of those confounding “blue meanie” metal film resistors.
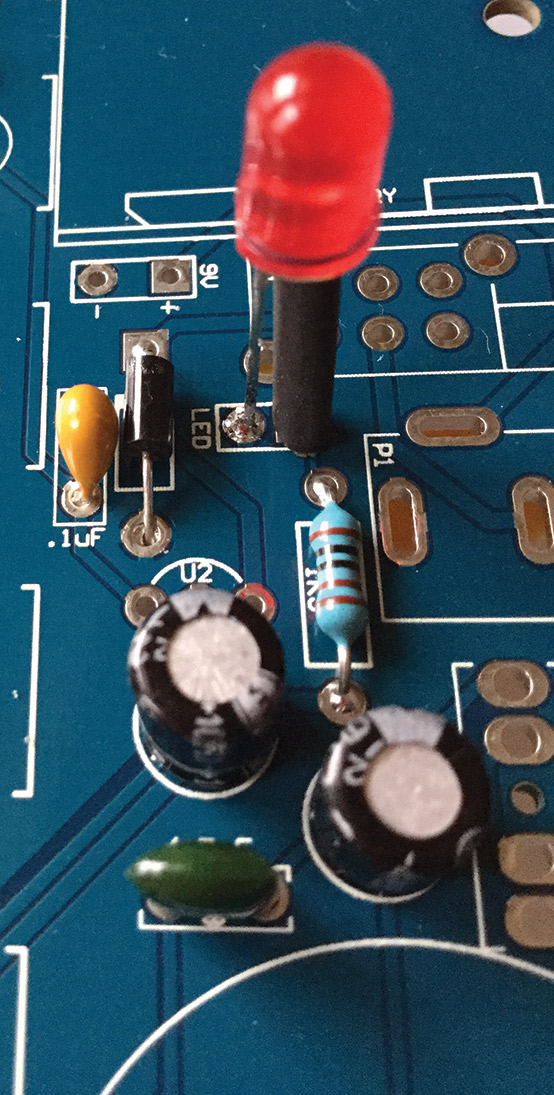
FIGURE 8. A couple of assembly pointers: You will need to solder the power LED proud of the PCB for installation into a chassis.
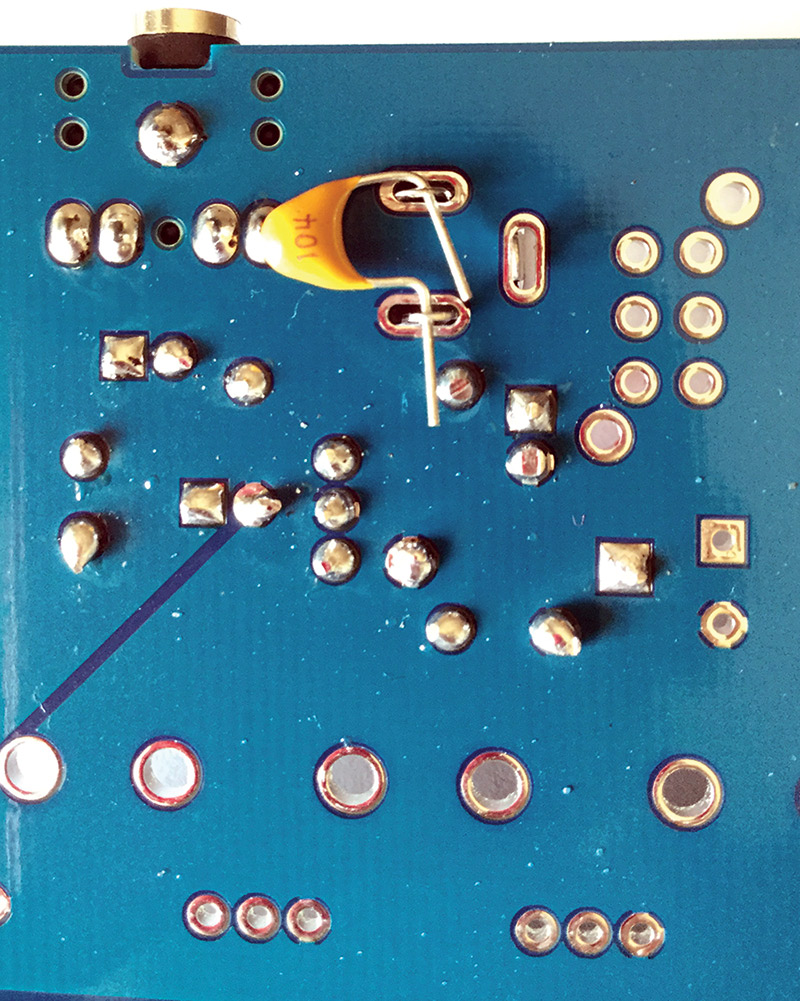
FIGURE 9. Also, a filter capacitor is soldered to the underside of the PCB.

FIGURE 10. Finally, the serial number sticker only goes on when the job is done.
While it can be difficult to accurately guess color bands on these metal film resistors, a great tip in the assembly manual offers some sage guidance for ensuring accurate resistor values: Use your digital multimeter for verifying the resistance of any questionable value.
Even the instruction manual missed two of these blue meanies: resistors R3, R5-R10, and R12 are 560K, but incorrectly color-code swapped for resistors R1 and R13 which are 470K. Just use your trusty multimeter for verifying which resistors are which and you’ll have no problem.
Along with these swapped resistor color codes, there are a couple of misprints on the PCB silkscreen. Luckily, each of these errors is highlighted in the assembly manual with a suitable disclaimer, “Don’t be dismayed that ...”
This reassurance goes a long way towards making the remaining assembly of the Macchiato Mini Synth kit a very pleasant experience.
As we mentioned earlier, you should expect to spend around 3-1/2 hours assembling this kit. One of the measurements that we always use for evaluating the quality of an electronics kit is what is left over in the parts bag when the project is finished. In this regard, we were lucky to find just one of those great knob-less pots Feeling So Lonely in the bottom of the bag.
Upon completion, you have four options for housing your Mini Synth. You can use the plastic chassis from Zeppelin Design Labs. This is a great choice that features tiny magnets for holding the sides together — very inventive. Your second option is to use the supplied chassis template for making a folded DIY cardboard container for your music machine.
If you elect to pursue this option, there is step-by-step guide in the assembly manual for using a cereal box as your cardboard source — again, very inventive. Following along with this DIY ethos, you could optionally make your own 3D printed housing. Finally, there’s a fourth option; the one that we used (shown in Figure 11) which is leaving the assembled kit bare.
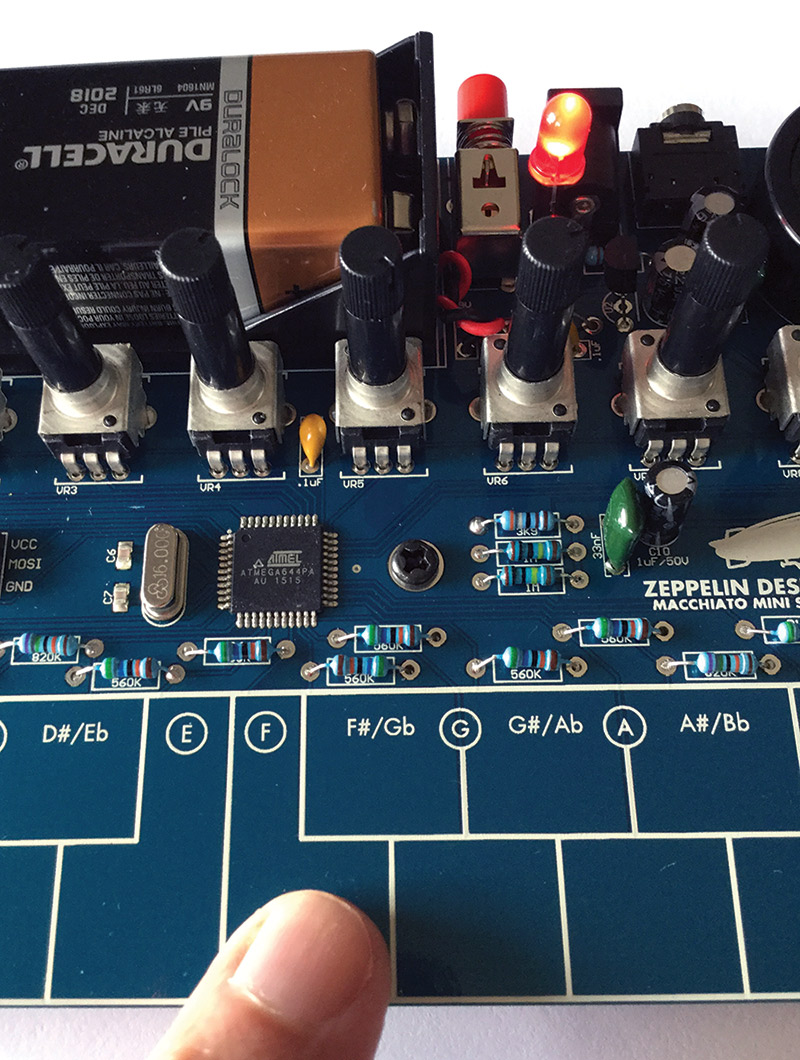
FIGURE 11. The next sound you hear will be my Moonlight Serenade.
No matter what your final chassis choice is, armed with the Macchiato Mini Synth in your pocket, you will be a Band on the Run. NV