I didn't start out to build a personal light show for my desk, but in the end that's what happened.
It all started when I saw a SainSmart 3.2” 320 x 240 TFT LCD display with built-in display controller, touch screen controller, and SD card interface for sale on Amazon for $16. I already had an Arduino Uno on hand, so connecting these two devices seemed like a natural thing to attempt. Having never connected an LCD display to a microcontroller before, I was anxious to do so. Finding a well written driver library (see Resources) for this display put the icing on the cake, so I got to work wiring things together. In an afternoon, I wired the LCD display to the Arduino, downloaded and installed the UTFT driver on my Mac, and compiled and ran the demos that came with the driver. I was amazed at how easy this came together, and I had the basis for my personal light show running in less than a day.
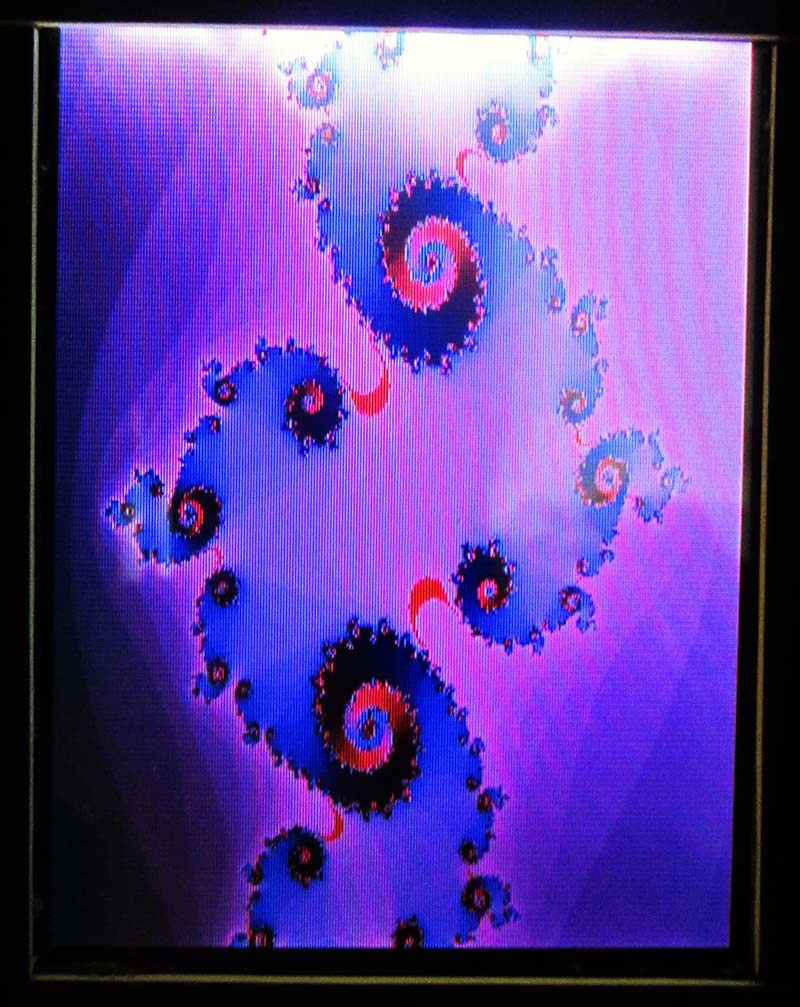
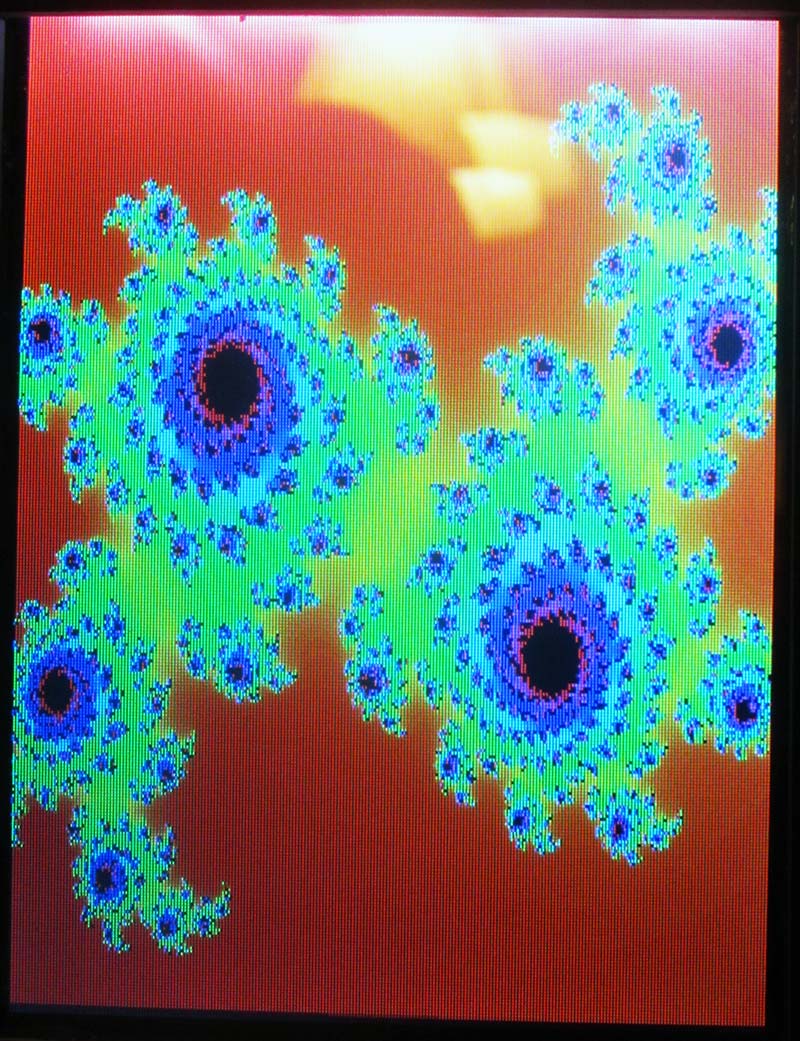
After seeing the demos, I started thinking about what else I could make this LCD display do. So, I started pulling out code I had written over the years and began porting it to the Arduino Uno. First off was the Mandelbrot set. While the code worked and the results were beautiful, it took a full five minutes to generate which was okay because I wasn't in a hurry. The long generation time was not too surprising because the Mandelbrot set requires a lot of floating point calculations which are time-consuming on any eight-bit processor.
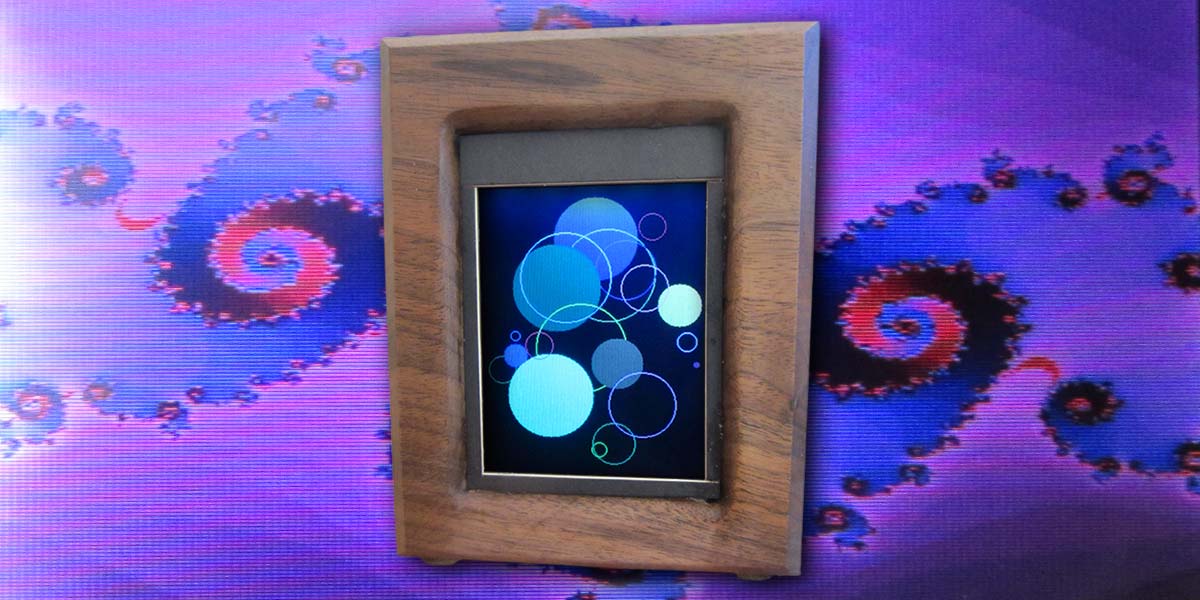
Equally as pretty and in general less processor-intensive are the calculations of Julia sets. So, this is what I tried next, and some of the images produced took my breath away. I was starting to think this hardware combination had some merit, so one thing lead to the next and pretty soon I had about 16 different display patterns running including: the Mandelbrot set, Julia sets, plasma patterns, numerous spirograph patterns, star burst patterns, concentric squares and circles, and much more.
Not being satisfied with static repeating imagery, I added a large dose of randomness into the pattern generation process, and with the addition of numerous palettes (some of which also contain randomness) I was soon generating some very unique images.
It was then that it hit me. I should package this thing up as a desktop device and let it generate images ad infinitum. After all, the hardware cost less than $40, so why not.
Since having this device on my desk/bench, I have found it helps me think. When I get stuck on something I'm working on, I glance over at the display for a few minutes taking my mind off of things which sometimes helps in finding a solution. For this reason, I've decided to call this device a “Desktop Contemplator.”
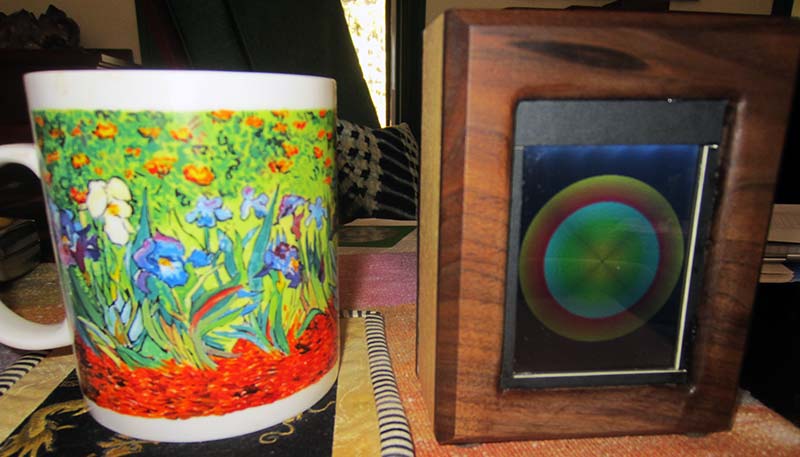
Size comparison for scale.
The Hardware
Building a Contemplator requires the electronic components shown in the Parts List.
Once you've gathered the required components, wiring the Uno to the LCD display is easy, though rather tedious due to the number of wires involved. A lot of wires are required because I used a 16-bit interface between the Uno and the LCD display. I chose this instead of an eight-bit or serial interface in the interest of performance.
A drawback to using the 16-bit interface with the Arduino is that it uses up every available I/O pin. This means neither the touch screen component nor the SD card interface available on the LCD display's PCB (printed circuit board) can be used. Luckily, neither were necessary for this application.
All required connections between the Uno and the LCD display are shown in Table 1 and the LCD display connector pinout is shown in Figure 1. Take your time when doing this wiring and double-check your work when you're finished before applying power.

FIGURE 1. SainSmart 320x240 TFT LCD display connector pinout.
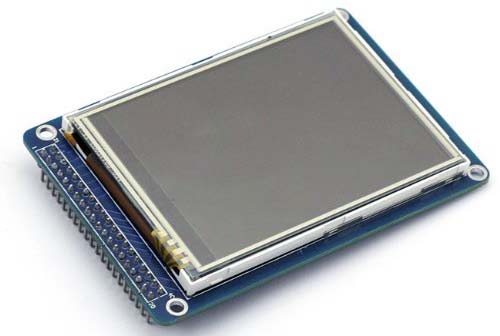
FIGURE 2. SainSmart 320x240 TFT LCD display.
The Contemplator is programmed and powered via the USB cable plugged into the Arduino. Once programming is completed, a USB charger can be used to power the Contemplator.
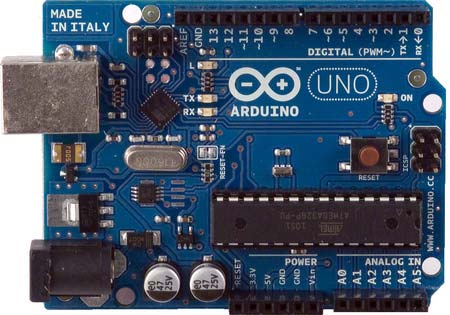
FIGURE 3. An Arduino Uno.
Optional Hardware
As I was writing this article, I discovered SainSmart also sells an assembly consisting of an Arduino Mega2560, a shield for connecting the LCD display to the Arduino, and the same LCD display we are using here. They officially call it the SainSmart Mega2560 Board+3.2 TFT LCD Module Display+Shield Kit for Atmel Atmega AVR 16AU Atmega8U2 and it’s available from their website (see Resources). If you were to buy this assembly, you could use it without having to do any wiring at all. A minor software change (to be described shortly) is required, however, to run the Contemplator sketch on this hardware.
A major advantage to using this hardware is that there are many more I/O lines available which allow access to the touch screen controller and the SD card interface if these are important to your application. Additionally, the Mega2560 has four times the RAM (8K) and eight times the Flash (256K) which would allow many more display patterns to be developed.
The Software
The Contemplator requires two pieces of software for its operation. The first is the UTFT driver library for the LCD display and the second is the Arduino sketch I wrote called Contemplator.ino (see Resources and the downloads for this article).
Installing the UTFT Library
You can skip this section if you already know how to install an Arduino library. If you don't, read on.
- Exit the Arduino IDE (integrated development environment) if you have it running.
- Download the UTFT library (UTFT.rar) using the link specified in Resources.
- Extract the library files directory using whatever file extraction tool is appropriate for your platform (Windows, Linux, OSX, etc.).
- Copy the UTFT directory to your Arduino/libraries directory. The directory structure should be Arduino/libraries/UTFT.
- The library should now be installed.
To verify correct installation of the library, start up the Arduino IDE and select File/Examples from the menu. You should see the UTFT entry listed.
Once you have the hardware wired up, the UTFT driver installed, and the Contemplator sketch available, you can download the sketch via the Arduino IDE and watch the magic happen. You don't need to understand how the Contemplator sketch works in order to use and/or appreciate it.
If, however, you would like to know how the various graphic display patterns work or if you would like to change the sketch to add new display patterns or remove existing ones, more in-depth knowledge is required. The best way to gather this knowledge is by knowing how the Contemplator is supposed to work and by studying the Contemplator sketch.
Basic Operation
As mentioned in the introduction, the Contemplator provides 16 display patterns for our viewing pleasure. Code in the sketch randomly selects which display pattern is shown and makes sure that all 16 patterns are displayed before any are allowed to repeat. The flags array in the code controls this.
A display pattern will be shown for either 30 seconds or the time it takes for the pattern to generate and display itself — whichever is shorter. If display pattern generation takes less than 30 seconds, some patterns will repeat so you will see them numerous times in succession.
The software was designed so that the individual display patterns do not need to concern themselves with display duration timing. All they need to do is to call the function checkForTimeout() periodically and if their display time period has expired, their execution will come to an end and the next display pattern will be invoked. The setjmp and longjmp mechanism built into the Arduino programming language allows this to work. Google these terms if you are interested in how.
Another interesting aspect of the code is the use of an array (called patternFunctions in the code) of function pointers to the display pattern routines. A display pattern is selected and executed via an index into the array with this single line of code:
(*patternFunctions[index])();
A typical display pattern routine is shown next. This code draws a series of connected line segments until its time is up. Any display pattern routines you write would resemble this code:
void linesPattern() {
int x, y, xPrev, yPrev;
// Pick a random palette
int paletteNumber = random(NUM_OF_PALETTES);
generatePalette(paletteNumber);
// Pick a random place to start within the palette
int colorIndex = random(PALETTE_SIZE);
xPrev = WIDTH_LANDSCAPE / 2;
yPrev = HEIGHT_LANDSCAPE / 2;
while (true) {
for (int i = 0; i < 80; i++) {
lcd.setColor(palette[colorIndex].red, palette[colorIndex].green, palette[colorIndex].blue);
colorIndex++;
colorIndex %= PALETTE_SIZE;
x = random(MAX_X_LANDSCAPE);
y = random(MAX_Y_LANDSCAPE);
lcd.drawLine(x, y, xPrev, yPrev);
xPrev = x;
yPrev = y;
delay(60);
}
checkForTimeout();
delay(1000 * BETWEEN_PATTERN_DELAY_SECONDS);
lcd.clrScr();
}
}
Important things to note about this code are:
- The palette from which the connected lines will be colored is selected randomly.
- The color picked for the first line is selected randomly from the colors contained in the palette.
- A while loop is used to continually cycle this display pattern.
- The checkForTimeout function is called within the while loop.
- There is a delay after all 80 lines have been displayed. Then, the display is cleared and the process starts over.
As mentioned, a software change is required to the Contemplator.ino sketch if a SainSmart Mega2560 is used instead of an Arduino Uno. The normal instantiation of the LCD driver for an Uno is as follows:
// Uncomment out next line when Sainsmart LCD display connected directly to Arduino Uno
UTFT lcd(SSD1289, 19, 18, 17, 16, LANDSCAPE);
If you're going to use the Mega2560, you would comment out the line above and uncomment the UTFT line below:
// Uncomment out next line when running on Sainsmart Arduino Mega 2560 + LCD shield + LCD display
// UTFT lcd(SSD1289, 38, 39, 40, 41, LANDSCAPE);
With that change, you should be good to go. Make sure you change the board type in the IDE to reflect which Arduino you're using.
Construction and Packaging
The Contemplator was designed to sit on my desk, so I wanted to make it as small and unobtrusive as possible.
I also wanted to make it structurally sound so it would last a long time. To this end, I epoxied four 3/4” wooden dowels (1/8” in diameter) to the top corners (component side) of the Arduino PCB. I then inserted .1” male header pins into all of the Arduino's female headers, to which I would solder wires from the LCD display's connector.
I then epoxied the other end of the four dowels glued to the Arduino onto the back of the LCD display's PCB, making sure to miss all of the components and to orient the Arduino so the USB connector was opposite to the connector on the LCD display. I made sure I left enough space so I could solder to the display's connector pins.
I wrapped this assembly with a rubber band while the epoxy dried. Once the glue cured and the assembly was stable, I soldered short wires from the display connector to the appropriate header pins on the Arduino as specified in Table 1.
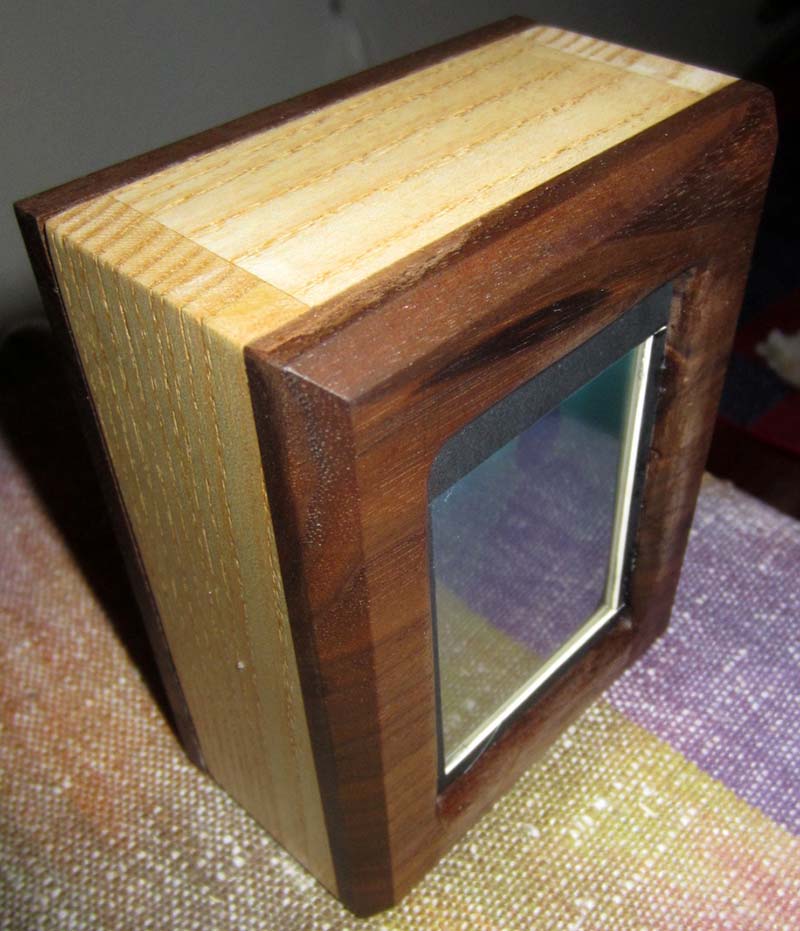
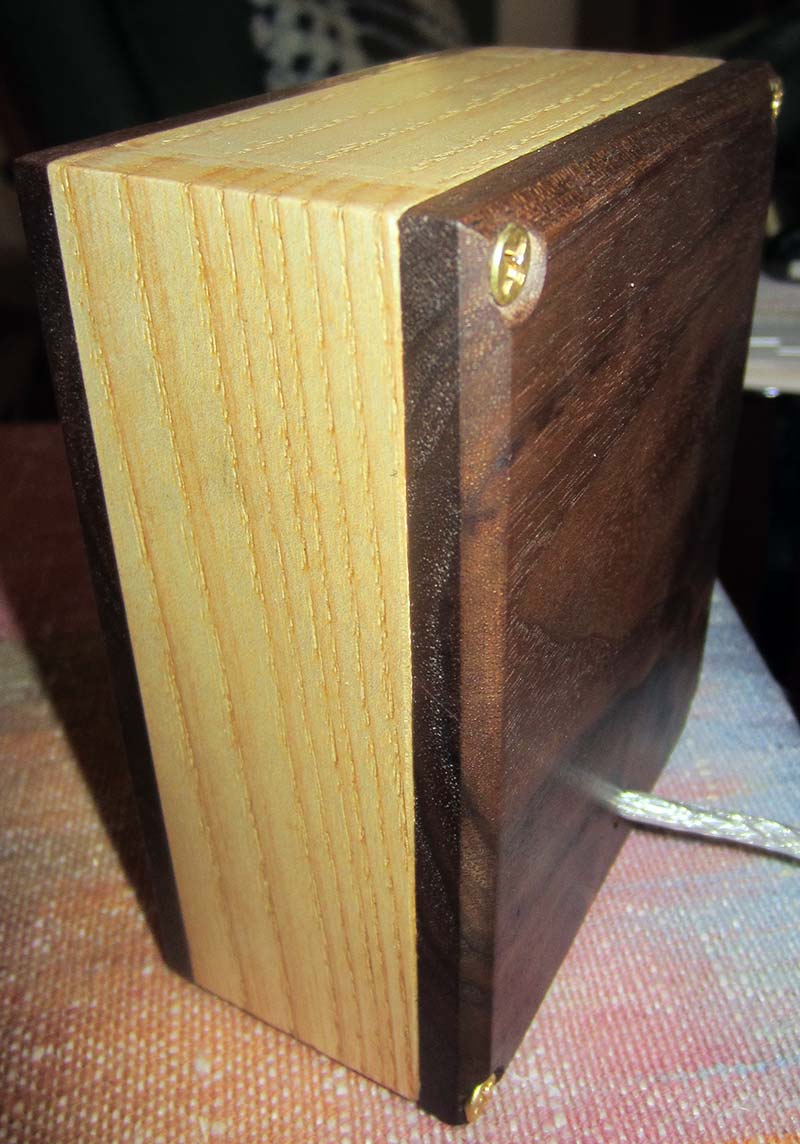
I packaged my Contemplator in a custom wooden box, but you can package yours anyway you like. I made my box out of ash and walnut for a nice contrast and a furniture-like appearance. Overall, the dimensions are 3.75” (wide) x 4.75” (tall) x 2.25” (deep); see the specific Parts List for the box.
After completing the box, I gave it a couple coats of natural finishing oil and — when dry — steel-wooled it and then rubbed it with paste wax. The finish turned out very smooth and nice (see the photos).
The cutout for the LCD display in the front panel was sized so that the actual display fit through the cutout but the display's PCB did not. During final assembly, I put a small amount of silicon caulking onto each corner of the display's PCB and pressed the display into the cutout. Once dried, the silicon holds the display/Arduino assembly in place, but it can easily be removed for servicing.
I had to modify a USB cable to make it work for this application. I cut off the end of the cable that plugs into the Arduino, removed the plastic encapsulation around the connector, and then unsoldered the wires from the connector (taking note of which color wire went where). I then passed the cable through the hole drilled in the rear panel of the box, stripped and tinned the wires, and reconnected them to the USB connector. Finally, the USB connector was plugged into the Arduino.
At this point, I downloaded code into the Arduino to make sure everything was still working. Once I was satisfied all was well, I placed some 3/8” foam on the back of the Arduino's PCB, put the rear panel in place, and screwed it on. The foam provided just enough thickness to gently hold the display/Arduino assembly in place.
Finally — because the frame around the LCD is white — I cut pieces of black cardboard and glued them onto the white frame to cover it. With that, the Contemplator was complete and has been sitting on my workbench/desk ever since.
Flashing Thoughts
Flashing LCD displays and other blinky things are not for everyone. For me, having a personal light show on my desk is a treat. There is something neat about have a little device with its one purpose in life to continually generate images like these to calm and amaze me.
When I get stuck on something I'm working on, I look over at the Contemplator and many times the change in focus is enough to get me going again. I hope this will work for you as well. NV
ELECTRONICS PARTS LIST
| ITEM |
NOTES |
| Arduino Uno board |
Other Arduinos can be used but this will necessitate changes in the software. |
| .1” break-away male header pins |
You need enough of these pins to populate all of the female I/O connectors on the Arduino Uno. |
| SainSmart 320x240 TFT LCD display |
This is a 3.2” display, although other SainSmart displays based on the SSD1289 controller will probably work as well. |
| USB cable |
The USB cable will become a permanent part of the Contemplator if you package it like I did. |
| USB charger |
This is for running the Contemplator after programming is performed. |
| Hook-up wire |
Light gauge flexible wire is best. |
| 27 ohm 1/2 watt resistor |
This is required to power the LED back lights of the LCD display. See Table 1. |
TABLE 1. LCD display to Arduino Uno connections for 16-bit data interface.
| LCD Display Pin Number |
LCD DisplaySignal Name |
Arduino Uno Signal Name |
Notes |
| 21 |
DB0 |
D8 |
16-bit data |
| 22 |
DB1 |
D9 |
16-bit data |
| 23 |
DB2 |
D10 |
16-bit data |
| 24 |
DB3 |
D11 |
16-bit data |
| 25 |
DB4 |
D12 |
16-bit data |
| 26 |
DB5 |
D13 |
16-bit data |
| 27 |
DB6 |
A0 |
16-bit data |
| 28 |
DB7 |
A1 |
16-bit data |
| 7 |
DB8 |
D0 |
16-bit data |
| 8 |
DB9 |
D1 |
16-bit data |
| 9 |
DB10 |
D2 |
16-bit data |
| 10 |
DB11 |
D3 |
16-bit data |
| 11 |
DB12 |
D4 |
16-bit data |
| 12 |
DB13 |
D5 |
16-bit data |
| 13 |
DB14 |
D6 |
16-bit data |
| 14 |
DB15 |
D7 |
16-bit data |
| 4 |
RS |
A5 |
Data/Command Selector |
| 5 |
WR |
A4 |
Write Enable (active low) |
| 6 |
RD |
5V |
Read Enable RD (active low)
tied to 5V |
| 15 |
CS |
A3 |
Chip Select (active low) |
| 17 |
REST |
A2 |
Chip Reset |
| 19 |
LED-A |
5V |
LCD signal tied to 5V through
27 ohm resistor |
| 1 |
GND |
GND |
Ground |
| 2 |
VCC |
SV |
Power |
Note: There are no I/O lines left over to connect the Arduino Uno to the touch screen controller or SD card interfaces, so these aspects of the circuitry are not available.
BOX PARTS LIST
| QTY |
MATERIAL |
LENGTH |
WIDTH |
THICKNESS |
FUNCTION |
| 2 |
Ash |
4.75” |
1.5” |
3/8” |
Sides |
| 2 |
Ash |
3" |
1.5” |
3/8” |
Top/bottom |
| 1 |
Walnut |
4.75” |
3.75" |
3/8” |
Front panel with cutout for the LCD to protrude |
| 1 |
Walnut |
4.75” |
3.75" |
3/8” |
Rear panel with hole drilled for USB cable |
| 4 |
Brass |
|
|
|
#6 screws for holding the back on |
| |
Glue |
|
|
|
For holding the box together |
Downloads
The Desktop Contemplator Program