Most of the projects described in Nuts & Volts can be built with readily-available, relatively inexpensive components from the likes of Digi-Key (www.digikey.com), Jameco Electronics (www.jameco.com), and All Electronics (www.allelectronics.com). Furthermore, in the rare cases in which the project author doesn’t supply the printed circuit board (PCB) layout, it’s typically a simple matter to use one of the free or inexpensive PCB CAD applications. Thanks to extensive libraries of the latest chip and surface-mount components, a layout is seldom more than a few dozen mouse clicks away. However, when it comes to tube-based projects, it’s a different matter.
I’ll illustrate with one of my recent design projects, a tube-based guitar amplifier. The project started simply enough. The basic amplifier design borrowed from schematics of Fender and Marshall amplifiers posted to the web, supplemented with a few tips from my dog-eared copy of the 1978 ARRL Handbook. So far, so good. When it came to assembling the parts, however, I discovered that my junk box was of little help. I had no tubes, high-voltage toroidal transformers, high voltage bypass and coupling capacitors, or relatively high-wattage precision leaded resistors. Furthermore, I had to search through the online databases of three vendors before locating the parts I needed to complete the project.
Before ordering the parts, I went to my favorite board layout program, ExpressSCH and ExpressPCB. Unfortunately, I discovered that the program doesn’t ship with schematic icons or layout templates for tubes and other high-voltage components. Fortunately, I found several libraries of tubes and associated components in the download area of the ExpressPCB group on Yahoo!. However, because of the greater trace spacing and larger components associated with the tube circuitry, the size of a PCB grew quickly — as did the cost.
In the end, I decided to forgo the expensive custom amplifier project and take a chance on one of many DIY tube amp houses that advertise on eBay. I went with AnalogMetric (www.analogmetric.com), a Hong-Kong company that offers dozens of tube-type DIY kits, from unpopulated PCBs and full kits to professional looking aluminum enclosures. I studied the schematic and photos on the AnalogMetric website and decided I’d rather spend my time modifying a clean, relatively simple amplifier rather than hunting for hard-to-find parts and paying more for shipping than components.
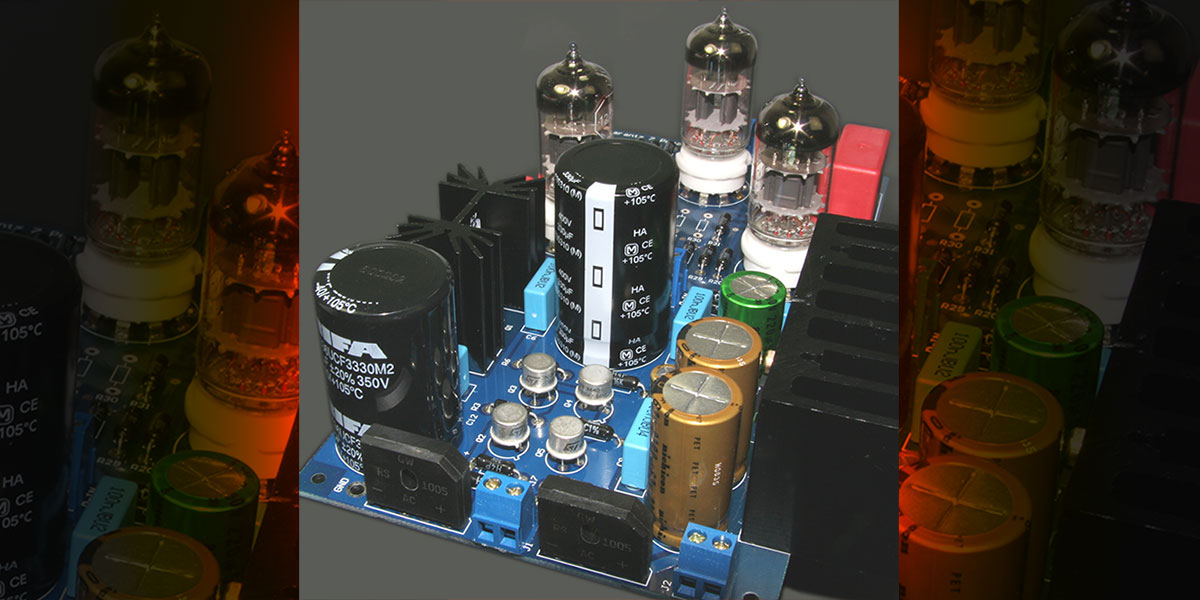
The DIY preamp, which consisted of a PCB and all the components except the power transformer, was $168, not including shipping from Hong Kong. The preamp sports three 12AX7s and solid-state power supply. Add one HV power transformer — also available from AnalogMetric — and you have a complete tube preamp that can feed a power amp. In all, I was pleased with the kit. The PCB was well designed, clean, and the parts fit easily. Inexperienced builders might be upset by a lack of instructions, though. I had to rely on a parts list keyed to a schematic because there was no step-by-step instruction manual. My only complaint with the kit was that the company shipped the incorrect power transformer, but readily replaced it with the appropriate model after an email. The components seemed first rate — except for the high voltage output capacitor, which I replaced with a capacitor with a higher capacitance and much higher ripple current rating. Although $168 may seem expensive for a preamp kit, the cost of parts and shipping from the three vendors for the original design would have cost more, and I would have spent a weekend designing a circuit board.
Working with the DIY tube amplifier was like taking a trip back in time. Although I grew up with tubes, I forgot many of the advantages of solid-state devices. Small, lightweight components and no danger of accidental electrocution. Working almost exclusively with SMT components over the past several years, I also forgot how much heat is required to solder a half watt resistor or tube socket to a thick, heavily plated PCB. Forget the temperature-controlled, needle-tipped soldering iron or hot air pencils — this is a job for a broad, chisel-tipped, 35 watt iron. And, except for the switching transistors, there’s no need to worry about static charge. Tubes are relatively indestructible in that respect.
The real pleasure in working with a tube preamp is the sound. Not the sound that comes from a carefully tuned amplifier with perfect input levels and no measurable output distortion — for that, you’d be better off with a solid-state amp. Where a tube amplifier comes to life is when the signal from a guitar or other instrument is heavily distorted – approaching 30% total harmonic distortion or more. Whereas solid-state amps sound harsh when driven to this level of distortion, tube amps have a ‘warm’ sound that’s impossible to exactly replicate with modern electronics. I have a couple solid-state modeling amps that come close to the tube sound, but in a side-by-side experiment, there’s no question that the tube amp provides the best sound. If you’re into bass or guitar and searching for your tone, you’ll more likely find it in a tube amp than in a more technologically sophisticated (and typically cheaper) solid-state amp. If you want to experience tubes without the hassle of scrounging for parts or dealing with a Hong Kong merchant, try PAiA Electronics, Angela Instruments, and Audio Note for kits and supplies. Good luck finding your tone. NV
RESOURCES
ARRL Handbook, Pre-1980.
AnalogMetric, Hong Kong
www.analogmetric.com
PAiA Electronics, Inc., Edmon, OK
Tube preamp kits, with a focus on music applications.
www.Paia.com
Angela Instruments, Annapolis Junction, MD
Tubes, sockets, capacitors, resistors.
www.angela.com
Audio Note
Audiophile-level preamp and amplifier kits.
www.audionotekits.com
Arctic Silver
Thermal epoxies and compounds.
www.arcticsilver.com
LED Supply
High-power LEDs and constant current drivers.
www.ledsupply.com