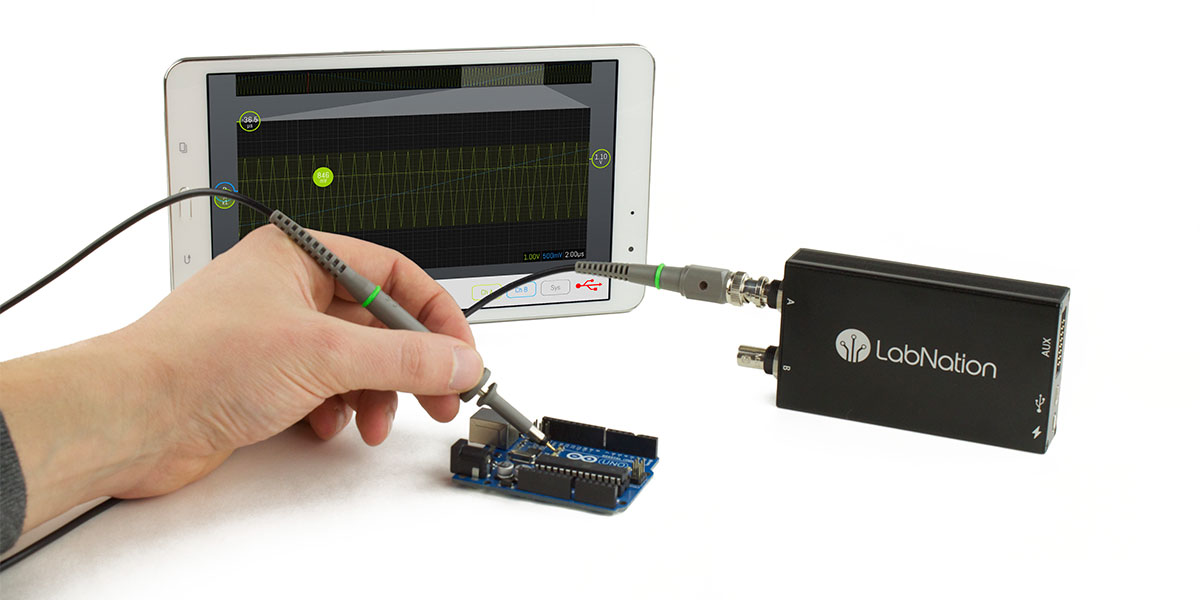
Recently, I had the chance to review a bench instrument: the SmartScope USB oscilloscope from LabNation (www.lab-nation.com). Here are the results of my test drive of this interesting device (Figure 1).
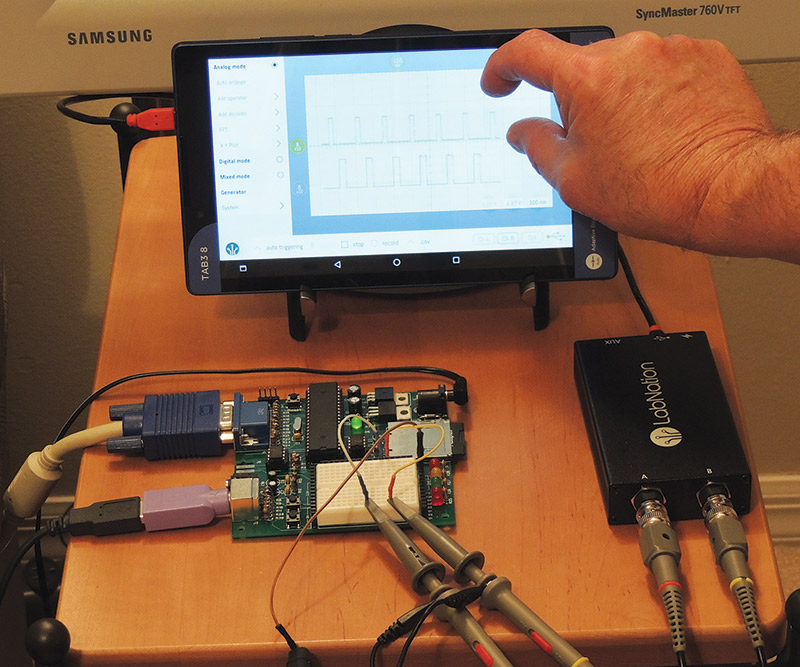
FIGURE 1. The SmartScope from LabNation, shown here using an Android tablet to display programmable signals generated by the Amigo retro computer. The SmartScope features a re-imagined oscilloscope built around a “modern” touch screen user interface.
LabNation describes the SmartScope as “the oscilloscope of the new generation,” targeted at makers and hobbyists, as well as professional engineers. Created by a small group of EEs disappointed with previous USB scopes and funded by a Kickstarter campaign, SmartScope combines a dual-channel 30 MHz oscilloscope with a logic analyzer and an arbitrary waveform generator (AWG) into an open architecture USB instrument that interfaces with most common platforms such as tablets, phones, and desktops (excluding the iPhone or iPad, which require jailbreaking).
SmartScope designers state they “challenged the century-old interface of knobs and dials, and redesigned it from scratch” using the drag-and-drop/pinch-and-swipe user interfaces of modern mobile devices. The result is a fresh user experience that you may find interesting and perhaps helpful.
Spoiler alert! This is not an exhaustive technical evaluation of each feature of the SmartScope against its published specifications. It is rather a report of my observations while using the device to perform various tasks I might come across in my adventures as an electronics hobbyist. There are several fairly rigorous evaluations of the SmartScope in various online publications, and it generally seems to meet its published specs. My questions were whether those capabilities would be of help to me as a hobbyist, and how my “dinosaur” hobbyist sensibilities (which date back to the late 50s) would react to the “more modern” user interface.
Figure 2 shows what comes in the box from LabNation. In addition to the hefty aluminum-cased SmartScope, there are two 60 MHz probes, a 24 inch USB A/Mini-B interface cable, a 10-conductor ribbon cable that connects to the SmartScope auxiliary port, and nine grabbers that connect that ribbon cable to your circuit under test. Heft, fit, and finish of the SmartScope are excellent, and the supplied probes are good quality.
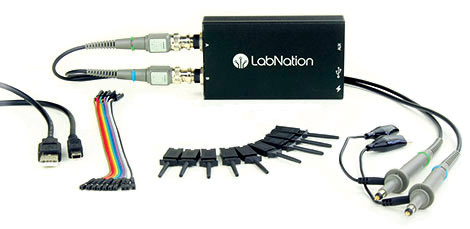
FIGURE 2. Here’s what comes in the SmartScope box. In addition to the two probes and the USB cable, the device ships with grabbers and cables for eight-channel digital signal analysis.
The ribbon cable and grabbers are adequate to extend the SmartScope auxiliary port features (arbitrary waveform generator, logic analyzer, and four-bit digital waveform generator) to your circuit under test. Not included in the base package — but available from LabNation — is a Micro-B/Mini-B cable to interface the SmartScope to a tablet. Make sure you have one of these if you intend to use the SmartScope with your Android device.
I puttered around for about 12 hours over a few days with the new scope, and the device appears to do what LabNation claims. The scope provides two 30 MHz channels of clean easy-to-read signal information. The arbitrary waveform generator provides several programmable waveforms, with the option to create and upload your own. The logic analyzer displays up to eight digital channels in a clear and common sense way.
As a bonus, four channels of programmable digital output are available on the auxiliary port. And importantly, once I got the hang of them, I found the “modern” user interface and screen layout of the SmartScope intuitive and easy to use.
Based on suggestions from Reimer Grootjans, one of the SmartScope designers, I began my look at SmartScope with an Android tablet (a Lenovo TB3-850F, running Android 6.0). The SmartScope app loaded cleanly, and after hooking up the probes and connecting the tablet to the SmartScope with a Micro-B/Mini-B cable, I was ready for some action. I planned to use my grandson’s approach of “avoid the instruction pamphlet, just press buttons and see what happens” to explore this new scope, and I needed a signal source now!
Since my Amigo retro computer was already fired up next to my desk and my homebrew signal generator was tucked away “somewhere” in my office closet, I wrote a quick code snippet in Color BASIC to send variable-width pulses to a couple of Parallax Propeller I/O pins, then connected the scope probes. After a few minutes of fumbling around, I did have some screen presentation of the two pulse trains, and could see in real time pulse width changes I input via the Amigo keyboard. However, I was still fumbling around, and a bit frustrated by the unfamiliar more modern user interface in front of the rich feature set of the SmartScope.
What I quickly learned was that my grandson is obviously smarter than I am, and dinosaurs should probably take a glance at the manual before venturing too far into unknown territory. The SmartScope has a lot of features, and a great deal of thought went into designing the user interface to control them. It was a bit presumptuous of me to think I could just bluff my way to mastery of this instrument without doing the needed work.
So, on my second attempt, I discovered that the SmartScope online manual is excellent (and available through the device menu), and that the “Dummy Scope” mode (available when the device is not connected to your tablet/phone/desktop) is a great way to explore the various SmartScope features and how to control them.
Now armed with enough knowledge to be dangerous, I went back to my Amigo retro computer and scoped the horizontal and vertical sync pins of the VGA interface. This time, I could quickly work the tablet interface to find the most helpful display of the two signals (see Figure 3).
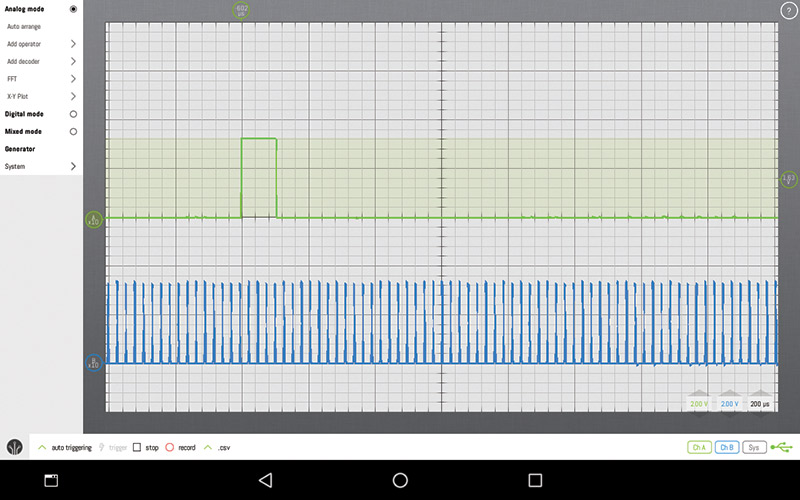
FIGURE 3. SmartScope display of Amigo retro computer VGA vertical and horizontal sync signals on an Android tablet. It was quick and easy ... once I figured out the SmartScope controls.
Next, I ventured into my office closet and unearthed my old homebrew signal generator, which can provide several waveforms at frequencies up to 200 kHz.
As expected, the SmartScope cleanly displayed those, and clearly showed the waveform distortion that I knew existed in the higher frequencies of my home-built device.
For the last several years, my preferred desktop machine has been a 21.5 inch iMac (mid 2011), now running Yosemite 10.10.5. I’m PC agnostic, but since I provide domestic IT support for my bride’s Mac, Time Capsule, and iPhone, the Mac on my desk becomes one less different platform to worry about. Usually when I’m in the middle of the latest electronics project, I’ll have several (often many) windows and tabs open on my Mac as hardware and software come together into the latest world-changing achievement.
One window that I don’t have on the Mac is my old USB DS1M12 Stingray oscilloscope, which runs on an ancient XP machine that I keep around just for that purpose. (The DS1M12 drivers are Windows only, and I just have not been able to get them to run under Wine on the Mac.)
So, how would the SmartScope work on my Mac? To find out, I downloaded the app, temporarily changed my security settings to install it (LabNation has not added to the price of the SmartScope by becoming an “Apple identified developer”), and fired things up. I used the Amigo VGA sync signals again as a test source. As shown in Figure 4, everything worked flawlessly, and in a few minutes I had successfully navigated the change from touch screen tablet to wireless mouse desktop.
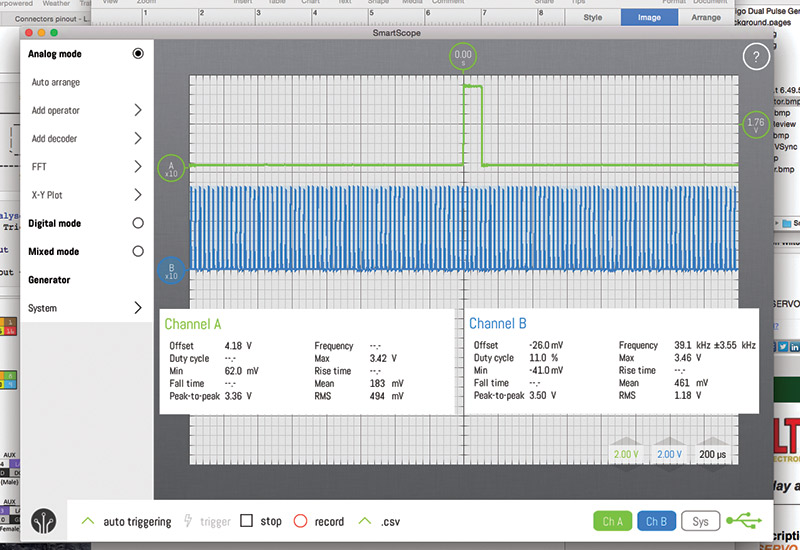
FIGURE 4. Amigo VGA sync signals again; this time with the SmartScope running on my Mac. I’ve adjusted the display to show the channel A and B measurement boxes.
Since I now understood the “where” of the SmartScope control features, the “how” of dragging and scrolling them with the mouse on the desktop seemed natural to me. Plus, an important benefit for my senior eyesight is the scope display on the desktop was much larger than on the tablet. So, not only could I see the waveforms more clearly, but also easily read all the control and data text on the screen. (There are some adjustments in the SmartScope System menu that allow you to adjust GUI size, waveform thickness, and color scheme for any platform, including the tablet.) I have to admit that I was pretty excited about the SmartScope in this configuration — the one that I would likely use the most.
Having driven the oscilloscope around the block a couple of times, it was time to take a look at the arbitrary waveform generator and the logic analyzer. Both of these devices are accessed through the auxiliary port (see Figure 5) on the SmartScope using the supplied female/female ribbon cable jumpers.
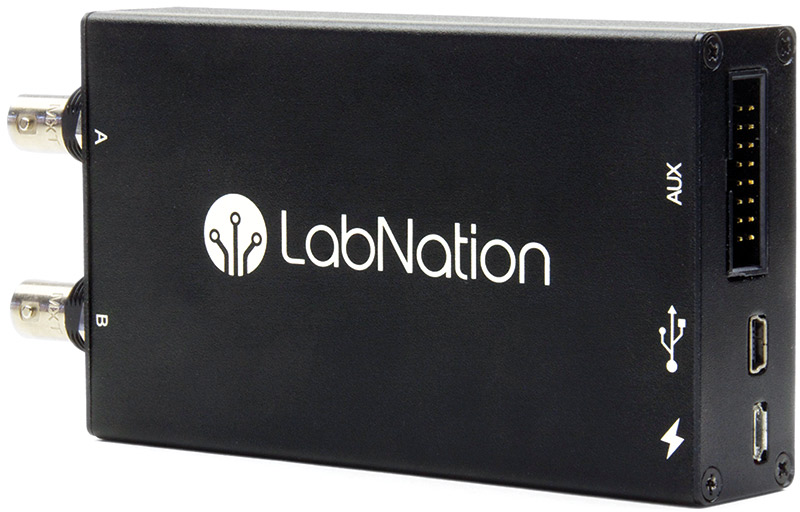
FIGURE 5. The non-BNC end of the SmartScope, showing the 16-pin auxiliary port, the Mini-B USB platform interface, and the Micro-B USB external power connector.
I started with the AWG, and connected the signal from the auxiliary port to my old DS1M12 Stingray scope probe using the SmartScope-supplied jumpers and grabbers. I’ve used my Stingray for years, and it is a known entity to me that I could use to double-check what the SmartScope was showing me. Also, while this was not a head-to-head comparison of the Stingray and the SmartScope, I thought utilizing both instruments in this review would give me a useful fresh perspective on both the traditional scope user interface and the more modern UI that LabNation claims.
Figure 6 shows a SmartScope AWG waveform on the Stingray display, complete with all the controls of a traditional scope.
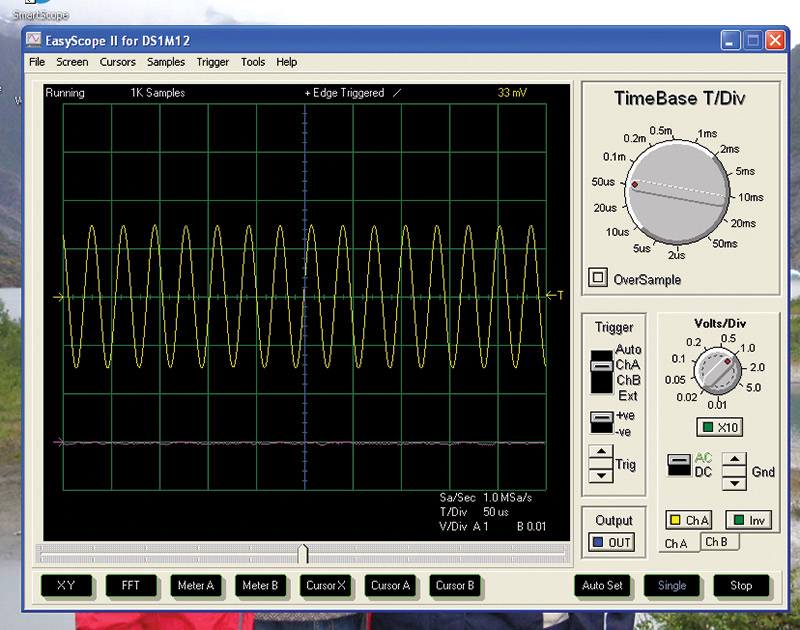
FIGURE 6. Using my tried-and-true DS1M12 Stingray scope to check the SmartScope arbitrary waveform generator. For me, the Stingray provided a good “traditional” USB scope baseline for examining SmartScope features, functions, and capabilities.
In my checks, the SmartScope AWG seemed to be a capable instrument, performing as expected and offering a good set of features, including the ability to define custom waveforms using .CSV files.
I found the user interface easy and intuitive, and the manual (yes, I did glance at it!) easy to access and follow. Once I had examined the AWG using my Stingray scope, I switched to the SmartScope probe and had another look. As shown in Figure 7, the display was clean and uncluttered, and the scope and AWG functions convenient to use together.
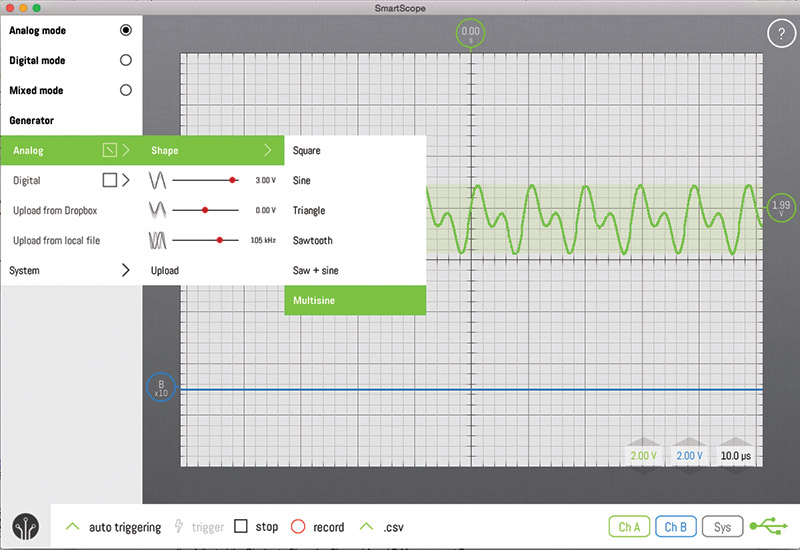
FIGURE 7. Another look at the arbitrary waveform generator; this time on the SmartScope itself, running on my Mac. I found the AWG easy to understand and use.
Now it was time to examine the SmartScope logic analyzer function. I thought about writing another Amigo Color BASIC code snippet to generate several channels of logic pulses via Propeller I/O pins, but decided instead to use the SmartScope digital generator function.
I connected the four digital generator pins of the auxiliary connector to the pins for four channels of the logic analyzer using the F/F jumpers, and quickly had my next test up and running. Figure 8 shows the setup on the SmartScope auxiliary port.
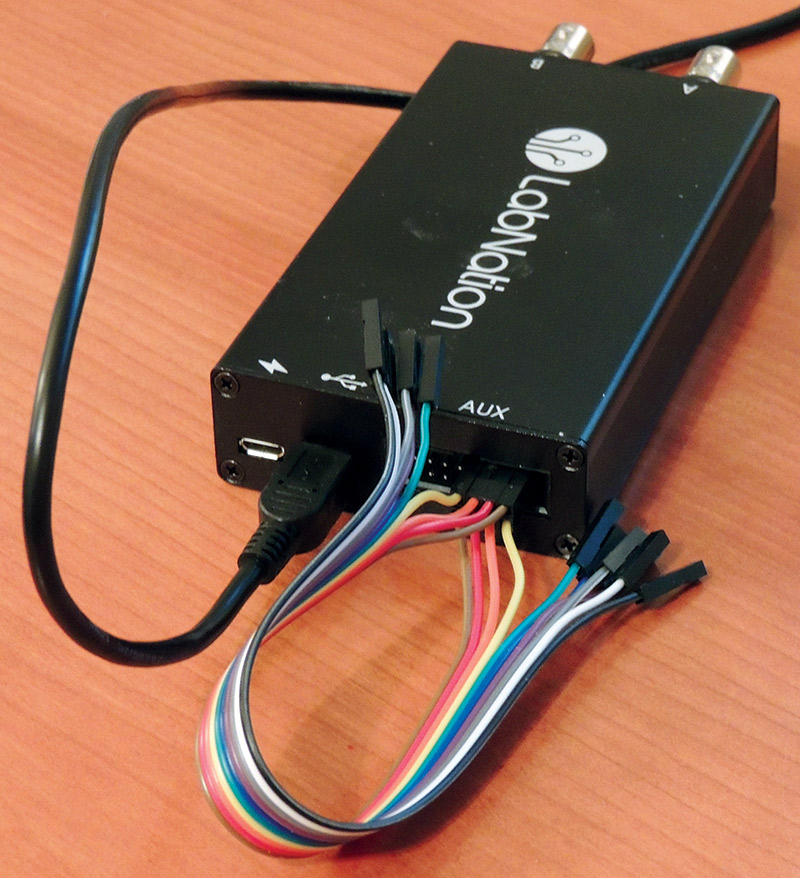
FIGURE 8. Connecting the SmartScope four-channel digital generator to the logic analyzer, using the provided female/female jumpers.
Figure 9 shows the results of this setup, with the generator providing a train of sequential “one-hot” pulses over the four channels. Several other pulse trains are available from the generator, and the logic analyzer provided a clean readable display of all of them, over the range of the generator.

FIGURE 9. The SmartScope logic analyzer, displaying one-hot pulse trains from the onboard digital generator. I’ve activated the Panorama feature at the top of the display.
In Figure 9, I’ve pulled up the logic analyzer Decoder menu to show the robust list of units that can be used in addition to the raw eight-channel digital display.
I’ve also activated the “Panorama” feature at the top of the screen, which shows the sampled waveform and allows you to zoom in on specific regions of interest. The Panorama feature is available in both analog scope and digital logic analyzer modes.
To finish out my review, I tried to run the SmartScope app on the other platforms I had laying around my office, with mixed results due to my platforms. SmartScope loaded and ran fine on Ubuntu 14.04 LTS running on an old (circa 2005) HP dv4000 laptop that I use intermittently.
It would not load in my ancient Windows XP desktop (the same one that runs my Stingray scope app); I suspect there’s a conflict with some special FTDI drivers I have installed on that machine.
LabNation did quickly suggest alternative drivers and provided specific instructions for the installation, but I didn’t want to perturb my known XP baseline for this review.
My final platform attempt was the ASUS Windows 8.1 laptop that I recently inherited from my grandson, and which I found would no longer boot when I tried to load the SmartScope (probably the reason he was so generous).
So, for this review, I ran the SmartScope on an Android tablet, a Mac desktop, and a Ubuntu laptop. The user interface was a bit different for each of these, but once I learned my way around the SmartScope controls, everything was intuitive and easy to use — no matter what the platform.
I found the SmartScope does what LabNation says it will, and it provides a full complement of features that should keep most hobbyists and makers and even professional engineers happy.
The online manual is clear and well organized, and the learning curve for the functions that I explored was surprisingly easy.
A check of the LabNation Change Log (online in their wiki) confirms that they are serious about listening closely to their customers and quickly responding with bug fixes and upgrades.
Bottom line: At $229, the SmartScope from LabNation is in my opinion one of the best USB oscilloscope deals around. It is packed with powerful features that you will likely find helpful, and I think you will enjoy its more modern user interface.
If you’re in the market for a new scope and you don’t usually need more than 30 MHz bandwidth or an iOS platform interface, I suggest you take a close look at the SmartScope. I think you’ll be glad you did! NV
Choosing an Oscilloscope
For a comprehensive guide to choosing a new digital oscilloscope, please see Alan Lowne's "Choosing an Oscilloscope" in the October 2016 issue of Nuts & Volts.
Resources
LabNation
www.lab-nation.com