The Crypt Creature is an animated six foot tall replica of a stone block burial crypt with black bars in front. Inside, a crouched cowled figure grips the bars with its skeletal hands, its head hanging down (Figure 1).
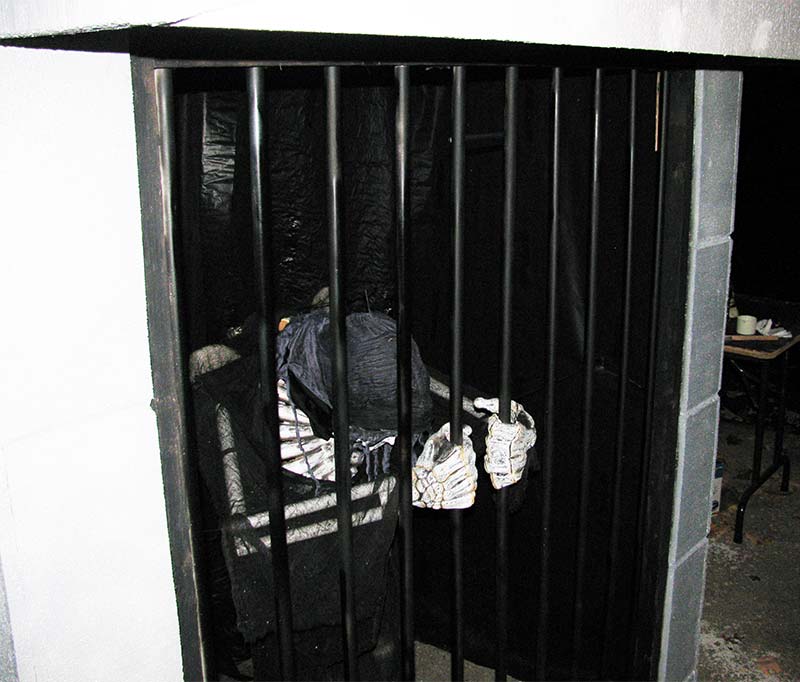
FIGURE 1. Crypt Creature waiting for activation.
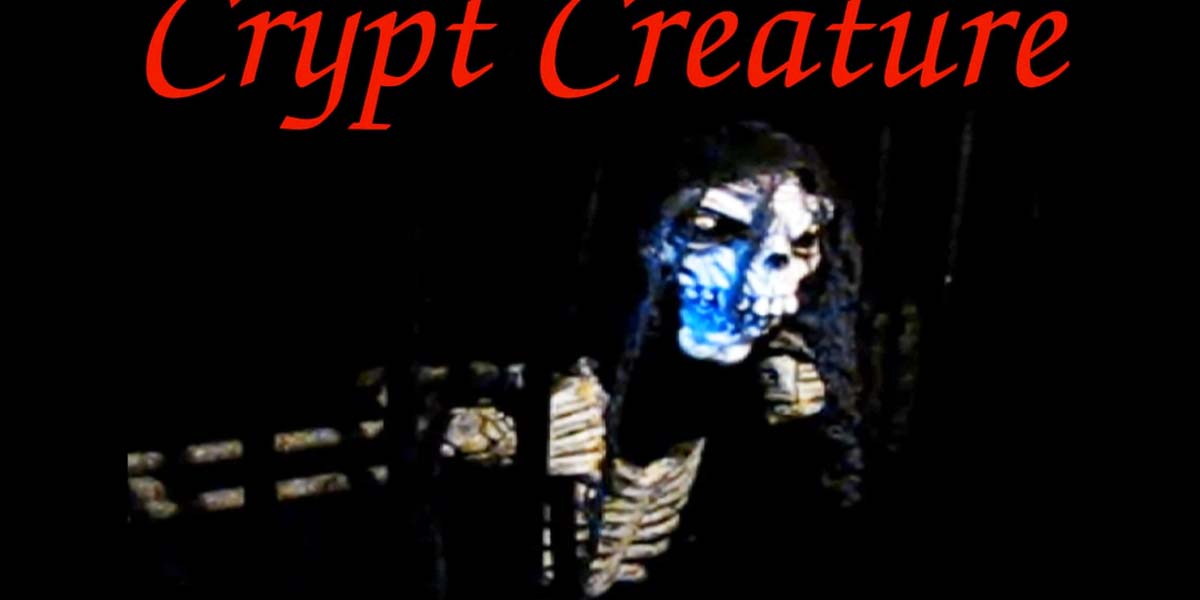
When activated, the creature lets out a loud growl, lunges forward, and forces the bars open. Its head snaps up revealing its skeletal gaze while emitting a shrieking scream (Figure 2).

FIGURE 2. Crypt Creature after activation.
It then bellows "Happy Halloween!" in a deep sinister voice. After a brief pause, the creature begins laughing as it retreats to its original position safely back behind the bars with its head moving to once again stare down at the ground.
I created the Crypt Creature prop for my home haunt in Orange County, NY that I call “Mountainview Cemetery.” My interest in Halloween and scaring people started early in life.
Growing up, I shared a room with my brother, Marcel (we’re identical twins). At the age of nine, we turned our room into a haunted house and got a kick out of showing it to friends and family.
As teenagers, we constantly scared each other with different pranks.
The fun I had as a kid at Halloween has stuck with me. Now, in my 40s, I’ve really started getting into building Halloween props.
Internet Inspiration
It was early fall several years ago, when a simple marionette prop known as the Flying Crank Ghost (see an example here) caught my attention and I decided to build one. Even though it took a while to find all the pieces (and the time to put them together!), when I finished it and switched it on for the first time, I was floored!
This was such a simple build but it provided such an amazingly spooky prop! I decided I needed to build more. With just three weeks left until Halloween and with a successful Flying Crank Ghost build under my belt, I started looking at the leftover parts on my workbench and went to town.
As a result, my very first home haunt debuted with my Flying Crank Ghost and three additional motion activated props. I was well on my way to creating my favorite and most elaborate prop to date: the Crypt Creature.
My philosophy for building props is, “Use what you have first, then buy only what you need.” So, the Crypt Creature is animated by a hacked cordless drill I had laying around (Figure 3).
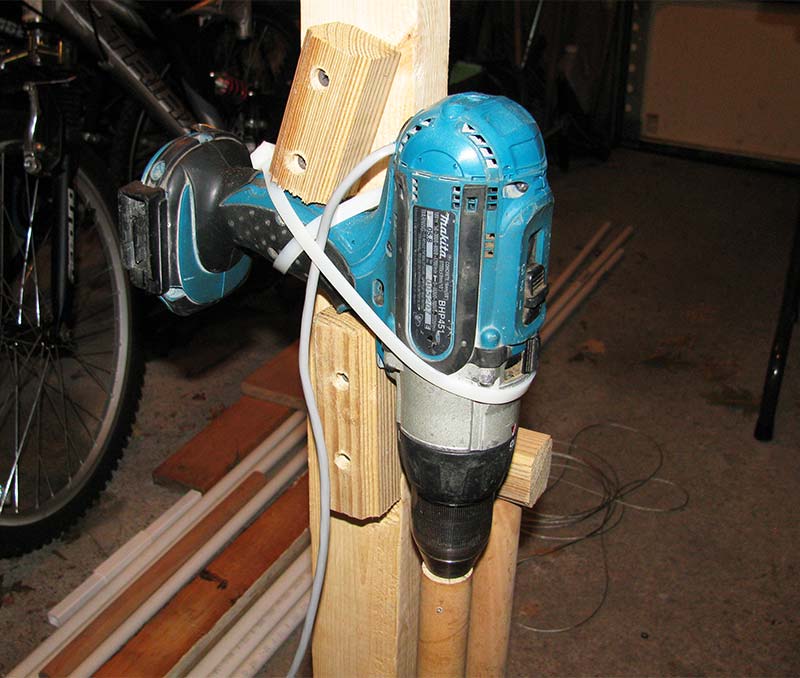
FIGURE 3. The cordless power drill that drives all the animations.
The sound effects were made using a surplus laptop that was triggered by the guts of an old USB keyboard (Figure 4).
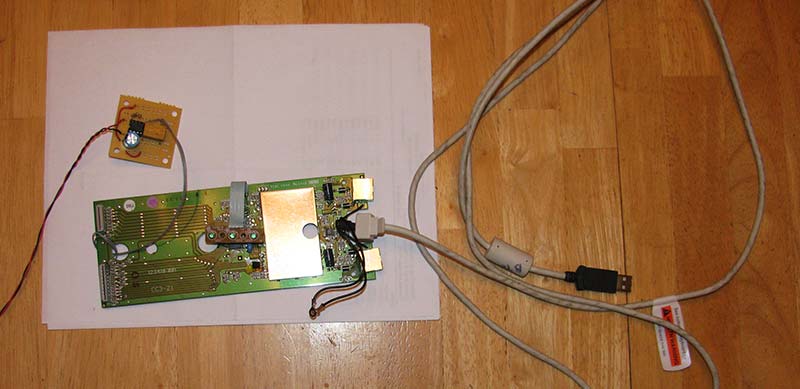
FIGURE 4. USB keyboard guts with 555 one-shot timer set to activate the spacebar.
The sounds were amplified through an old car stereo amplifier and speaker system. The entire system was powered by a 12V 18 Ahr battery, and triggered with a salvaged wireless remote (Figure 5).
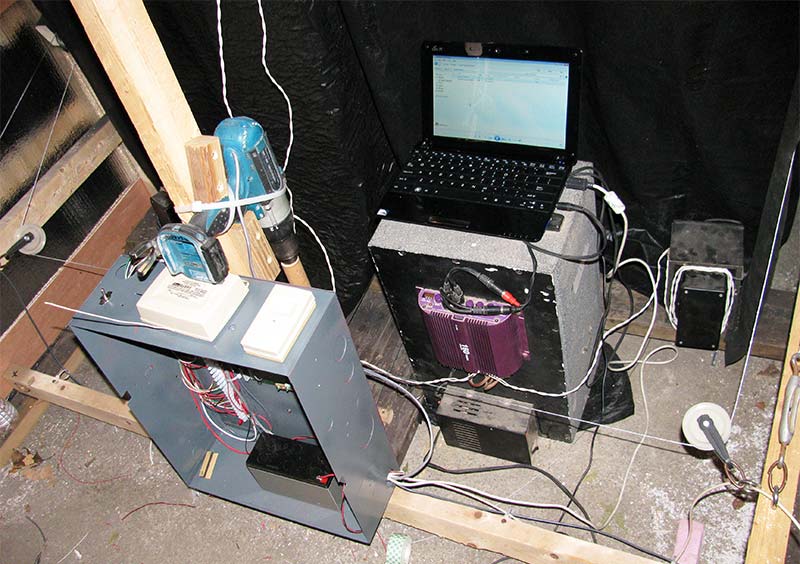
FIGURE 5. Car stereo amplifier and subwoofer used to amplify audio from the laptop.
Toying With an Idea
The idea for this prop came from a small battery powered Halloween toy I found at a local drug store. The toy was a six inch figure of a prison-garbed skeleton in a cage (Figure 6).
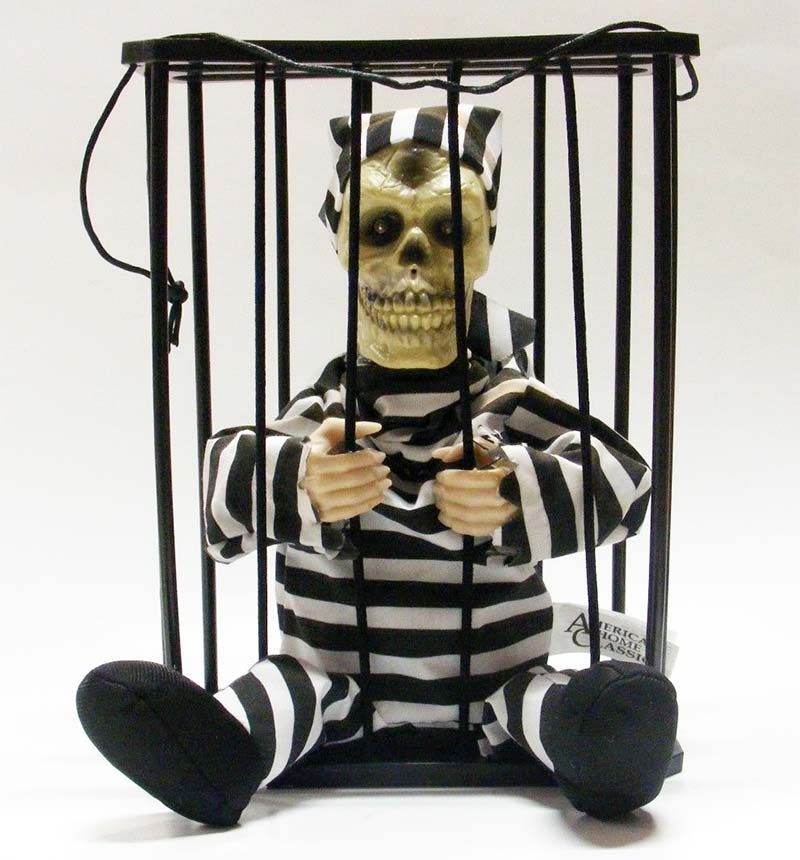
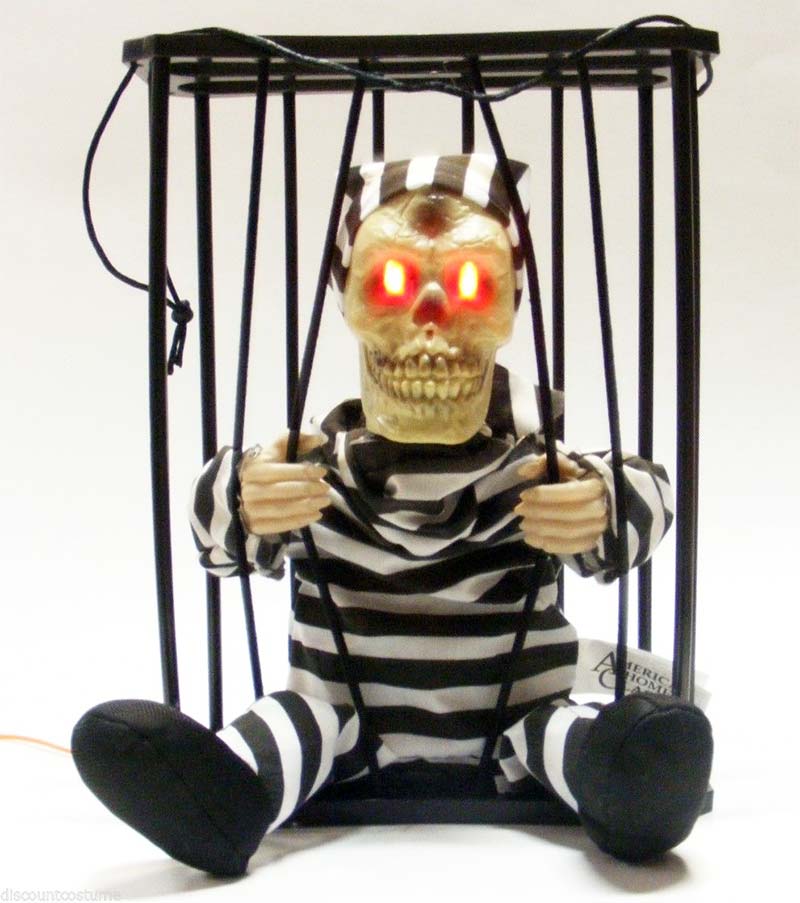
FIGURE 6. The animated toy that inspired this build.
When its rudimentary motion detector was triggered, it lurched forward, spread the plastic bars of its cage, and said something rather corny through its tinny sounding little speaker. However, when I first walked past this thing, it actually startled me!
I think it was the combination of the interesting motions and well-timed sounds. It really got me wondering how hard it would be to scale it up for a life-sized effect. Could I turn the little toy into a big scare? Finding out became my obsession.
Getting Ahead
To inspire myself when making Halloween props, I always start with a scary head or mask; it helps to get my creativity going. For this prop, I found a witch-like full head skeleton mask that was very creepy. I sat it on a post in my garage/workshop and would look at it every time I came in, imagining how it would move.
The idea was to start with the head hanging down and then raise it up to startle people just like the little six inch toy had startled me. Once I imagined the neck moving forward and the top of the head being held back with a string, I knew I had it! The rest of the mechanism just seemed to fall into place after that.
One of the most interesting things about this build was just how many motions could be accomplished using only a single motor. The mechanism began with a wooden 1 x 6 acting as a base. To that, I attached a 1 x 3 plank standing vertically in the front to hold the creature, and another in the back to hold the winch rod (Figure 7).

FIGURE 7. The base board and two vertical planks that hold the torso and the winch rod.
On the front vertical plank, I used a single bolt to attach a second plank that could pivot forward and backward. This was to act as the creature’s torso, and the single pivot point would allow for the lunging motion. To the top of this torso plank I attached the head with a neck swivel joint to allow the head to move freely. I also attached a string from the back of the head to the rear vertical plank.
Next, I ran a cable from the vertical winch rod forward towards the front support where I pinned it to the torso plank. It then ran around two rollers at the front of the prop and returned to the back of the prop where it went around a third roller before returning to the first vertical winch rod (Figure 8).

FIGURE 8. The bottom of the winch rod that anchors all the cables and drives their motion.
When the drill spins clockwise, the cable pulls the plank backwards at the bottom which makes the torso lunge forward. As the torso moves forward, the head is pulled upwards by the string that anchors it to the rear plank (Figure 9).
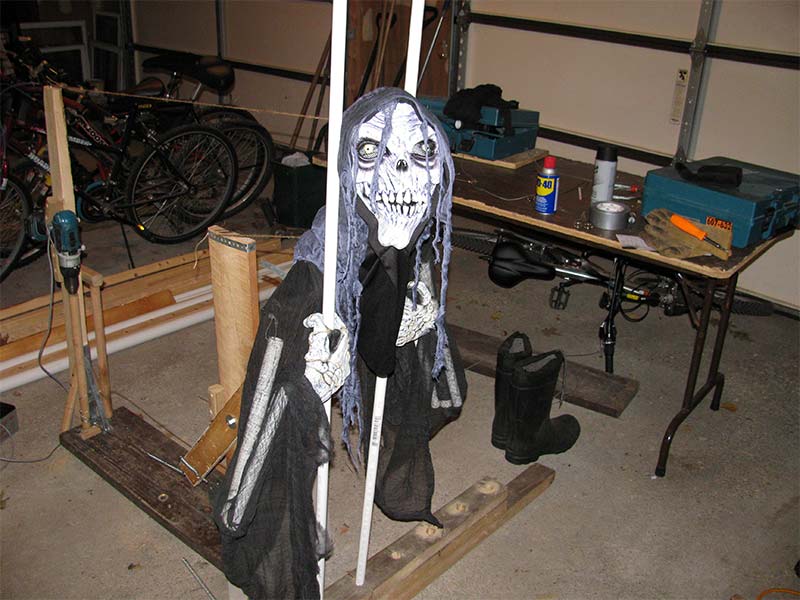
FIGURE 9. When the torso board extends, the string on the top of the head causes it to lift up and turn slightly.
When the drill spins counter-clockwise, it pulls the torso board back to its starting position.
I made two PVC pipe arms and attached them to two PVC bars that would be used as the cage bars (Figure 10).
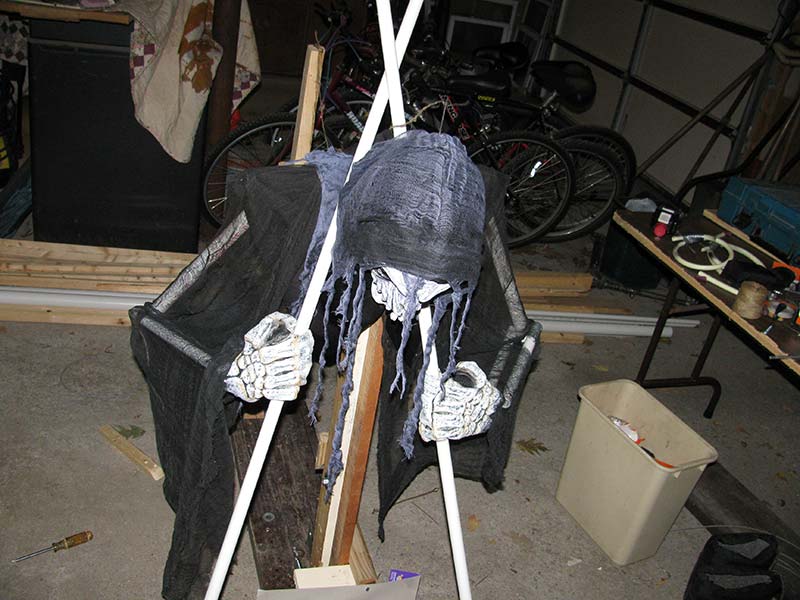
FIGURE 10. The two arms are attached by the hands to the two PVC pipe bars.
Two block-and-tackle type pulley systems were used with cables that went through the arms and hands. This pulley system decreased the force needed to open the bars and decreased the bar travel from nine inches to four inches (Figure 11).
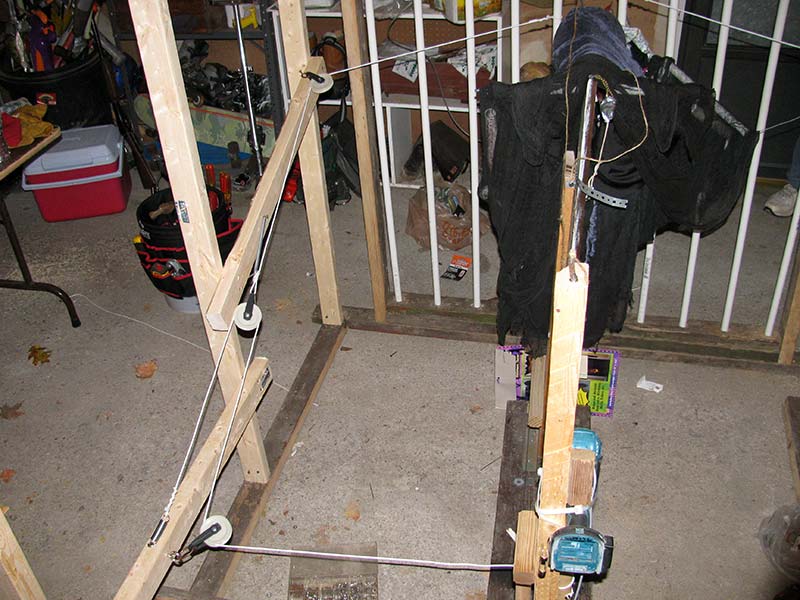
FIGURE 11. Top view of the left arm pulley system.
Electrifying Motion
To control the motor, lights, and sounds, I made a controller and housed it in a gutted metal alarm system cabinet (Figure 12).
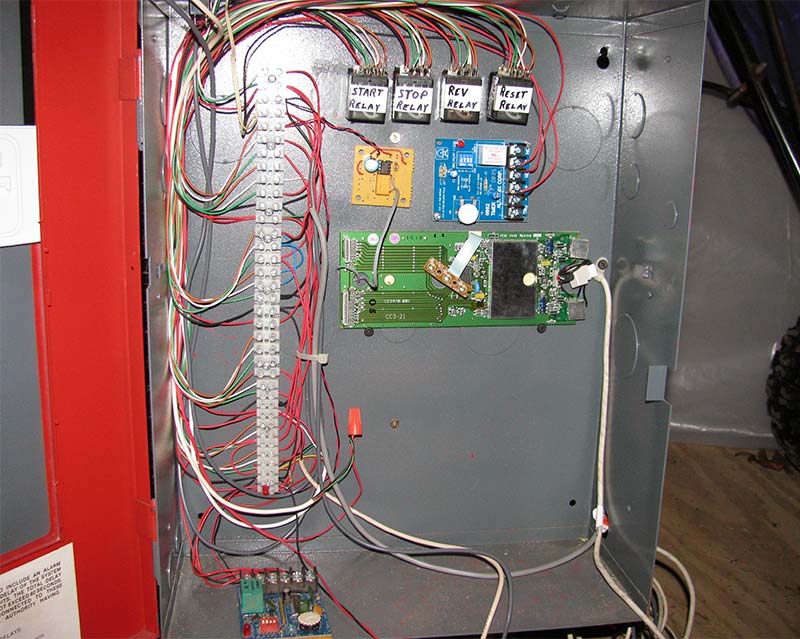
FIGURE 12. A repurposed burglar alarm box holds all the electronics for the prop.
The controller used four DPDT relays, three timers, the guts from a USB keyboard, and a momentary type dry contact RF wireless remote control. The relays and timers are used to start, pause, and then reset the prop, as well as control sound effects and lights (Figure 13).
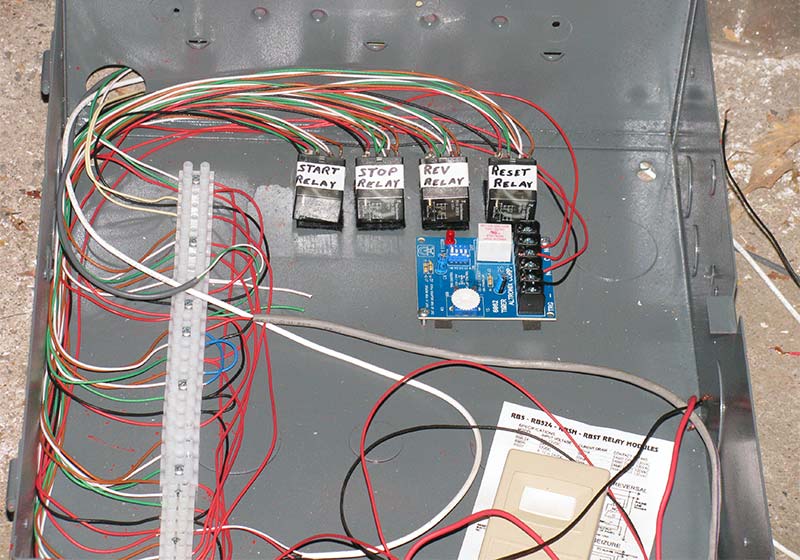
FIGURE 13. The wiring strip, relays, and timer circuit.
The start relay is wired in a self-latching configuration by having one set of contacts used to apply power to its own coil. The other contacts of the start relay apply power to the motor circuit and the crypt lighting, as well as triggering the one-shot 555 timer circuit that causes one close/open cycle of its output.
Once triggered by the wireless remote, this relay stays energized until power to it is interrupted. This keeps the torso moving forward until it is extended all the way and activates a position sensor that cuts power to the latching relay (thereby resetting it). This also triggers the “delay timer” to keep the creature visible for a few seconds.
At the end of the delay, the timer activates the “reversing relay” which starts the prop moving backwards. Once the prop is all the way back to the reset position, a second position sensor activates the “reset relay” that cuts power to the latching relay which shuts off the prop motor and the lights.
Sounds for the prop were created with a sound editor, and a sound effects file was saved to the laptop. To play the sound file, I used the built-in “media player” bundled with the OS. Each time the spacebar is pressed, the sound file plays one time and then stops. I used a 555 chip to create a one-shot timer (Figure 14) to short the terminals of the spacebar on the innards of the hacked USB keyboard (Figure 15).
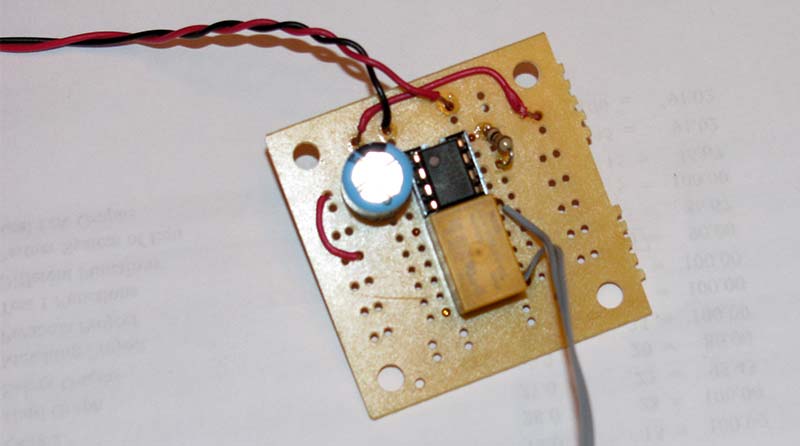
FIGURE 14. A simple one-shot 555 timer circuit.
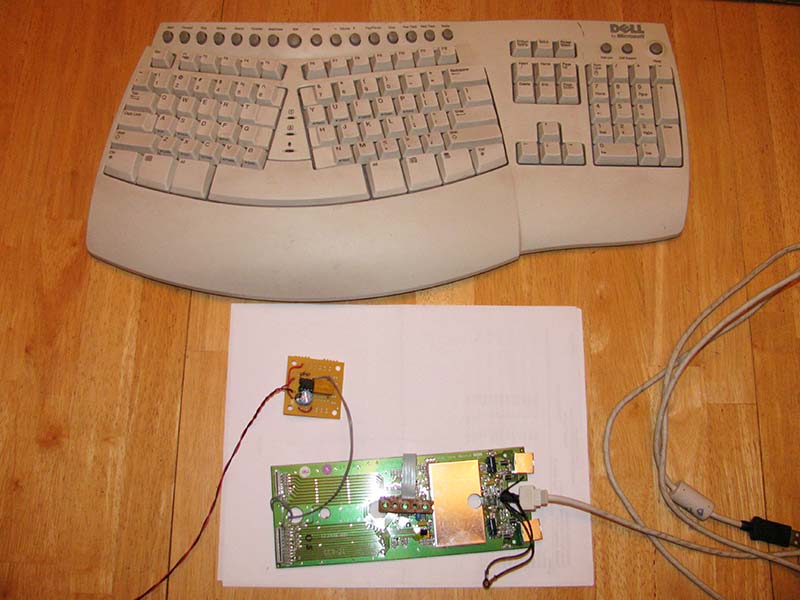
FIGURE 15. The 555 timer connected to the USB keyboard.
The one-shot timer is activated by the latching relay. This started the sound effects as soon as the prop started moving, which had the added benefit of covering the sound of the drill motor running.
Crafting a Crypt
The crypt itself was modeled after a local style I’d seen on my way to work. The structure is a wood frame (Figure 16) sheathed in 3/4 inch Styrofoam sheets with PVC bars instead of a door.
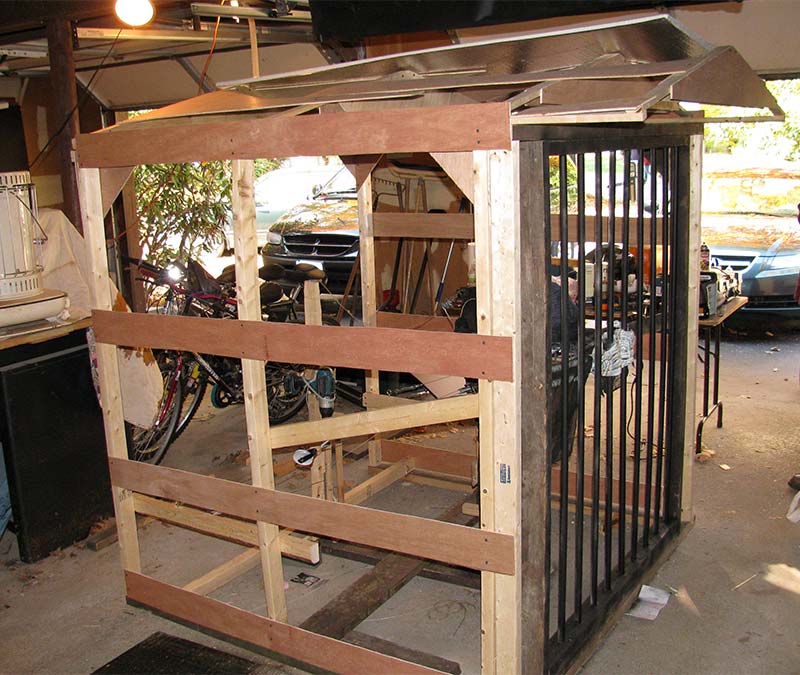
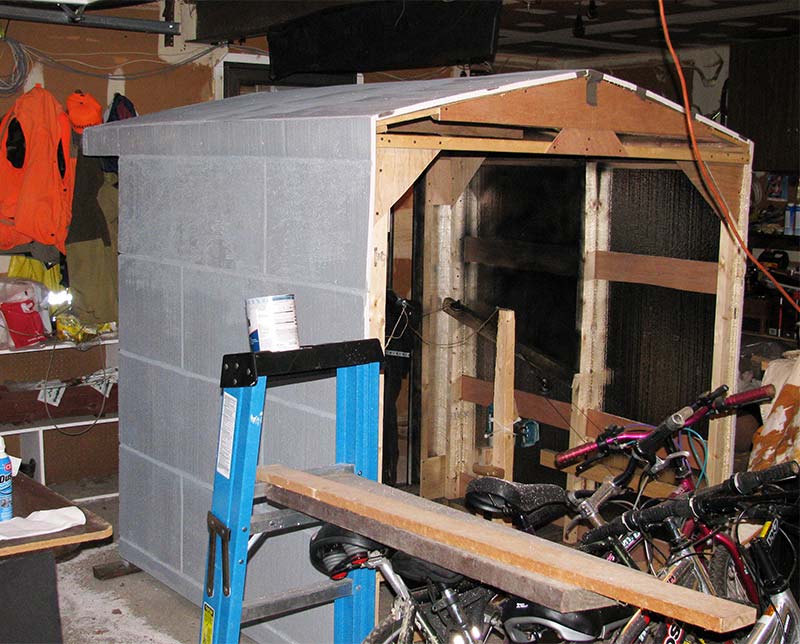
FIGURE 16. The wooden frame for the crypt taking shape.
I spent time carving the foam to make it appear as if it were made of stacked granite blocks. This obsession of mine also became my brothers, as we worked at a feverish pace to get the prop done for Halloween that year.
Late one night with just one day left before the big night, we were doing a bit of testing when disaster struck. We triggered the prop and it proceeded to lunge forward, but it didn’t stop! Imagine the horror on our faces as we watched the prop try to pull itself apart. We heard the sound of springs stretching and parts breaking as the side walls were being pulled together. I ran to the back of the crypt, frantically yanking the power to the controller. Shaking our heads, we looked at each other in disbelief.
Turns out the sensor that told the motor to stop had failed. The foam walls and PVC pipe frame were no match for the power of the drill.
We took the sides off the crypt and assessed the damage. Lucky for us, the flexible nature of our building materials saved the prop from serious issues. One cable had broken, there were a few cracks in the foam walls, and the frame had come a bit loose in places. Other than that, the prop was surprisingly intact.
We were able to patch the few cracks and reattach the cables, then double-check the sensors. In short order, we had the creature back in business! I have to hand it to my brother. If it wasn’t for all his donations to the project and staying up until the wee hours in the morning after this failure, the prop would never have been finished for Halloween.
The prop did debut the next day to scare quite a few people (Figure 17) ...
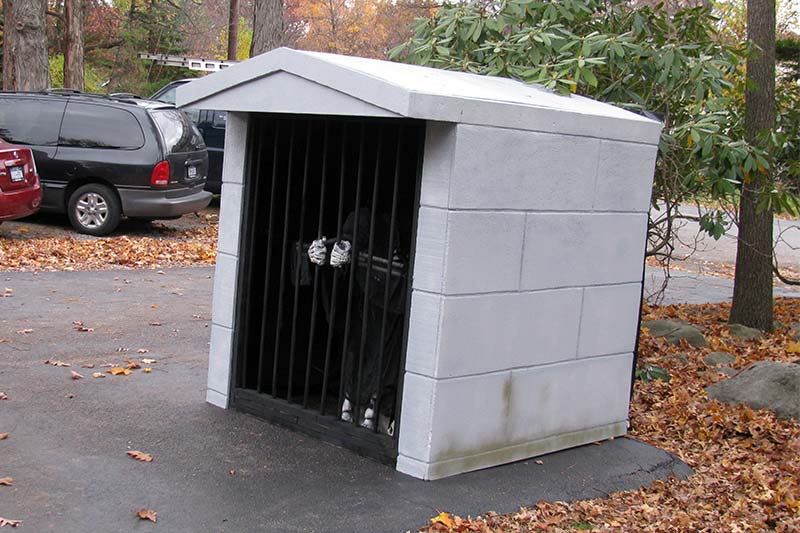
FIGURE 17. The crypt in place and ready to scare for the Halloween season!
... but with one little change: a kill switch in the front! NV