I grew up in south Texas just a few miles from the border with Mexico. The local culture was saturated with rich Spanish and "TexMex" traditions. It was quite common to have mariachis playing at wedding receptions, a Spanish polka band playing at high school graduations, or to spend an evening dancing at a neighbor's Quinceañera — a birthday celebration for 15 year old girls graduating into young womanhood. As such, it's probably no surprise that where I grew up, right after Halloween everyone would celebrate Dia de los Muertos or, the "Day of the Dead." Even though officially Dia de los Muertos was supposed to be a day for friends and family to remember those who had died, for most of us it was just an excuse to wear our Halloween costumes for one more day and to throw a big party!
Dia de los Muertos celebrations are traditionally held on November 1st and 2nd, and extend all over the state of Texas. Since I moved from south Texas to central Texas, I have personally been to quite a few of these amazingly fun events in and around Austin. In the last few years, a talented artist and good friend of mine by the name of Marvin Niebuhr has made it a habit to bring some of his amazing kinetic art creations to some of the local events.
He has created elaborate costumes and sets with many different displays that reflected the Dia de los Muertos feel. He also started organizing his own party and show with audience members participating in live music jam sessions as all of his kinetic art displays filled out the stage show I have been lucky enough to be both an invitee and participant.
One year, he asked for my help in creating a new art piece. He wanted to animate a set of three skeleton dancers to be featured at a Dia le los Muertos review at the Marcos Caliente Theater in Dripping Springs, TX.
He showed me some of his initial art pieces (Figure 1) and began to describe the motions he envisioned for the piece.
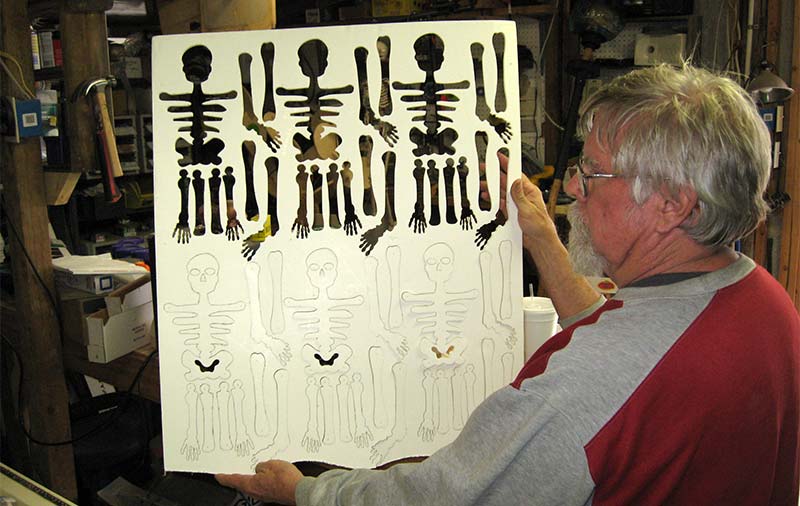
Figure 1. Laser cut foam core skeleton prototypes.
Essentially, he wanted the motions to randomly go in and out of synchronization with the background music. At first, I began to evaluate using a microcontroller to drive an arrangement of servo motors or to move the skeletons using a pseudo random algorithm. As part of the testing, we stumbled upon a way to create pseudo random motions with an extremely simple crank mechanism and using only a single motor per skeleton.
Apophe ... what?
The fascinating part about this is that — even though the dancers movements are essentially completely disconnected from any musical soundtrack — human observers tend to comment about how well the dancers seem to be moving in time with the music. They’ll usually ask how we managed to get them to synchronize so well. Seeing patterns in random motions — even when none are actually present — is a psychological phenomenon known as Apophenia:
Apophenia is the experience of seeing patterns or connections in random or meaningless data. The term is attributed to Klaus Conrad by Peter Brugger, who defined it as the “unmotivated seeing of connections” accompanied by a “specific experience of an abnormal meaningfulness,” but it has come to represent the human tendency to seek patterns in random information in general, such as with gambling and paranormal phenomena. (Definition courtesy of Wikipedia.)
Essentially, this means anyone can build animatronics, puppets, or marionettes that — to the observer — appear to have deliberate or pre-programmed motions when in reality the motions are nothing more than a simple motor and a crank!
Animation Motivation
In our trio, the guitar-playing skeleton is animated through the use of a Tamiya three-speed crank-axle gearbox purchased from Pololu (Figure 2).
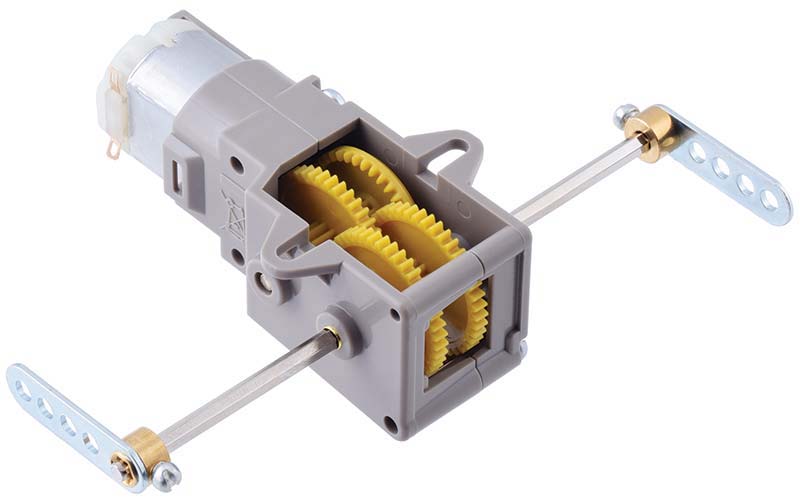
Figure 2. Tamiya electric motor gearbox kit.
It was powered by adapting an old Nokia 3.5V 500 mA cell phone charger and connecting it directly to the motor. The Tamiya kit includes a crank arm fitting (Figure 3) to which we fixed the two strings which led to the hand on the fret board and the hand that would appear to strum the guitar.
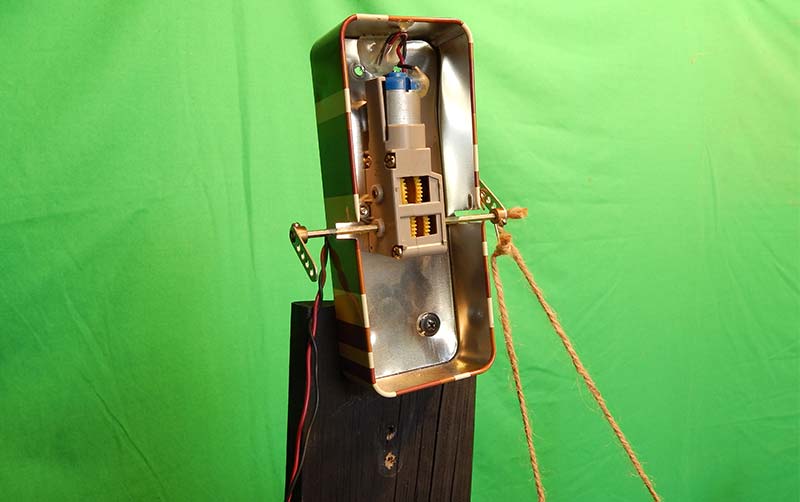
Figure 3. Assembled Tamiya gearbox mounted on the guitar player skeleton.
Even though the 3.5V cell phone charger provides just a little more voltage than what the motor is rated at, we didn’t have any trouble with heat or excessive wear in our limited use. However, if you plan to run this little motor system for an extended period of time, you might want to play it safe and stick to the recommended 3V specified by the manufacturer.
For the two dancing skeletons, we used a pair of 200 RPM 12V gearhead motors purchased a while ago from Parallax (Figure 4).
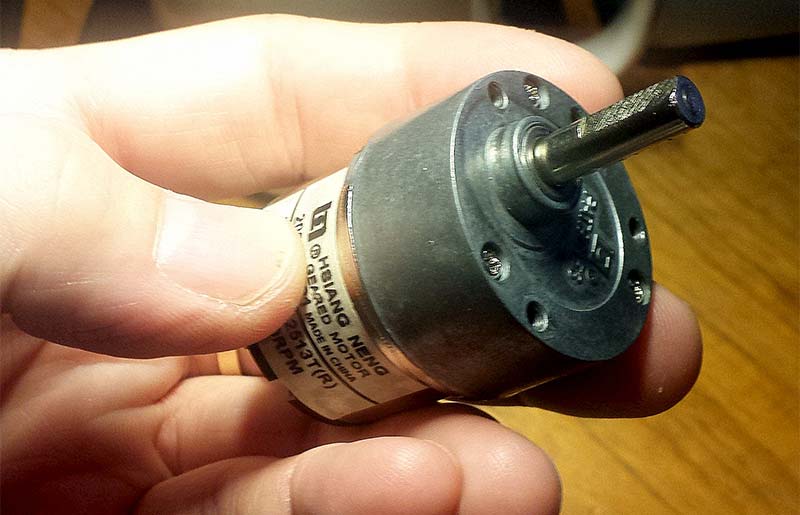
Figure 4. Parallax Stingray high torque/low speed gearhead wheel motor.
These motors were used to drive the wheels in the now retired Parallax Stingray robot. They are now obsolete themselves, so we've listed some options to buy now in the Resources. These high quality motors are actually a little high RPM for this application.
In order to slow them down a bit, we drove them with a pair of repurposed wall wart style 7.5V power supplies (see sidebar on power supplies). As these motors are discontinued now and they were a little fast for this application to begin with, I would suggest you look at some lower RPM motor offerings by some surplus electronics vendors (I’ve provided a listing of some suitable candidates in the Resources section).
Unlike the Tamiya gear motor kit which came with a pair of crank arms, the Parallax drive motors had a quarter inch flatted shaft and were simply used to directly drive the wheels of the Stingray robot. Subsequently, we had to fabricate our own crank arm and pulley assembly for these motors.
To do this, we purchased some angled aluminum, a cable clamp set (Figure 5), and patio door wheels (Figure 6) at a local home improvement store.
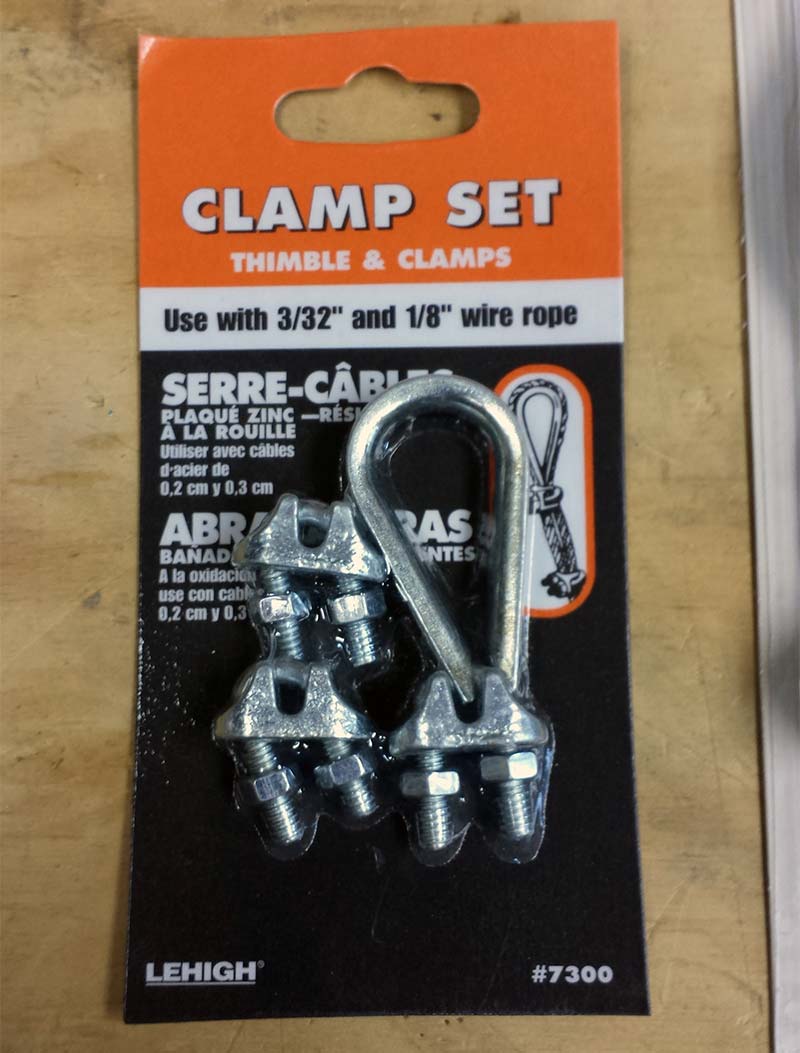
Figure 5. Cable clamp set yields three horseshoe shaped bolts and matching nuts.
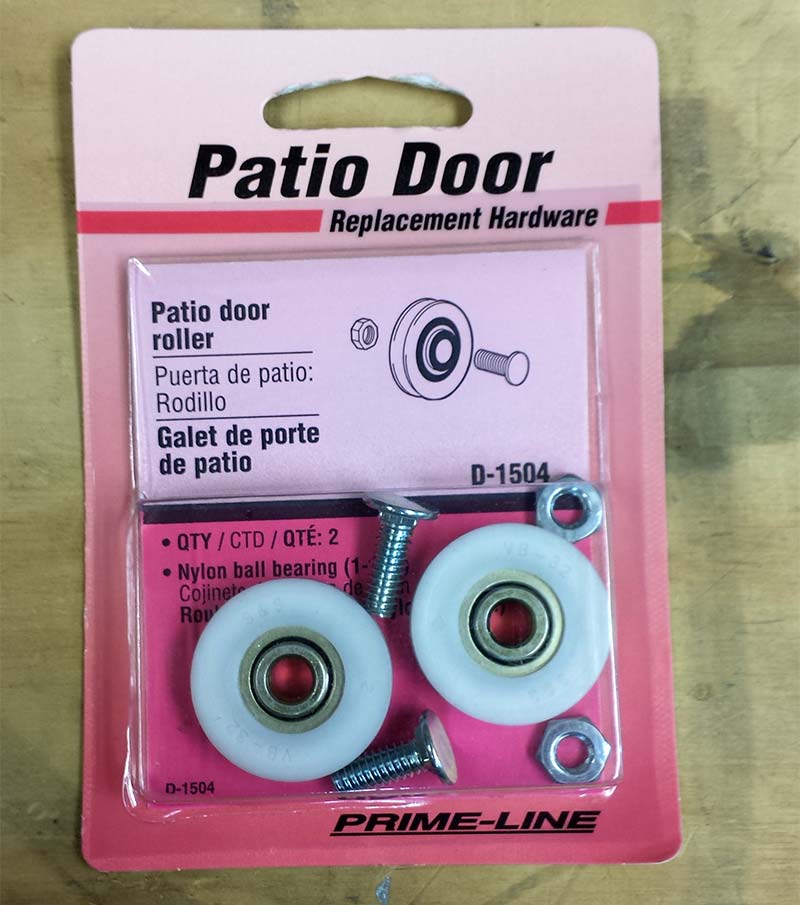
Figure 6. Patio door rollers with ball-bearings and nut/bolt set.
To create the crank arms, we started by cutting the angled aluminum to a usable size (roughly 12 inches). We then placed the horseshoe bolt from the clamp set onto the crank arm and marked where the two holes would go. We used a spring punch to create start points for the drill (Figure 7).
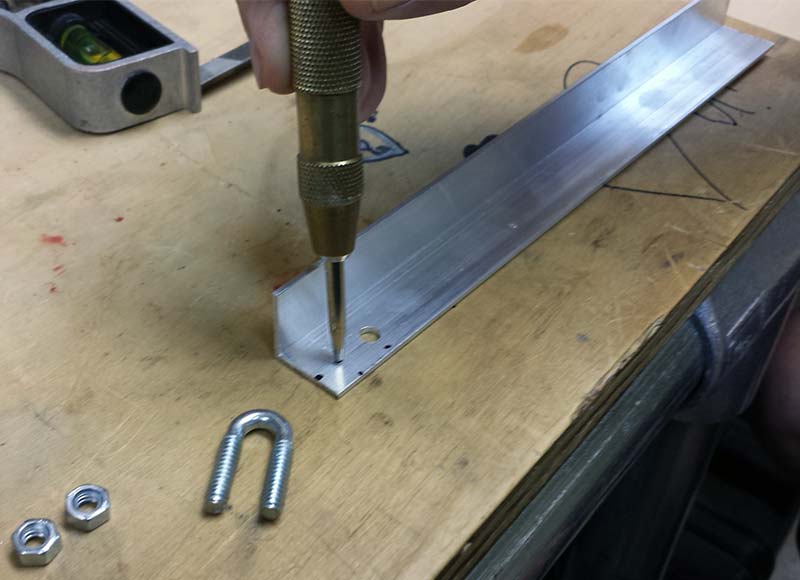
Figure 7. Use a spring punch to help keep the drill from wandering.
After drilling the two holes, the horseshoe bolt is placed around the motor shaft (Figure 8A), the bolts are affixed to the other side, and tightened down (Figure 8B).
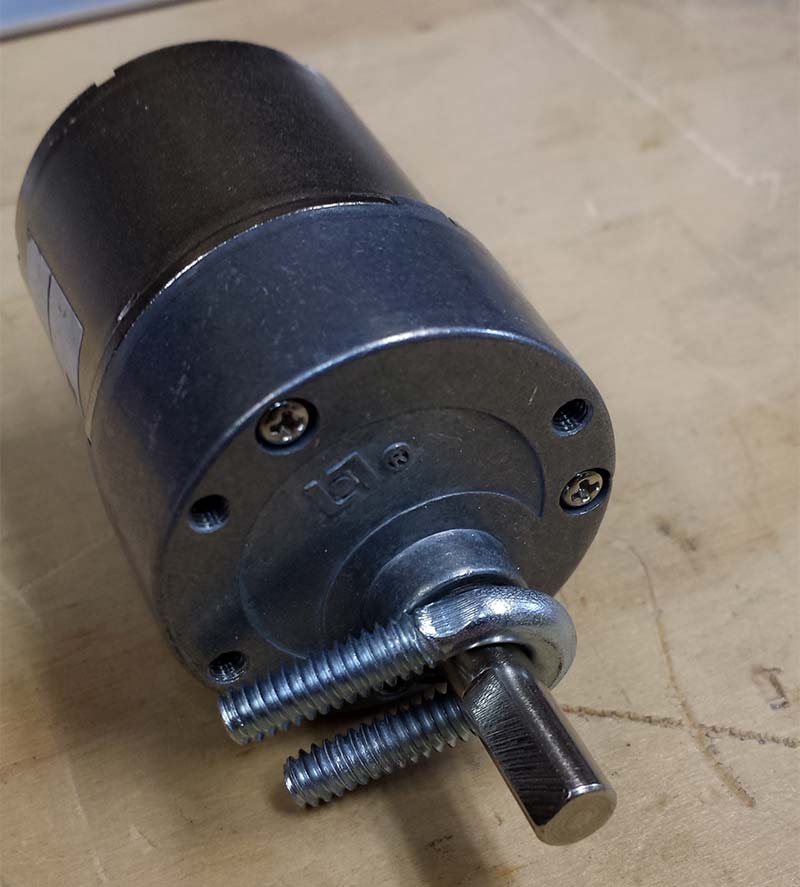
Figure 8A. Horseshoe bolt fits perfectly on the 1/4" shaft of the gearhead motor.

Figure 8B. Bolts tightened down.
Make sure the flatted part of the motor shaft lays flush against the aluminum bar to ensure the crank arm doesn’t slip (Figure 9).
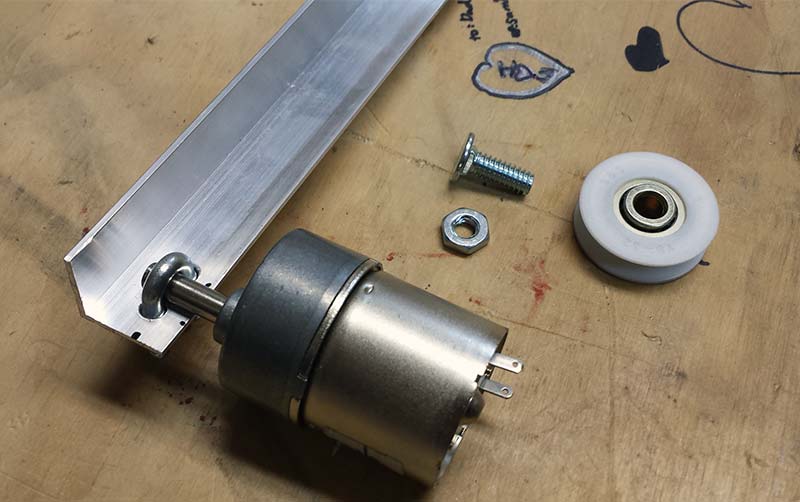
Figure 9. The flatted shaft flush against the aluminum crank arm.
Next, we drilled a series of holes in the angled aluminum crank arm so we could select different travel distances for the anchor point. We then attached one of the patio door wheels to the end of the aluminum crank arm (Figures 10A and 10B).
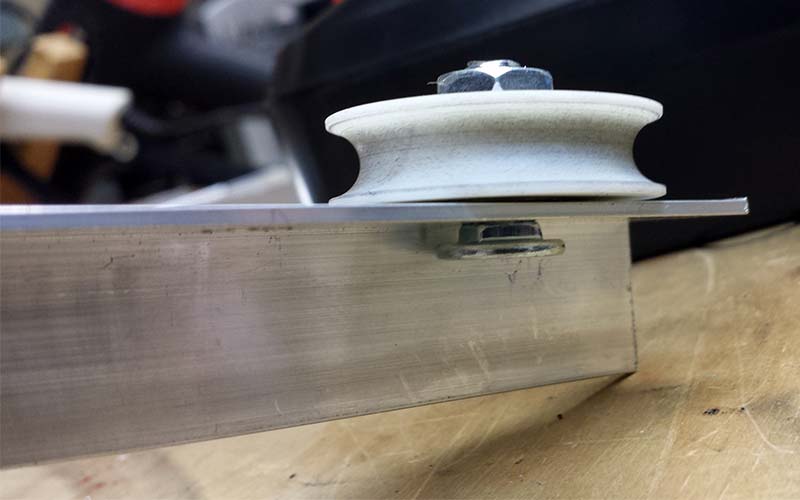
Figures 10A. Patio door wheel attached to the end of the crank shaft.
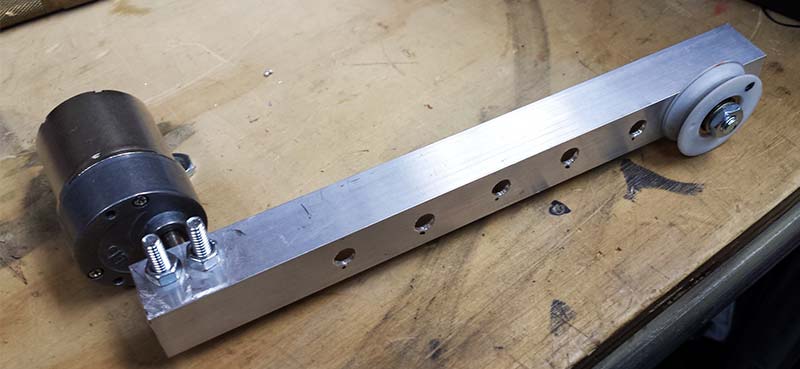
Figures 10B. Detail of the crank arm with mutiple holes to allow travel distance selection.
Holes were drilled in the edge of the wheel to create points to which we could affix the strings (Figure 11).
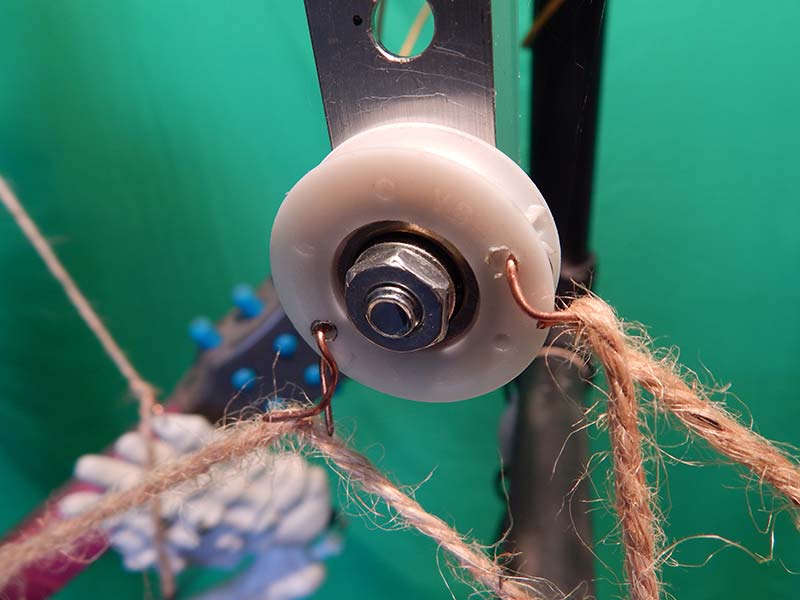
Figure 11. Patio door wheel with holes drilled for string anchoring.
Once we had both of the completed gearhead motor/crank shaft assemblies built, they were mounted with hose clamps to the tops of the stands holding the skeletons (Figures 12A and 12B).
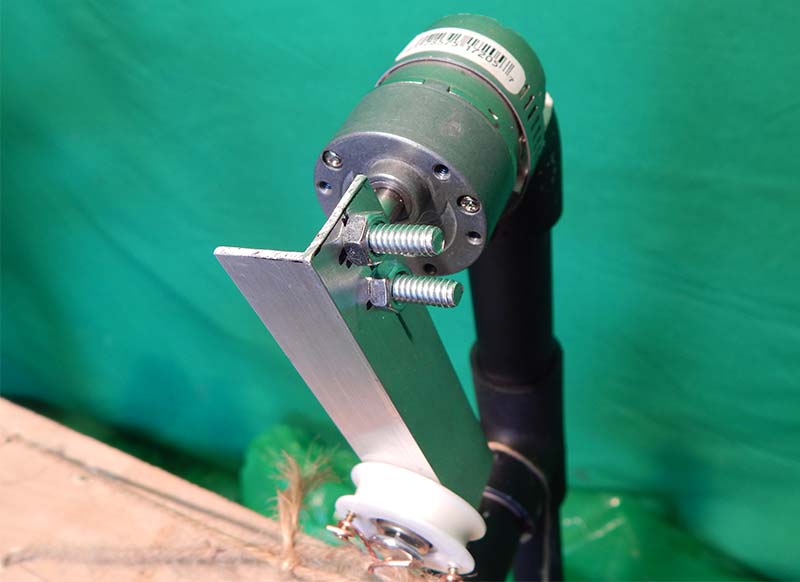
Figures 12A. Hose clamp around motor body and PVC pipe.
Figures 12B. The PVC pipe can also be used to route the wires to the motor.
You’ve Gotta Dance Like Nobody’s Watching!
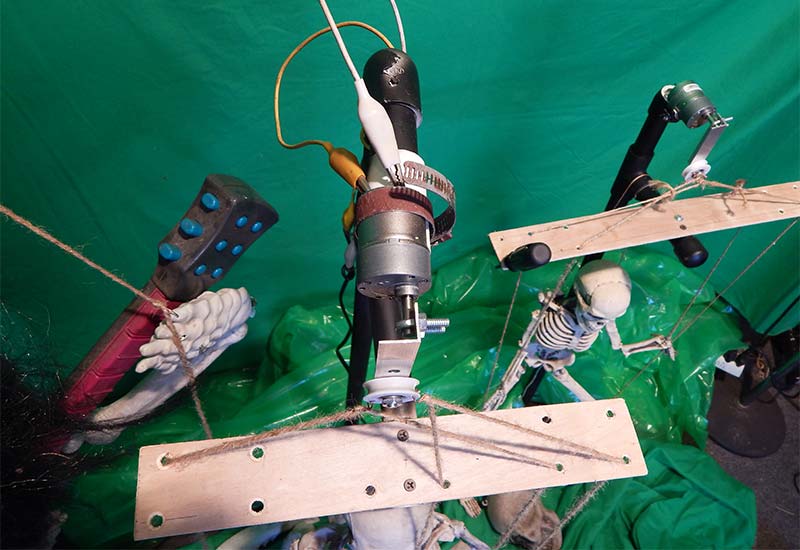
The completed Trio de los Muertos works better than we could have imagined (Figure 13).
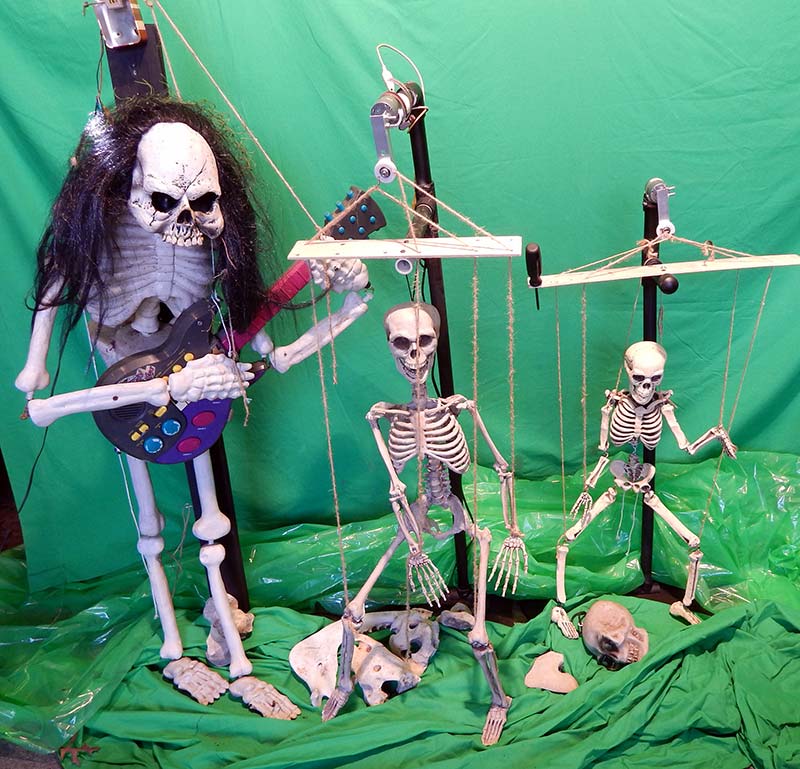
Figure 13. The completed Trio de los Muertos.
It is fascinating how — even though you are aware that each skeleton is operating in a non-programmed random fashion — it seems as if they move to and with a musical background. They even seem to synchronize with each other, having motions that are at first complimentary and then in counterpoint to each other. To get the full effect, I highly suggest having a look at the video (link in the Resources section) of the finished trio performing to an original sound track by Marvin himself. He’s not only an artist, he’s a musician too!
After you’ve built your own dancing skeletons or ghosts or spiders or whatever prop you’ve decided to animate, keep in mind the concept of Apophenia. This tendency of humans to find patterns in random motions could be very useful in other projects — artistic or not.
As examples, the random movements of a robot could be perceived as intentional, or random LED lighting patterns could be viewed as meaningful.
There are lots of ways you can use this knowledge to your advantage in all sorts of human interface designs. NV
Downloads
What’s In The Zip?
Videos