Smiley's Workshop — AVR C Programming Workshop Series - Part 9
 |
|
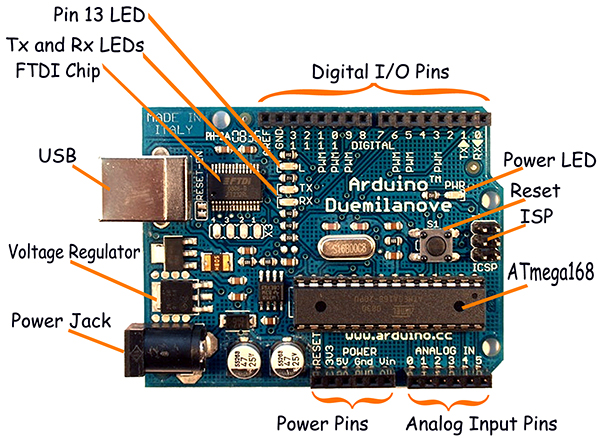
FIGURE 1: The Arduino Duemilanove
|
If you have been following this series, then prepare for a bit of Workshop whiplash. Up to this point, we have learned how to program the AVR Butterfly using the C programming language with the WinAVR GCC compiler toolset and AVRStudio. Now, just when you think we would start learning more about the underlying AVR and doing more hardware oriented projects (like I promised), we are going to go off the rails, throw the gears in reverse, and accelerate backwards to the beginning so that we can learn an entirely new system: the Arduino Duemilanove (Italian for 2009).
This wasn’t exactly according to plans, but as Robert Burns said: “The best laid schemes o’ Mice an’ Men, gang aft agley.” And — while I can only hope that “gang aft agley,” is what an 18th century Scotsman says when he means: ‘go often astray’ — just accept that I too am continuing to learn and occasionally plowing up a mouse in the process. One of the things that I learned in the midst of this Workshop series is that the Arduino is a darn good system for beginners and is even simpler than the Butterfly for the complete novice to use. I decided to insert a couple of Workshops to bring the reader up to speed with the Arduino and then get back on the rails and use both the Butterfly and the Arduino in subsequent workshops where we will — I promise (and this time I mean it) [really] — start learning more about the AVR hardware. And don’t worry about all those brain cells you’ve used up learning C, the Arduino uses C. It just does a real good job of hiding that fact from the casual user.
Restarting the Workshop
So, bear with me for this article since I am going to pretend that you, dear reader, wouldn’t know a microcontroller if one bit you on the butt — it is not that I want to talk down to you — it is because the ‘Arduino Way’ was developed for total absolute novices.
Massimo Banzi begins his book, Getting Started with Arduino, “A few years ago, I was given the very interesting challenge: teach designers the bare minimum in electronics so that they could build interactive prototypes of the objects they were designing.” He summarizes his philosophy of ‘learning by tinkering’ with a quote from www.exploratorium.edu/tinkering: “Tinkering is what happens when you try something you don’t quite know how to do, guided by whim, imagination, and curiosity. When you tinker, there are no instructions — but there are also no failures, no right or wrong ways of doing things. It’s about figuring out how things work and reworking them.” Arduino provides a great toolset for designers, tinkers, and even some of us surly old engineers who sometimes just want to play with an idea.
The genius of Arduino is that it provides just enough access to get specific tasks done without exposing the underlying complexities that can be truly daunting for folks new at this stuff.
A Few Definitions
- Sensor — A computer-controlled mechanism that measures or detects events in the real world such as motion, light, or voltage. For example, an IR optical sensor used to detect the motion of a computer mouse.
- Actuator — A computer controlled mechanism that causes a device to be turned on or off, adjusted, or moved. For example, the devices that spin a DVD, move the sensing head, and turn the read/write laser on/off.
- Micro (microcontroller) — A single integrated circuit that contains a computer, memory, and peripherals used with sensors and actuators to provide control of real-world events. For example, an AVR such as the ATmega168 can be used to sense button presses, motor rotation, and temperature, and use that input to control the voltage to the cavity magnetron (makes the microwaves) in a microwave oven.
- Real World — For our purposes, this is everything outside our micro and associated sensors and actuators, though to be completely honest, I gave up on trying to define ‘real world’ years ago.
- Physical Computing (embedded systems) — A combination of micro(s), sensor(s), and actuator(s) designed for some specific control function and ‘embedded’ into a specific device, usually requiring little human input. An example would be the air/fuel mixture control system in an automobile engine. This term is often used in contrast to a ‘general-purpose computer’ such as the PC or Mac, which can do a lot of different things and are designed for intense human interaction.
- Sketch (program) — A sequence of human readable text statements following the rules of a programming language that can be converted and uploaded to a micro providing instructions as to how it will make decisions about using its sensors and actuators.
- Verify (compile) — The process of converting a sketch to instructions suitable for the micro. The process provides feedback if the conversion cannot be completed due to errors.
While using Arduino is relatively simple, it is built on top of some things that can quickly become complex if you dig a little below the surface.
Hardware Resources (see Figure 1):
- 14 digital I/O pins, six of which can be configured as analog output (PWM) pins
- Six analog input pins
- Pins are on female sockets that are easy to wire to a breadboard
- USB serial port with +5V bus power through a PTC fuse.
- Serial transmission and reception LEDs.
- May be switched to regulated external power socket.
- ATmega168 with a pre-programmed bootloader.
- ISP (In-System Programming) header.
- Reset button.
Processing
You have probably seen some of the cool (or annoying, depending on your viewpoint) graphic Java applets that bless (or infest) Internet browsers. Things like those ‘too darn cute’ rotating bouncing cubes with different pictures or messages on each face did show that you could use Java to build some very interesting graphic things, and artists took notice. The only problem is that artists tend not to be programmers and vice versa. Casey Reas and Benjamin Fry while in the Aesthetics and Computation Group at the MIT Media Lab took note of the potential for Java to be used by artists to do artsy stuff and decided to create a simpler interface that would be more artist-friendly. They developed Processing: a programming language, development environment, and online community [www.processing.org]. The syntax looks a lot like C (but then so does Java if you squint). The Arduino Integrated Development Environment (IDE) is derived from the Processing IDE.
Remember that Processing was designed for artists. It substitutes ‘sketch’ for ‘program’ and ‘verify’ for ‘compile.’ If you are at all interested in art, be sure and go to their website and click on the exhibition tab.
Wiring
Wiring was started by Hernando Barragán at the Interaction Design Institute Ivrea in Italy and builds on Processing to provide an ‘electronics prototyping input/output board for exploring arts and tangible media.’ The Arduino folks smash this mouthful into ‘physical computing’ and I’m temped to redub it ‘playing with electrons’ because it makes things so much easier than many earlier systems that the concept of ‘play’ is not out of the question. The Wiring board is based on the ATmega128 and the language has libraries built around that device’s resources and tasks you might like to do with them (like blinking LEDs or monitoring a microphone). The good news is that this is a feature rich platform and the bad news is that all those riches cost money. So, enter the Arduino.
Arduino
Arduino is built directly out of Wiring except that it uses a more affordable board, and has its own online community. Massimo Banzi (www.tinker.it) thought up the name Arduino and — if the story is true — it was christened five minutes before the first board was to go into production. Massimo was on the phone with the PCB fabricator who wanted a name for the board and Massimo suggested the name of a bar that some of the developers once frequented. And while the name may be somewhat accidental, it is a masterstroke of Googleability, especially compared to the names Processing or Wiring (try Googleing the three and see what I mean).
Since this is all open-source, it didn’t take long for lots of folks to make their own versions of the board and use the –‘duino’ in the name as if it was a valid suffix. This apparently irritates some Italians who note, for instance, that the board name Sanguino would be what an Italian would shout if he was bleeding. There was a bit of debate on the Arduino forum about PCB designs perhaps straying too far from the original concept and making it difficult to provide support so several of the originators copyrighted the name and allow its use for boards that pass muster. Naturally, a conspiracy theory rebellion occurred and some folks mounted their high horses and came up with the name Freeduino as a ‘free’ alternative (www.freeduino.org).
Arduino Quick Start Guide: The Arduino Integrated Developers Environment
 |
|
FIGURE 2: Bogus Security Warning
|
You can download the Arduino software from www.arduino.cc. This article is based on release 0012 working on a Windows XP PC.
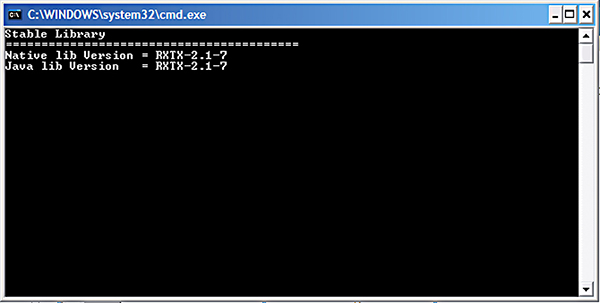
You can go ahead and click on ..\arduino-0012\Arduino.exe and see what happens; it might run on your system. In order to run the Processing IDE on my Windows XP machine, I have to click on the ..\arduino-0012\run.bat file. Windows doesn’t like that, so it displays a security warning (Figure 2). To heck with Windows and its so-called security (like they would know security), just click ‘Run.’ This will open a ‘cmd’ window (Figure 3) and in a little while, Windows will run Java for you and display the Processing IDE (Figure 4).
 |
|
FIGURE 3: cmd.exe window
|
 |
|
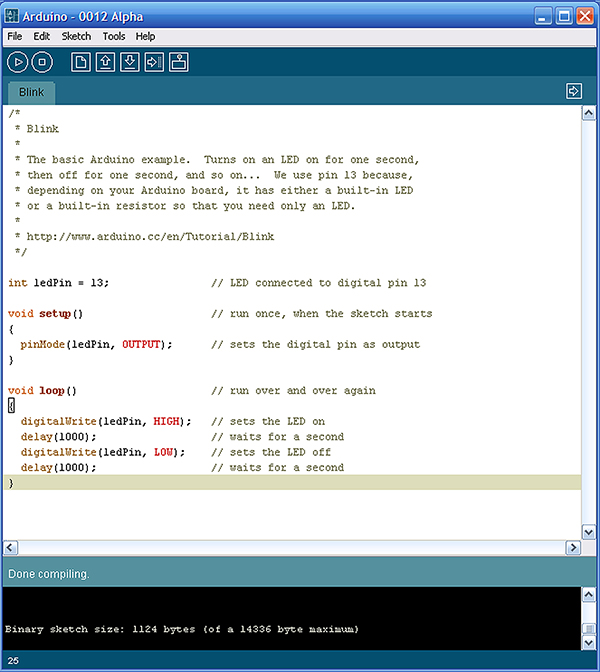
FIGURE 4: The Arduino Integrated Developers Environment
|
The Blinky Program, urr ... Sketch
The Arduino Duemilanove has a built-in LED with a resistor attached to I/O pin 13 (see Figure 1), so we will start with a program (okay, sketch!) to blink that LED.
The following sketch was copied from the Arduino-0012 menu:
File/Sketchbook/Examples/Digital/Blink and modified to better fit in the magazine.
/*<br />
 * Blink<br />
 *<br />
 * The basic Arduino example.<br />
 * Turns on an LED on for one second,<br />
 * then off for one second, and so on...<br />
 * We use pin 13 because, depending on your<br />
 * Arduino board, it has either a built-in<br />
 * LED or a built-in resistor so that you<br />
 * need only an LED.<br />
 *<br />
 * [url=http://www.arduino.cc/en/Tutorial/Blink]http://www.arduino.cc/en/Tutorial/Blink[/url]<br />
 */<br />
// LED connected to digital pin 13<br />
int ledPin = 13;
// run once, when the sketch starts<br />
void setup()<br />
{<br />
  // sets the digital pin as output<br />
  pinMode(ledPin, OUTPUT);<br />
}
// run over and over again<br />
void loop()<br />
{<br />
  // sets the LED on<br />
  digitalWrite(ledPin, HIGH);<br />
  delay(1000); // waits for a second
  // sets the LED off<br />
  digitalWrite(ledPin, LOW);<br />
  delay(1000); // waits for a second<br />
}
We will discuss this later, but let’s first run it and blink that LED.
Verify the Sketch (Compile the Program)
 |
|
FIGURE 5: Verify the sketch.
|
 |
|
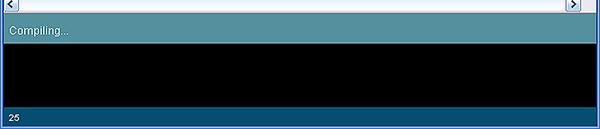
FIGURE 6: Compile
|
 |
|
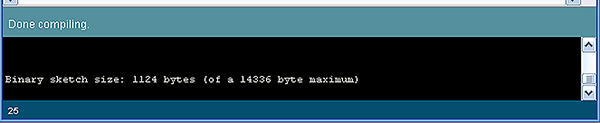
FIGURE 7: Done compiling
|
The Arduino folks also decided to call compile ‘verify.’ Instead of ‘compiling the program’ we are verifying the sketch’ [artists … go figure]. When you click on the button shown in Figure 5, the IDE uses the WinAVR toolset for the GCC C compiler, and if everything goes okay — meaning it compiles without error — you don’t have to know what WinAVR is, how it works, or even that it is there. We’ll look at the situation involving errors later.
After you click verify, you will notice some activity at the bottom of the Processing window. Figure 6 shows the bottom block of the IDE you will see ‘compiling’ and then the results of the compilation as shown in Figure 7.
Please don’t ask me why they call it verify at the top of the IDE, but compile at the bottom. Hopefully, you got the message: “Binary sketch size: 1,124 bytes (of a 14,336 byte maximum” meaning everything is copasetic. [If you wonder why there are only a maximum of 14,336 bytes available when the ATmega168 has 16,384 bytes of memory, it is because 2,048 bytes are used for the bootloader.]
Uploading the Sketch to the Arduino Board
 |
|
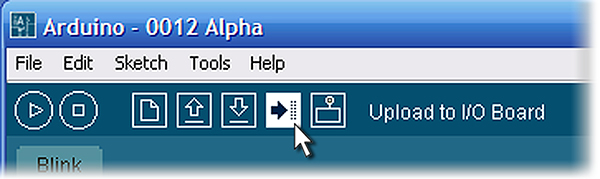
FIGURE 8: Upload to the I/O board
|
Next, we will ‘Upload to the I/O board’ as shown in Figure 8, meaning we will secretly use AVRDude to send the hex code using the USB serial port to the bootloader on the ATmega168 that will write it to memory. Though AVRDude is kept hidden, if you are curious, check out http://savannah.nongnu.org/projects/avrdude/.
Be sure and look at the TxD and RxD LEDs on the board right after you click the button so you can see them blinking rapidly in time to the flow of data between the Arduino board and the Arduino IDE. Sometimes it just helps to make things visible. The pin 13 LED should be blinking on and off now, once per second.
Well, that WAS easy, wasn’t it? The Arduino Way is great for the intended audience: designers who want to know the bare minimum. But wait… we are readers of Nuts & Volts, and we want to know what is going on under the hood! So, next month we will learn how to use this neat Arduino board with the IMHO ‘real’ C programming language and the official Atmel software AVRStudio, and the semi-official WinAVR and AVRDude packages. NV
 And Now a Word from our Sponsors ...
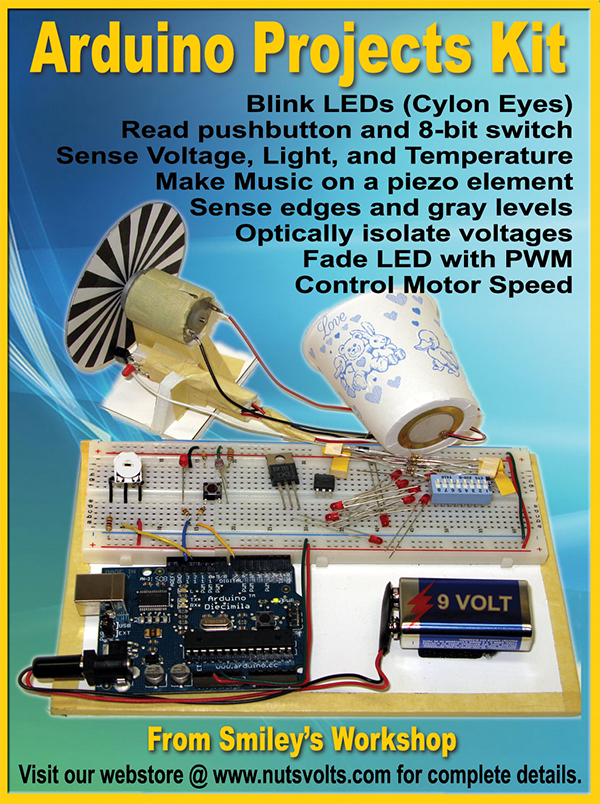
Smiley Micros and Nuts & Volts are selling a special kit — the Arduino Projects Kit — 2009, — which has a bunch of neat stuff that will help you train your Arduino to sit up, roll over, and chase bad guys. Sort of, anyway ... it actually has parts to help you learn how to use a microcontroller to: blink LEDs, read switches, talk to a PC, measure light, temperature, and voltage, AND other neat things [see the links at the end of the article].
BTW, the USB serial port on the Arduino uses the FTDI FT232R chip which was discussed in detail in the article “The Serial Port is Dead, Long Live the Serial Port’ by yours truly in the June 2008 issue of Nuts & Volts. And, if you come to really like that chip you might want to get the book Virtual Serial Programming Cookbook (also by yours truly) and associated project kits from either Nuts & Volts or Smiley Micros. Also, check out the Design Cycle in the April 2009 issue as it discusses the FTDI FT232R further.
Look for information on the Arduino Projects Kit on the Nuts & Volts (www.nutsvolts.com) website.