Save Time and Money Making CNC Halloween Decorations
By Len Shelton, Melissa Shelton
 |
|
Create complex 3D contoured parts by combining fast and simple 2.5D pocketing and profiling operations with manual finishing techniques. |
Getting Started
As with any project, you have to do your research. I needed to answer questions like: What do tombstones look like? How are they shaped? What do they say on them? How are people using them in their Halloween displays? Most importantly: How do I make them on a CNC router? So, I got a lot of great design ideas examining epitaphs and tombstones using Google image search. Unfortunately, most of the models I found required 3D contouring. With that type of work, I would first need to spend the time creating a 3D model and even more hours carving it out.
There are three primary phases to a CNC project:
1) Design: The drawing or CAD model.
2) Tooling: Creating the tool paths with CAM software.
3) Machining: Running the tool paths on the machine.
I am admittedly an impatient man. With time being a finite resource we can never get back, isn’t everyone looking for a faster way? So, let me show you how you can use CNC routers to shortcut the 3D contouring process. First and foremost, you want to create your basic shapes and features using 2.5D operations. This is by far the biggest time saver. I’m talking about pocketing, profiling, and drilling mainly flat features on flat parts. You then follow it up with a bit of hand sculpting. This marriage between CNC and hand work produces impressive results for this type of project, while shaving valuable time from the process.
 |
|
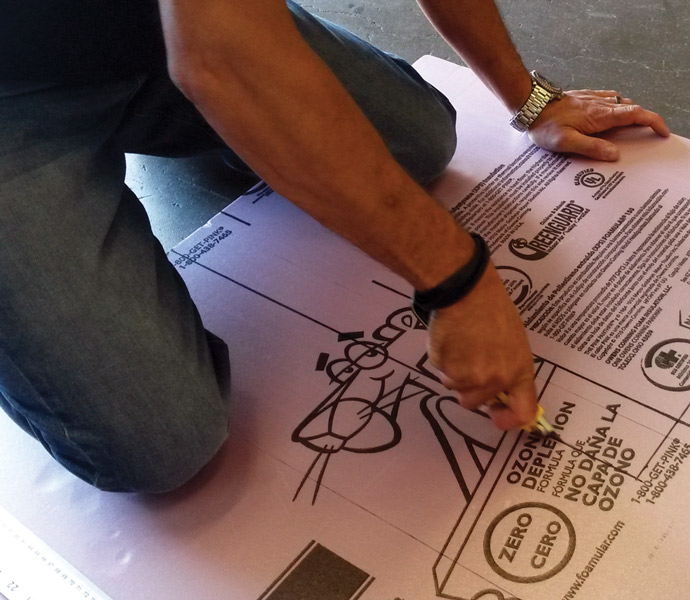
Figure 1. Cutting 2" foam stock |
To start, I needed an inexpensive material that I could get from my local home improvement store that was easy to work with. The obvious choice was 2” thick foam insulation which I purchased in a 4 x 8 foot sheet for about $28. It’s thick enough to allow for a lot of depth and contrast in my design, which really pops when hit by a spot light on my lawn display. I happened to pick up a panel of pink Owens Corning — the one with the Pink Panther mascot (Figure 1). Other brands in other colors should work equally well.
I Think I CAM, I Think I CAM ...
My favorite piece of CAM software is Vectric’s VCarve Pro. This is by far the easiest-to-use CAM software on the planet. I also like how their software shows you a 3D preview of what the finished part will look like (Figure 2). I mention the CAM software first because the feature I like best is the built-in drawing tools, as opposed to other applications that require third-party drawing tools. This allows you to blend the first and second phases with a single piece of software.
 |
|
Figure 2. 3D view of the tombstoned esign in VCarve Pro. |
Given that, we will skip the first phase and blend it in to the second phase when we get to that point.
This article is not intended to be a step-by-step tutorial, so I will not go into the details of how to use VCarve Pro. There are plenty of excellent tutorials and sample projects on their website if you need help using any of their software. You can download the design files for this project at the article link or at www.probotix.com/downloads to help get you started or if you want to simply recreate my design.
The first step in the CAM software is to define your stock (length, width, and height) and also where you want the origin (the zero location) to be. You can choose the back right corner at the bottom of the stock, top dead center, front left corner, or the top of the stock — it’s wherever you need it to be. It can depend on a lot of things, but typically people use the front left corner at the top of the stock.
The next step is to import your drawing from another drawing program. In this case, you can take advantage of Vcarve’s built-in drawing tools to create your shapes. I design machines and electronics for a living, so mechanical design comes naturally to me. However, I really struggle with organic design. So, whenever I come across a project like this, I rely on a variety of resources to help me.
Design, Fonts, and Clipart
There are plenty of sources of clipart available online, but many of them are click farms in disguise, so beware. I really like the CD-ROM/DVD clipart collections that include categorized catalogs (long live print!). Most of these designs require a lot of cleanup before they can be machined. They were not designed for CNC and will often have both disconnected and hidden vectors that have to be reworked first. Boolean drawing tools are your friend here.
Another great source of simple shapes are themed dingbat fonts. They require very little work to make them machinable. The horned head in my design was one of the “letters” in such a font. Speaking of fonts, there are tons of free font websites out there where you can find a multitude of themed type styles for your designs.
Once you are satisfied with your design, you will assign tool paths to the various shapes in it. Vcarve has a variety of tool path operations, but for this project we are only using the pocketing and profiling operations. With any of the tool path operations, you will be assigning the tool geometry, starting depth, depth of cut, step-over, feed rate, plunge rate, direction of cut, and so on. Because I was working with foam, I was able to take some overly aggressive cuts.
The order of operations is important when laying out your tool paths. For instance, you may need to cut your shallower pockets first when you have overlapping or embedded pockets. If the stock is being held from the outer edges, the last operation should be to do your final outside profile pass. I didn’t have an end mill long enough to make it through the whole slab of 2” foam, so on my outside profile, I cut it through as far as I could, then hand cut the rest of the way through with a knife.
Now that you have your tool paths, you export them as g-code through the appropriate post-processor, and then carry that g-code over to the CNC machine on a USB thumb drive and load it into the control software. Our machines at Probotix run the open source software LinuxCNC.
Mount Up
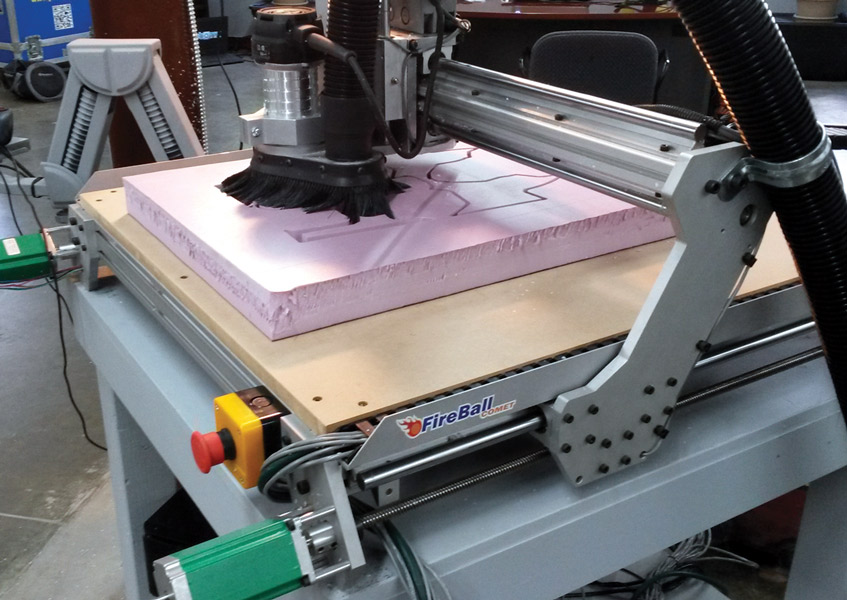
I was cutting this particular part on the Probotix FireBall Comet™ CNC router that has a 25” x 25” work envelope (Figure 3). My foam slab was 18” x 24”, so I had to be careful that I mounted it to the table inside of the travel envelope of the machine. Double-sided 3M tape that has the green argyle backing is what I like to use for mounting stock to my table. Use a generous amount so the stock doesn’t come loose in the middle of the job.
 |
 |
|
Figure 3. Probotix Fireball Comet CNC Router. |
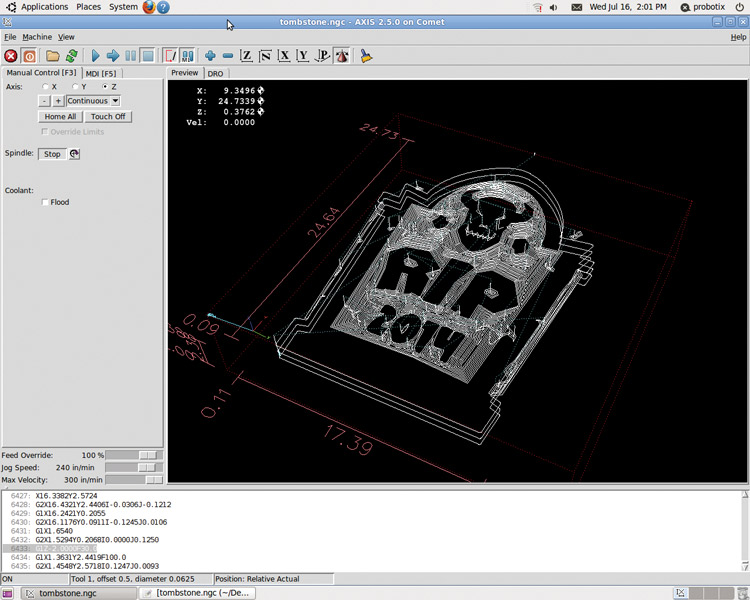
Figure 4. Screenshot of LinuxCNC showing tool paths. |
Once the stock is mounted, install the tool into the spindle and then jog the tool over to the corner that you chose for the origin in the CAM software. Then, you will “touch off” each axis. What you are doing is telling the control software that you are now sitting at the starting point of each axis, or X0 Y0 Z0.
Give yourself a sanity check and look at the 3D toolpath on the display. You want to make sure that the tool path appears where you think it should within the work envelope bounding box on the screen (Figure 4). Then, hit the start button, sit back, and watch (Figure 5).
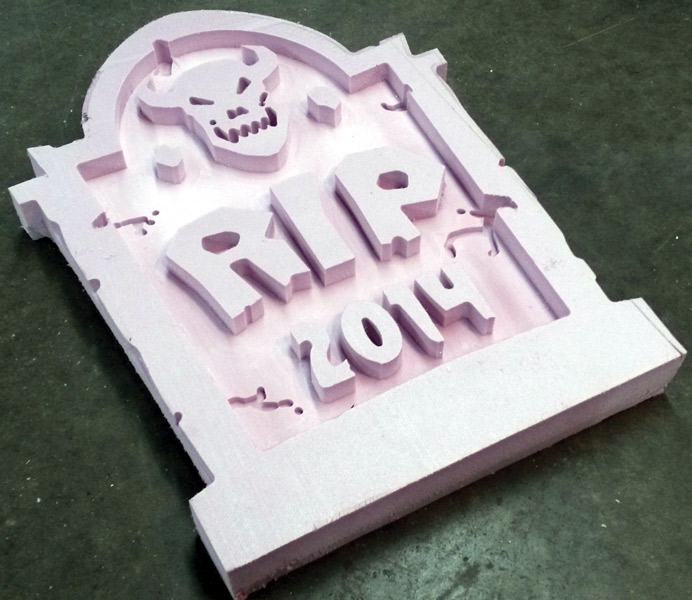
About 30 minutes later, you will have the basic tombstone carved out. So, pry it off the table and remove the double-sided tape. Figure 6 shows what it looked like after I cut off the outside scrap. Pretty cool already, but not very scary looking ... yet.
 |
 |
|
Figure 5. Fireball Comet in action - cutting the tombstone design. |
Figure 6. Tombstone after maching, but before handwork and paint. |
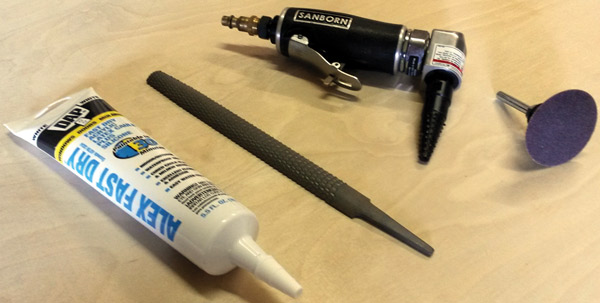
The next step is to hand contour the piece to rough it up so it looks aged and weathered. There are many tools and methods you could use here, and you could spend a lot of time adding detail. Remember how impatient I am, though? I grabbed a die grinder with a rasp bit and a sanding wheel. I also used a hand rasp, and then smoothed out certain parts of the tombstone with some DAP fast drying latex caulk (Figure 7). Watch out for that die grinder — you can remove too much material in a hurry if you are not careful.
 |
|
Figure 7. Die grinder, hand file, sand disc, and caulk. |
Finishing Touches
So far, so good, but have you ever seen a pink tombstone? Me neither. So, let’s change its color!
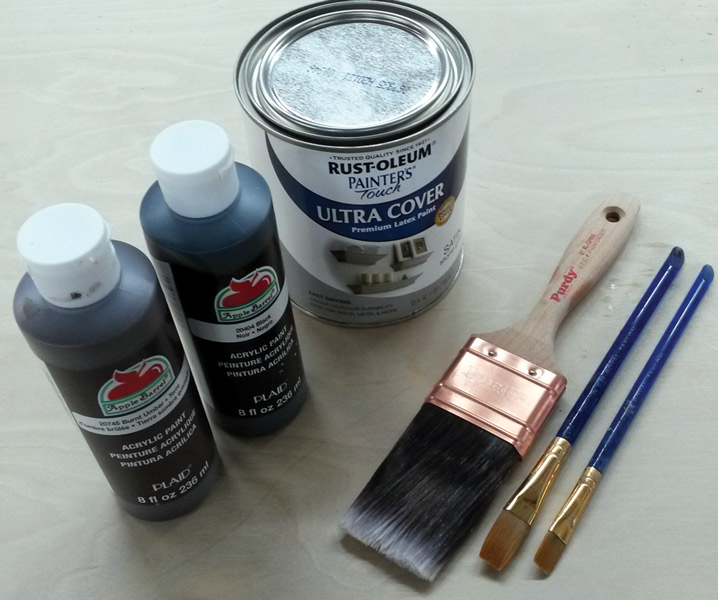
I love modern spray paint technology. There are many fast-drying exotic finishes available — your options are limitless. You can get a fantastic finish with little time and effort. A fleck stone spray paint finish was very tempting here, but since most spray paints will dissolve foam, I decided to use latex. I chose a satin gray as my base coat, and then used gray, black, and burnt umber mixes to weather and shade the tombstone (Figure 8).
 |
|
Figure 8. Painting supplies and brushes. |
Save Time, Save Money
You can spend a little time or a lot of time here. These tombstones are typically viewed under low light conditions, so I was looking mostly for contrast and depth, and that didn’t require a lot of time. Here is a breakdown of the time invested in this project:
-
Research: 3 hours
-
Design time: 1 hour
-
CNC routing: 30 minutes
-
Hand contouring: 10 minutes
-
Painting: 30 minutes
So, my total time was 5:10.
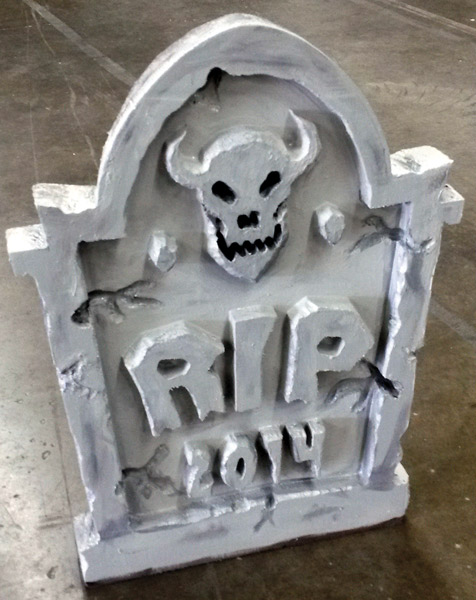
Compare that to the 10-20 hours that could easily be spent on a full CNC 3D contouring to accomplish the same thing (Figure 9)!
 |
|
Figure 9. Finished tombstone decoration. |
Ta-Da!
All-in-all, I was pretty satisfied with the results from such a small investment in time. If I were going to do this again, I would have spent more time and creativity on the tombstone verbiage.
Do a Google search for “funny epitaphs” to get some inspiration. Maybe include names of family members or friends. Add an Arduino and LED lights. Then, make a whole graveyard full of them if you want!
Most importantly, make sure to work safe and have fun! NV
Resources
Probotix Comet CNC Router
www.probotix.com
Royalty Free and Public Domain bitmap and vector clipart libraries
www.openclipart.org
www.pdclipart.org
www.clker.com
Files for this project
www.probotix.com/downloads
LinuxCNC
www.linuxcnc.org
Vectric Vcarve Pro
www.vectric.com
Free Fonts
www.dafont.com
Halloween Fonts
www.dafont.com/theme.php?cat=803
How to draw a creepy tombstone
www.fuelyourillustration.com/draw-acreepy-tombstone-using-adobe-illustrator/
Some definitions sourced from WikiPedia and other online resources
Comments