 |
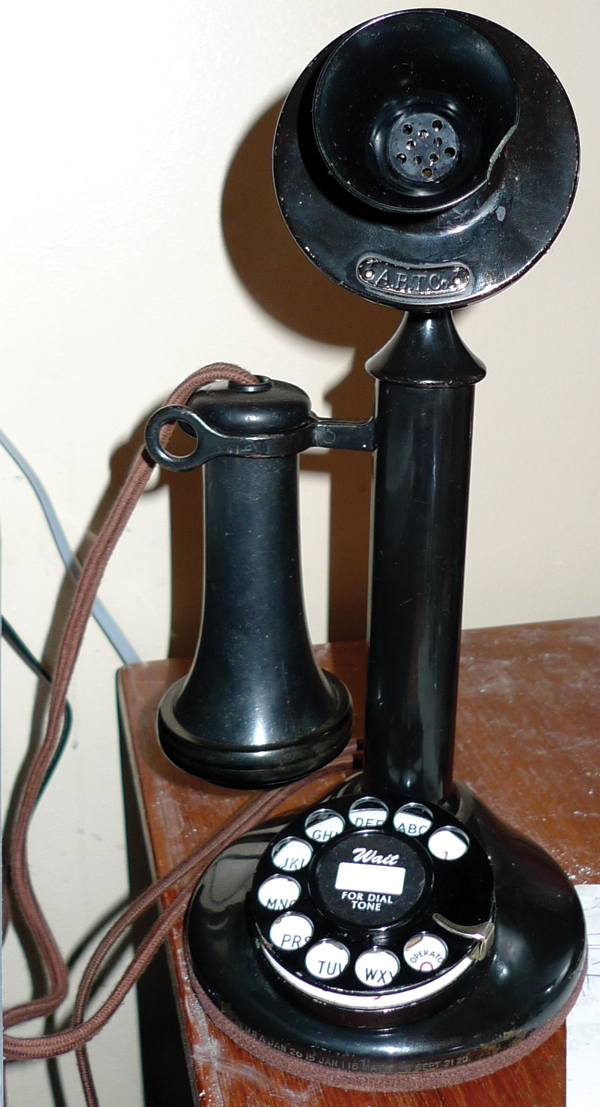
| Figure 1A: Candlestick Style Phone |
Since the days of old, many people believed the veil between the land of the living and the domain of the dead is at its thinnest on Samhain, All Hallows Eve, or — as we know it today — Halloween! Soothsayers, shaman, psychics, and mediums would all claim to provide patrons the privilege of speaking to their long-lost loved ones or would offer to carry back messages from the other realm — for a nominal fee, of course. So, how about we just skip the middleman and create a direct line to the afterlife? If this sounds like fun to you, then this fairly simple Halloween prop is just the ticket!
Propping It Up
I set out to create the Ghost Phone as a fun and interactive prop that anyone could make, using found objects and/or parts bought from local stores. Once the basic parts are gathered, it is unlikely that you'll spend more than a couple hours getting it all up and running since there's just a little wire splicing required. No tricky programming or custom-crafted printed circuit boards (PCBs) will be needed here. The premise is simple enough: When people get near the phone, it rings suddenly! Those brave enough to answer will be greeted with ghostly voices from the beyond.
There are three main components to this project; first of which is the phone itself. A suitable candidate can typically be found in a dusty corner of a thrift shop, in a box of junk at a garage sale, or maybe hidden in your very own attic. Second is the audio system which consists of a snap-action microswitch and a small MP3 player with a cheap set of headphones or earbuds. The third and final part is the ringer system. Though it may be possible to use the existing bells in the phone, I found it simpler to purchase an inexpensive low voltage electric bell and a "doorbell" style transformer to drive it. To control the ringer, I went to my local hardware store and purchased an off-the-shelf wireless light switching system that came with a handheld remote.
Though you can use pretty much any old corded phone for this project, I suggest you go for a style that fits the era of the haunted room in which you intend to use it. Victorian, Candlestick, WWII Army surplus, or even ‘50s era big black Bakelite style phones are all good candidates. Keep in mind that the modifications will likely render the phone unusable for "normal" phone service, so make sure you're not inadvertently destroying an expensive antique or family heirloom! For my haunt environment (classic Victorian haunt atmosphere), l found and purchased a replica Victorian-style phone.
 |
 |
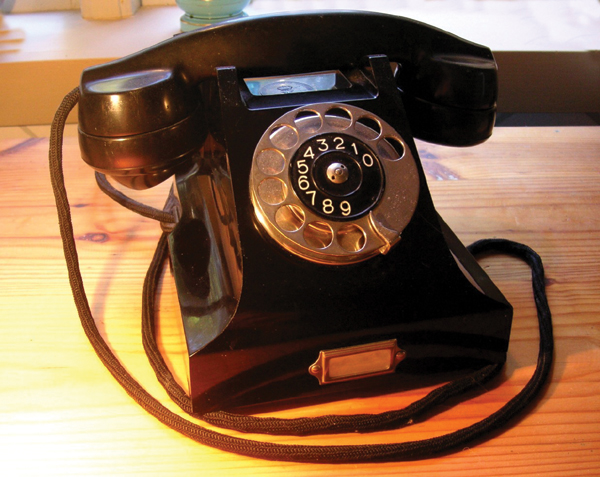
| Figure_1B: 50's Era Big Black Bakelite Style Phone |
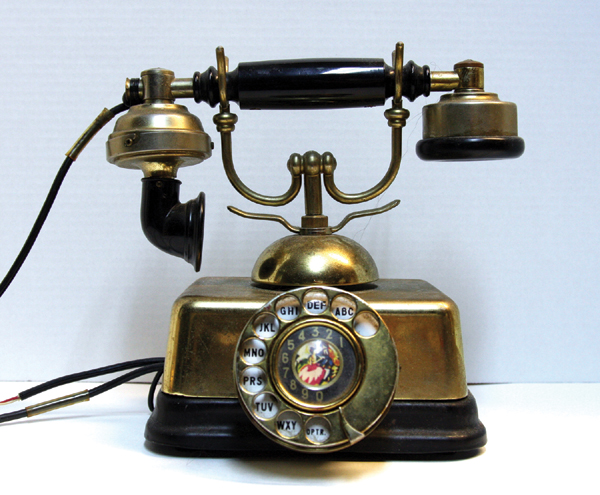
Figure 2: Victorian Style Phone |
Sounds ... Scary!
In operation, you want to give your guests the illusion that they are hearing voices from beyond the grave, but only when they pick up the receiver. To do this, I had to discover which wires went to the speaker in the earpiece of the phone handset. A quick search around Google and Wikipedia shows that many handsets used four wires: two for the microphone and two for the earpiece speaker.
 |
| Figure 3: Microphone to Speaker Wiring Schematic |
We will need to access the two wires that go to the speaker in the handset. Lucky for us, older model telephones were long-lived devices and are typically easy to open for repairs. As such, it's normally a simple matter to unscrew the cover from the phone base and reveal the internal terminals and wiring. Once you have the cover removed, look carefully for the wires that come from the handset.
If you're lucky, they may be coded with the standard black/red/green/yellow colors. If this is so, you can try using the battery "tap test" to see if you can quickly identify the speaker. To do this, hold the green wire on the bottom terminal of the AA battery, then "tap" the red wire on the top terminal. At each tap, you should hear a pop and/or a slight crackle sound come from the speaker. If this doesn't make a sound on your first round, you can try each set of wires in turn until you hear the sound come from the ear piece.
If you prefer not to "experiment" looking for the speaker wires, you may disassemble the handset and check to see which two wires are connected to the earpiece. Many older phones feature a circular style ear and mouth piece on the handset that may simply be unscrewed. Some newer models may require you to pry the handset apart to gain access to the speaker.
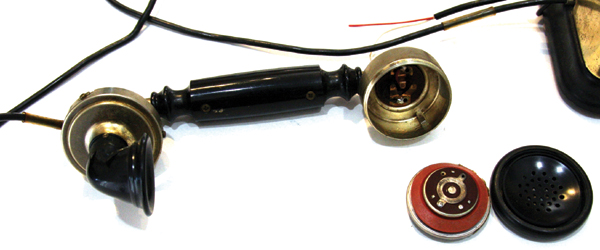 |
| Figure 4: Disassembled handset to find the speaker wire in the ear piece. |
In any case, exercise caution not to break anything and make sure you can put it back together again. After you have identified which wires go to the earpiece in the handset, the next step is to modify the base.
Switch It Up
Once the speaker wires are located, we are going to wire in our MP3 player. We need an 1/8" stereo plug that ends in bare wires. If you have an old pair of ear buds or if your MP3 player came with a pair you are willing to sacrifice, simply cut the buds off the ends to create the cable we need. Carefully strip the wires from one side of the headphone cables (either the left or right speaker). Once you have stripped the wires, we are going to splice them into the handset speaker wires and our microswitch.
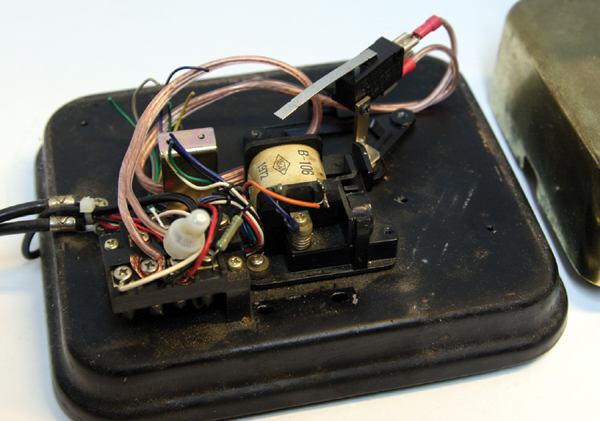 |
| Figure 5: Wiring in the MP3 Player to the Phone. |
In order to use the microswitch, we are going to find the "hook mechanism;" this is the piece that goes up and down when the handset is picked up. Depending on the type of phone you have chosen for this project, the next step might take some creativity. You will want to attach the microswitch to the moving piece of the hook mechanism so that when the phone is "on hook" (the handset is down), the connection to the speaker is open; when it's picked up ("off hook"), the connection is completed. I positioned my microswitch in such a way that the hook mechanism would push against it when the handset was down.
We want to wire one of the leads from our headset to the normally-closed position so that when the switch is released, the circuit is completed and the audio is allowed to play. Essentially, you will be breaking one side of the speaker connection with the microswitch.
You may need to remove most of the phone's internals to do this. That's okay, since we will want room inside to mount the MP3 player as well.
If you have followed these steps correctly, you should now be able to put a spooky MP3 of your choice onto the MP3 player and test out your work for the first part of this prop. Be sure to set your MP3 player to loop endlessly. Pick up the handset and make sure you can hear the player coming through the speaker.
If for any reason you cannot, be sure to check your wiring. These wires can often be very small and difficult to work with, so take your time and double-check your work. Be sure everything is working as it should, then reassemble the phone. If you picked a sufficiently small MP3 player, you should be able to hide it inside the phone itself.
 |
| Figure 6: MP3 Player hidden in phone base. |
There are plenty of great free spooky MP3 sounds you can download on the Internet, or you can make your own if you know how. Since we are using only one speaker, be sure to make your audio track of choice mono.
The second part of the prop allows the phone to ring when guests are near it and is much easier to make. To give the illusion of the phone's omnipresent sense for ringing, we are going to use an old-fashioned doorbell with a 2.5 inch bell and connect it to a wireless light outlet. The host can secretly hide the transmitter in their pocket or hand and control when the phone rings. These doorbells and the doorbell transformer can be found at most local hardware stores and online.
In order to hook the doorbell up to the wireless light outlet, we are going to use an old power cord for a PC and the doorbell transformer. The transformer will take the 120 VAC from the wireless light outlet and drop it down to a more usable 12-16 VAC for the doorbell itself.
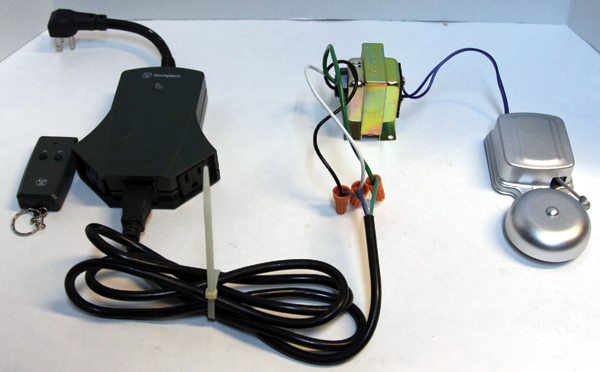 |
| Figure 7: The Doorbell Transformer hooked up to the Wireless Remote |
Trim off the female end of the power cable and strip the wires back. Next, splice the end of the cable to the 120V side of the doorbell transformer and then wire the doorbell to the other side. Now, we can plug the cable into the outlet on the wireless transmitter, giving us a wireless ringer for the phone. You will need to turn the bell on and off by hand, so try to do so in a way that makes it sound like a phone ringing and not simply an endless ring.
Once the ringer is complete and tested, you can now hide it on the bottom of the table or desk that you are placing the phone on. Most tables and desks have a recessed area on the bottom which is perfect for hiding the mechanism. Practice a few times with the ringer to make sure you get the hang of making it sound like a phone, and be sure to stop once a guest picks up the handset! This prop is great because it has a nice startling effect of the loud bell ringing when people least expect it, and it's even creepier when guests realize they can answer the phone and hear the spooky voices from the other side.
This project was designed so that anyone could build it with simple-to-find parts, regardless of their skill level. A more advanced approach could be done using something such as an Arduino kit with an MP3 player board and PIR sensor to help automate the prop. You can find videos of the ghost phone in action at http://youtu.be/qx_Mujj_wbA.
For more fun Halloween project tips and ideas, be sure to check out my site at www.EerieAcresCemetery.com. NV