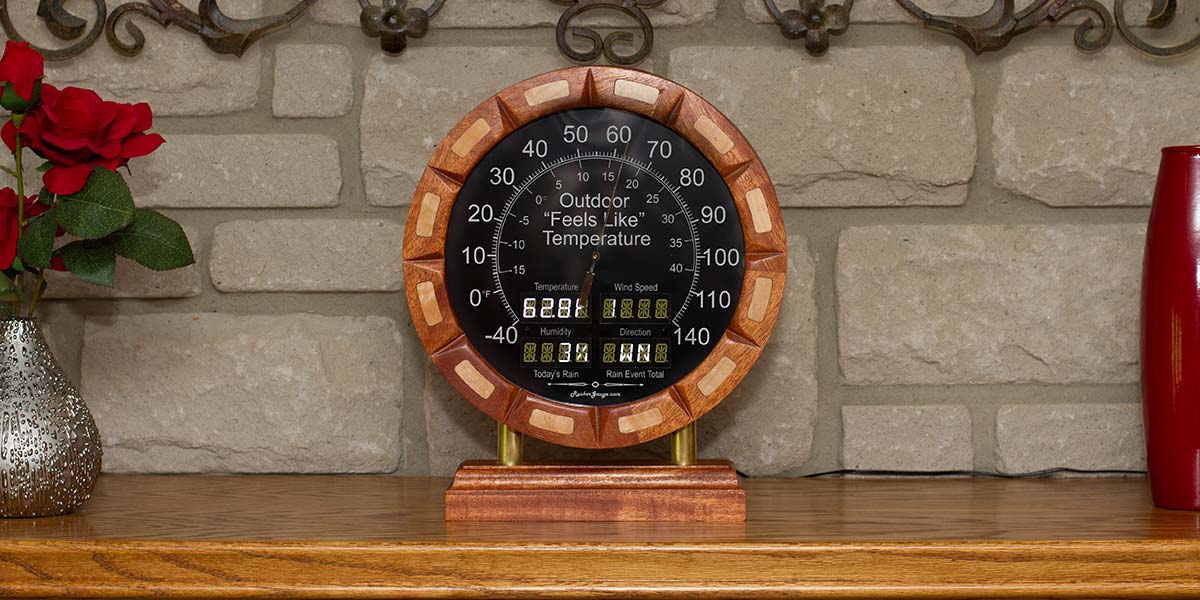
A complete stand-alone platform for displaying data from the Internet.
In our previous article, we discussed the circuit and code for each of the core components for the Weather Gauge. We took a deep dive on how the stepper is wired up and the node.js code that drives it. Now, it’s time to put it all together and light it up!
Assembly
On the backside of the acrylic base (Figure 1) are four pressed-in 2.5 mm nuts that line up with the mount holes of a Raspberry Pi. The acrylic base is designed to have the RaspPi directly mounted and still allow air to flow around it. Attach the Pi with four 2.5 mm by 10 mm high nylon standoffs.
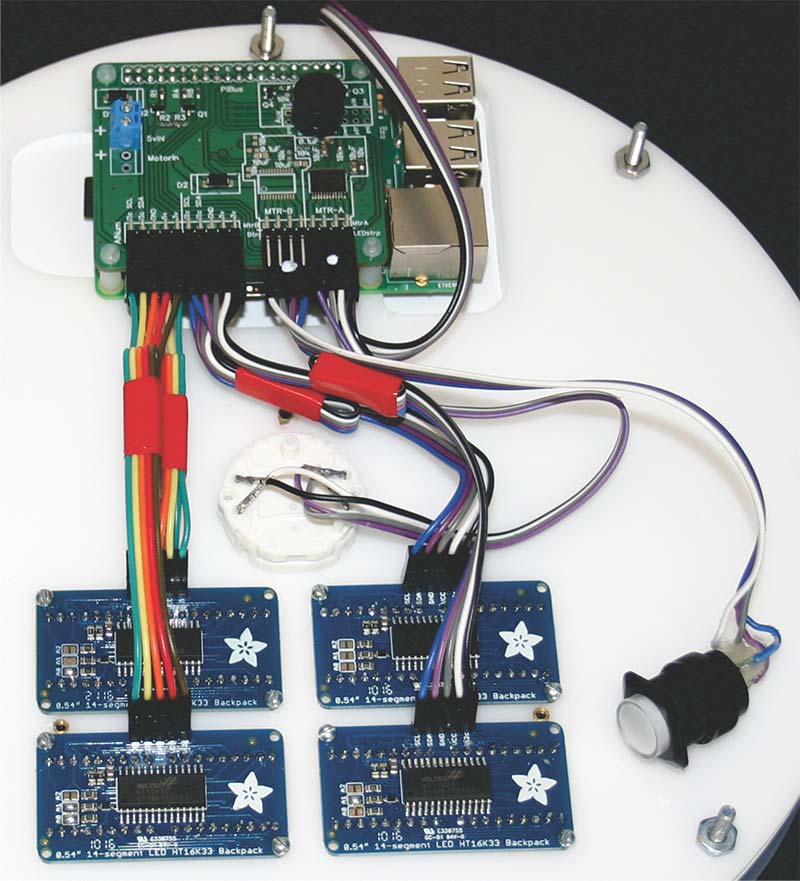
FIGURE 1. Backside of acrylic base.
Notice the SD card is to the left and the USB ports are to the right. Next, attach the RG- 2MtrDrvr daughterboard to the top of the Pi, lining up the holes and the header. Use four 2.5 mm nylon screws to secure the daughterboard to the standoffs.
Next, attach the stepper motor and the four alphanumeric displays as shown.
Once the alphanumeric displays are attached, they need to be addressed according to their position on the gauge face. There are three solder jumpers on the left side of each alphanumeric display that are used to set unique addresses for each display bank. Create a solder bridge across the pads of A0 and A1 as shown in Figure 2.
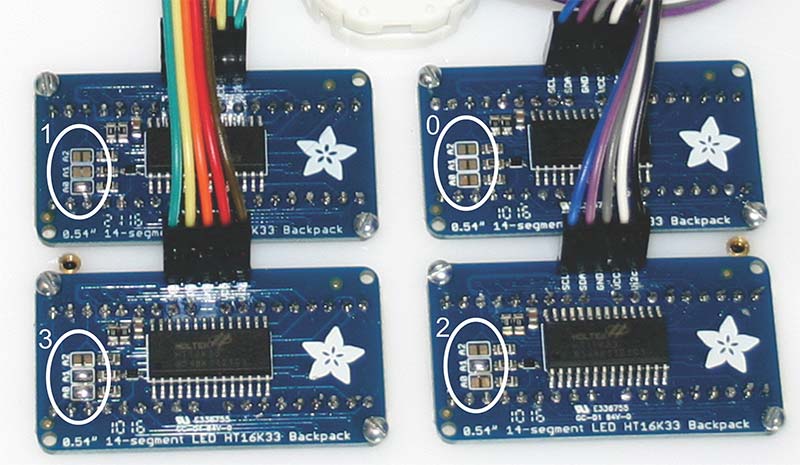
FIGURE 2. Alphanumeric addressing.
Flip the acrylic base over and locate the three pressed-in 2.5 mm nuts for securing the gauge face. The gauge face will line up with these three nuts as well as the eight standoffs around the outside.
Use three black 2.5 mm screws to secure the gauge face to the acrylic base (see the green arrows in Figure 3).
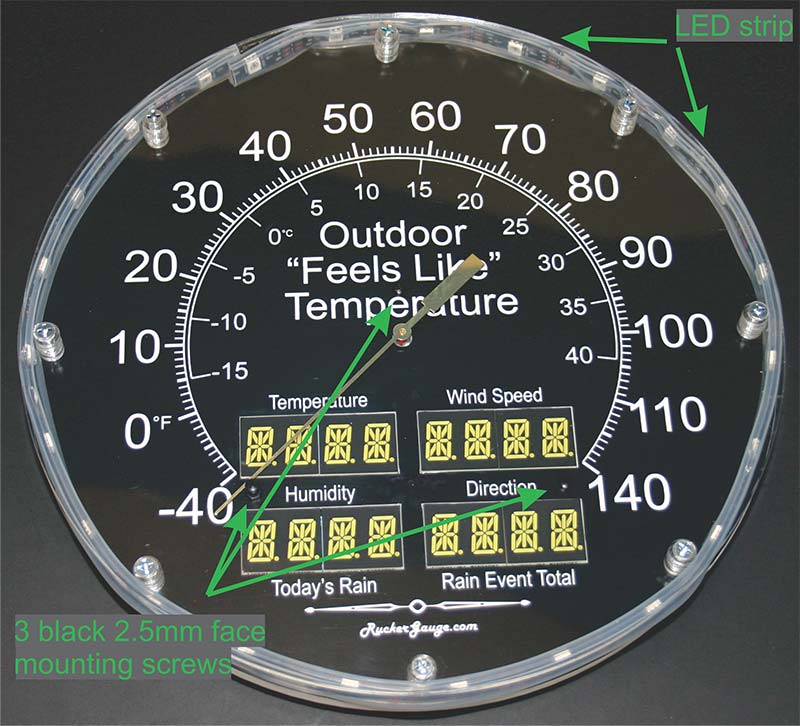
FIGURE 3. Gauge face mounting.
Notice that one of the 2.5 mm screws is longer than the other two. This is because it’s used as a needle bump for the stepper motor; it’s the one just to the left of the word “Humidity” on the gauge face. Next, press the brass needle onto the stepper’s shaft; make sure it can rotate to the needle bump and then all the way over to the max value of 140.
The next step is to attach the clear acrylic cover with the eight number 6 machine screws and standoffs as shown in Figure 3. Once the clear cover is attached, wrap the LED strip around the outside of the standoffs; it will fit between the black gauge face and the clear cover.
You can now tighten the eight nuts on the back and connect the cables as shown back in Figure 1. Note the lit pushbutton is also attached now, but lays loose as it will be mounted to the back of your case.
The gauge face sits inside the case as shown in Figure 4 and is secured into position with two pressure wedges along the sides (the two green wedges in Figure 4).
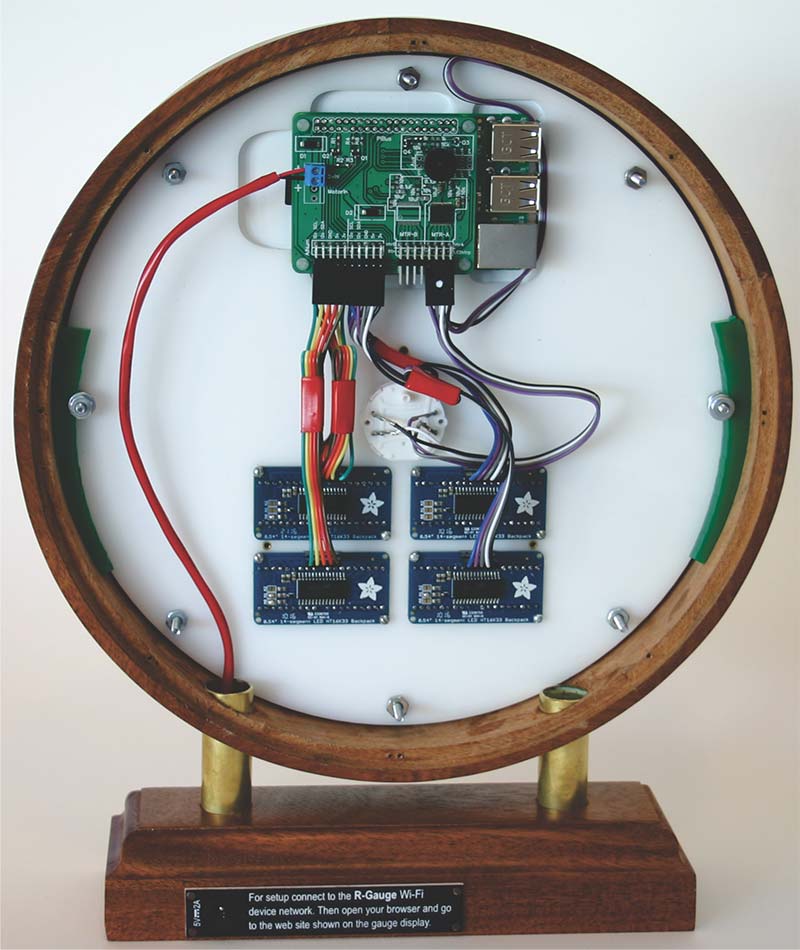
FIGURE 4. Backside with green pressure locks.
The lit pushbutton is fished through a hole in the back panel as shown in Figure 5.
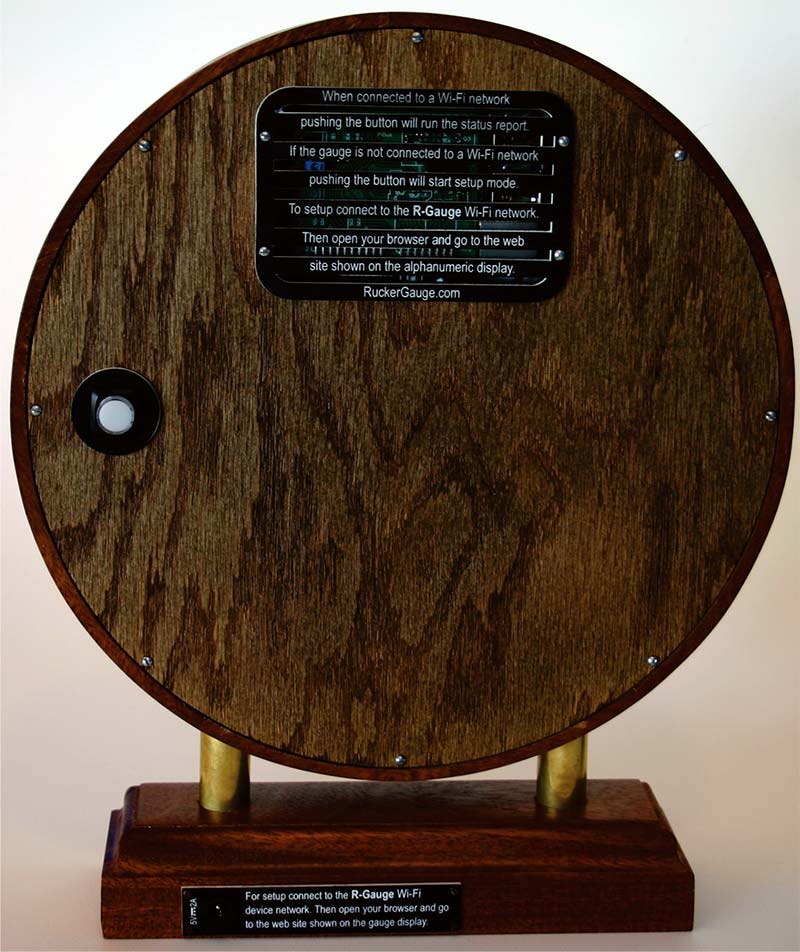
FIGURE 5. Backside of case with lit button.
Software Install
To install the software, you’ll need to connect a USB keyboard, HDMI monitor, and an Ethernet cable to the RaspPi ports as shown in Figure 6.
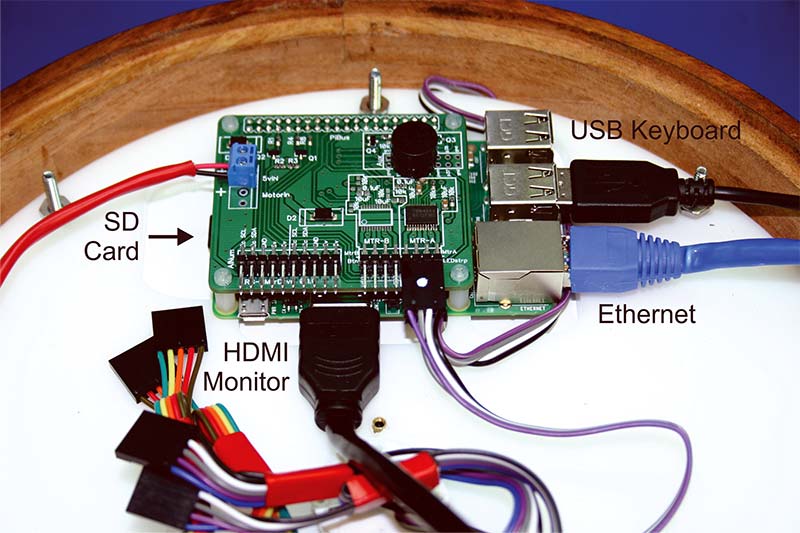
FIGURE 6. Keyboard, monitor, and Ethernet connection.
You will also need an 8 GB or larger micro SD card to put the OS and program on.
The following steps walk you through the install process at a high level. You may have to tweak some of the steps as the OS changes over time and menu options get moved around and renamed.
Google is your friend. If you get stuck, do some searching. There is an unbelievable amount of information on the Web about the Pi.
Software Setup (note the first two steps are done from a Windows 7 or Windows 10 PC):
1. Download the latest version of Raspbian Jessie from the Raspberry Pi Downloads tab at https://downloads.raspberrypi.org/raspbian_lite_latest to your Windows PC.
2. Open Win32 Disk Imager and write your image to a fresh SD card. Everything will fit on an 8 GB card. If you don’t have Win32 Disk Imager, you can search for “Win32DiskImager” and download it for Windows. (You’ll need a way to plug in the SD card to your Windows PC. There are several USB SD card readers available on Amazon if your PC doesn’t have it built in.)
3. Take your SD card out of your Windows PC and put it into your Pi. Connect a USB keyboard and HDMI monitor as shown in Figure 6. Boot the weather gauge up and log in as pi with the default password of raspberry.
4. At the command prompt, type sudo raspi-config and configure the following:
a. Change your password; this is a must!! Please, please, do this!! The default pi password is common knowledge and you need to be responsible and change it!
b. Change your host name. In my case, I changed it to wugNutsVolts. You will use the host name to connect to your weather gauge over the web interface.
c. Under localization options:
i. Change Time Zone to match your time zone.
ii. Change Wi-Fi Country to match your country.
d. Optionally, you can enable the SSH shell under Interfacing Options. Only do this if you intend to use SSH to connect to your Pi remotely.
5. Exit out of config and let the system reboot. Then, log in with your new password.
6. Now, we need to install Node.js. From the command line (after you have logged in), type these commands:
a. cd /usr/local
b. sudo wget https://nodejs.org/download/release/v7.2.0/node-v7.2.0-linux-armv7l.tar.gz
c. sudo tar —strip-components=1 -xvf node-v7.2.0-linux-armv7l.tar.gz
d. Now, type node -v and you should see you have node v7.2.0 installed.
7. Install GitHub. From the same command line, type:
a. cd
b. sudo apt-get update
c. sudo apt-get install git
8. Install the Weather Underground Gauge node.js application from my GitHhub site:
a. git clone https://github.com/RuckerGauge/WeatherUndergroundGauge.git
b. cd WeatherUndergroundGauge
c. sudo npm install
9. Now, we need to configure the app to automatically start when your RaspPi reboots. To do this, follow these steps (make sure you’re in the WeatherUnderground Gauge directory):
a. sudo cp rGauge.service /etc/system/system
b. sudo systemctl enable rGauge.service
10. Power off your Pi and remove your keyboard, monitor, and Ethernet cable. Reconnect your alphanumeric cables if required and power the system back on.
If everything went well, your weather gauge will boot up and go through a quick self-check. You’ll see your stepper motor move the needle; your LED strip will flash; and your alphanumeric display will let you know the status of the IPL (Initial Program Load).
When IPL is complete, the weather gauge will detect that it is not connected to a Wi-Fi network, and create an Ad-Hoc network for you to connect to. To do this, use your smartphone; tap on settings, then Wi-Fi, and then join the R-GAUGE network.
Next, open the browser on your smartphone and go to the hostname.local address. For example, my host name is wugNutsVolts, so I type http://wugNutsVolts.local in the phone’s browser. Make sure you add the dot local (.local) at the end of the name as shown; this tells your phone it’s a multicast DNS address and it will only look on the local network for it.
Once your phone connects, you will get the “Success!” message shown in Figure 7.
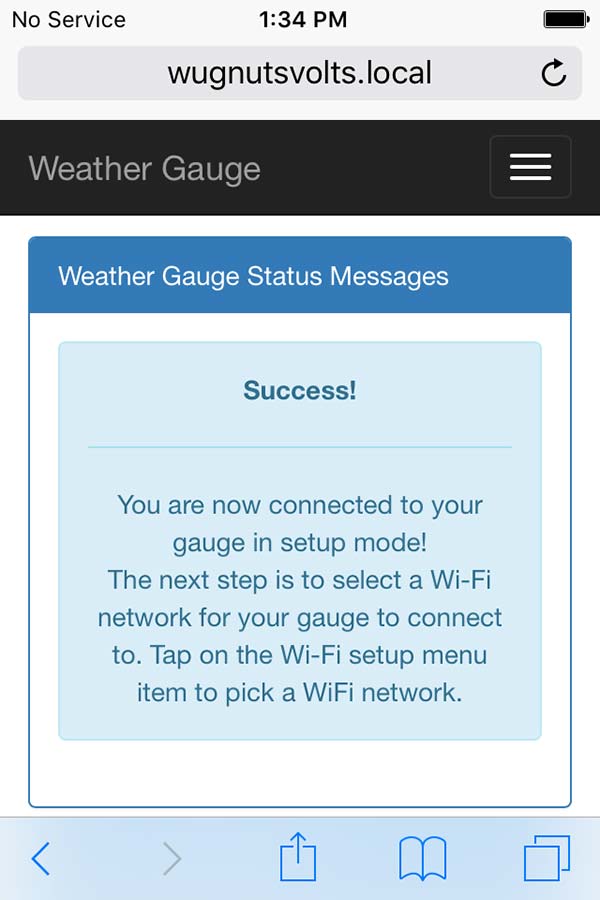
FIGURE 7.
Tap on the “hamburger menu” (the three white bars in the upper right corner) and select Wi-Fi Setup. You’ll be prompted for the admin password; type in Limestone5$. Now the screen will show you all the Wi-Fi networks (Figure 8) the gauge is in range of. You can tap on Change Wi-Fi Network to select one. Select your Wi-Fi network, type in a password, and tap on the save and activate button.
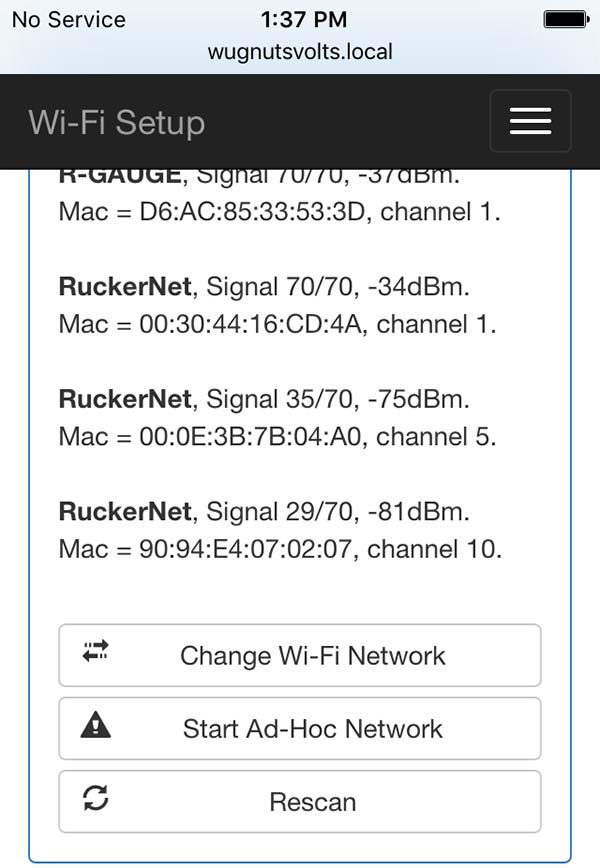
FIGURE 8.
Back on the alphanumeric display, you’ll see status messages while the gauge tries to connect to your Wi-Fi network. When successful, you will see “Success” scroll across the screen and your gauge will reboot. We now need to configure the weather gauge with your Weather Underground key and weather station.
Gauge Configuration
The weather gauge’s web interface allows you to customize the weather gauge to your environment. You can set the gauge face brightness, the alphanumeric display brightness, sound, and also when you want it to be quiet in the evening so it won’t beep while you’re sleeping.
The only two things you must change are the weather underground API key and the personal weather station ID.
The API key is how the Weather Underground controls access to their API. Every time the weather gauge makes a call to their API, it must pass a valid API key. These calls are metered, and if everyone used the same key, it would go past its budget and be shut off.
I’ll walk you through getting an API key and picking a personal weather station close to you. We will then enter these numbers into the weather gauge’s web interface.
Weather Underground API Key
At this point, you’ll need to set up a developer’s account on the Weather Underground’s website. Go to https://www.wunderground.com/signup and create an account. Once you have an account created, go to their developer’s page at https://www.wunderground.com/weather/api; click on Pricing and then on Purchase Key (don’t worry this is a free key). Fill out the form with your information. At the bottom of this screen, they let us know the criteria for a free account.
Our weather gauge can only make 500 calls a day and no more than 10 calls per minute. That is exactly what the application does, so you should always be in the free range. If the weather gauge goes above this limit, it will just be disabled for that day.
Click on Purchase Key and you will see your 16-character key ID. Make a note of the key. We will need to tell our weather gauge to use that key for accessing the weather data.
Personal Weather Station ID
Next, we need to get a station ID to pull the weather telemetry from. You can leave it at the default if you want to see the weather in my backyard, but I bet you’ll want to find a weather station close to your home.
Go to https://www.wunderground.com/weatherstation/overview.asp and in the Weather Underground search bar at the top of your page, type in your home city or a city you would like to monitor. You may have to hunt around a little to find it on the page.
You should see a dropdown called “Change Station;” if you click on it, you will see a list of all PWS close to your city. Pick one (for example, my station ID is KILJERSE7) and make a note of the station’s ID.
Configure the Weather Gauge
You can use your web browser to connect to the weather gauge’s web server to get to the configuration page. Now that your weather gauge is connected to your home Wi-Fi network, you can use a Windows 10 PC, Mac, or smartphone that is connected to the same network to configure it (if your PC supports multicast DNS).
When the weather gauge is rebooted, it will tell you the multicast address and the IP address to use to access it. If you can’t connect with the multicast address, try the IP address.
Back in Step 4-B of the software install, I gave the Pi the machine name of wugNutsVolts; this means the multicast address for the weather gauge is http://wugNutsVolts.local. Type that address or the IP address into your browser to access the main screen shown in Figure 9.
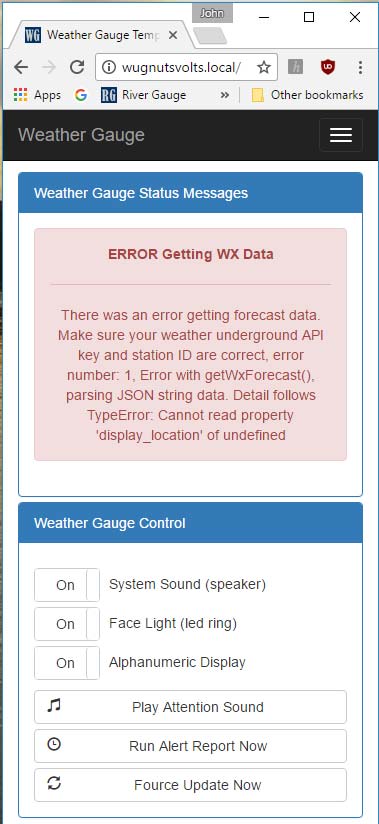
FIGURE 9. Home screen.
Next, tap or click on the hamburger menu (remember, the three white bars in the upper right corner) and select Maintenance. You will be prompted for the admin password; enter Limestone5$.
Once logged in, you will see the maintenance page as shown in Figure 10.
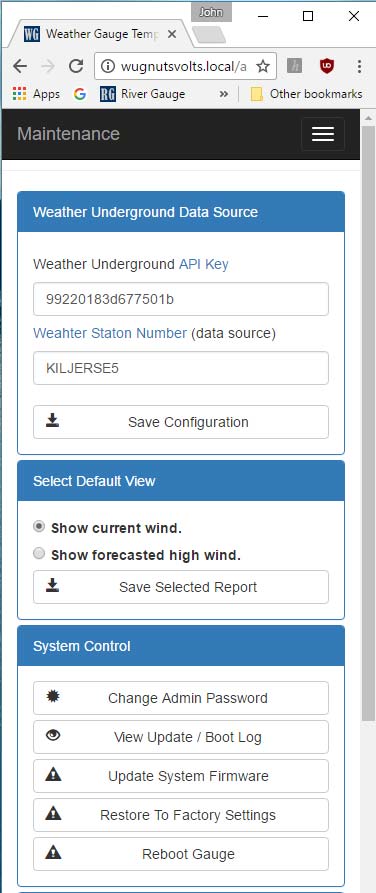
FIGURE 10. Maintenance page.
In the “Weather Underground API Key” text box, type in your API key; type in your Weather Station Number in the Weather Station text box. Tap or click on Save Configuration, and then tap or click on Reboot Gauge and OK.
Your weather gauge will reboot and start pulling data from the Weather Underground.
Security Considerations
At this point, the weather gauge is running with minimal security (if you changed the Pi’s default password, and did not enable any of its external interfaces like SSH or VNC).
If you didn’t change the Pi’s default password, you are opening yourself up to a future attack. Please change the password if you haven’t. You should only operate your weather gauge on your home network behind a router with a built-in firewall.
If you’re interested in locking down your Pi, I suggest researching and implementing the following:
- Change the Raspberry Pi’s default password.
- Change the weather gauge’s admin password in the maintenance “hamburger” menu. Tap on the “Change Admin Password” in the “System Control” screen group (see Figure 10).
- Enable the built-in firewall with the iptables and ip6tables commands.
- Change the default “pi” user name to another name. If you do this, make sure you update the path to your new user name in the following: rGauge.service, updateMe, and autoStart files.
- Only use SSH for remote administration with public/private key pairs instead of passwords.
- Only access your weather gauge over SSL. The weather gauge has a self-signed certificate that should be replaced with your certificate. To use the SSL connection, go to https://wugNutsVolts.local. You will receive an error since this is a self-signed certificate. If you add that certificate to your browser, you’ll be able to access all the weather gauge web pages over SSL.
I spent close to a year of my spare time on this project, and still look forward to seeing it built on and expanded! Please share your weather gauge projects. I would love to see them! NV