I have always loved to build things ever since I can remember. I started with rebuilding small two-stroke engines and worked my way up to full-size car engines. This was really satisfying, but I’ve always craved more. I picked up programming around 12 years ago and fell in love the instant I started writing my first C program. I’m no longer building engines. I’m now replicating commercial systems like Wemo (refer to my previous article at https://www.nutsvolts.com/magazine/article/diy-wemo-for-home-automation). Let’s take a closer look at my latest Arlo replication and the framework I call MotionDetection.
MotionDetection monitors motion from a USB webcam on a Raspberry Pi 3 using the OpenCV API. Once movement is detected by the system, it takes a picture of what set the motion detection software off and emails that picture to you. It also affords you the ability to remotely view the webcam from an Android application from any where in the world at any time.
After you’re notified via email, you can then open the Android application on your phone and check out what’s going on in your home (or whatever location you choose).
Let’s take a look at how this highly configurable and stable system works.
How the Motion Detection System Works
As mentioned previously, at the heart of this project is an amazing Raspberry Pi 3 single-board computer (SBC; Figure 1) and a PlayStation 2 USB camera called an EyeToy (Figure 2).
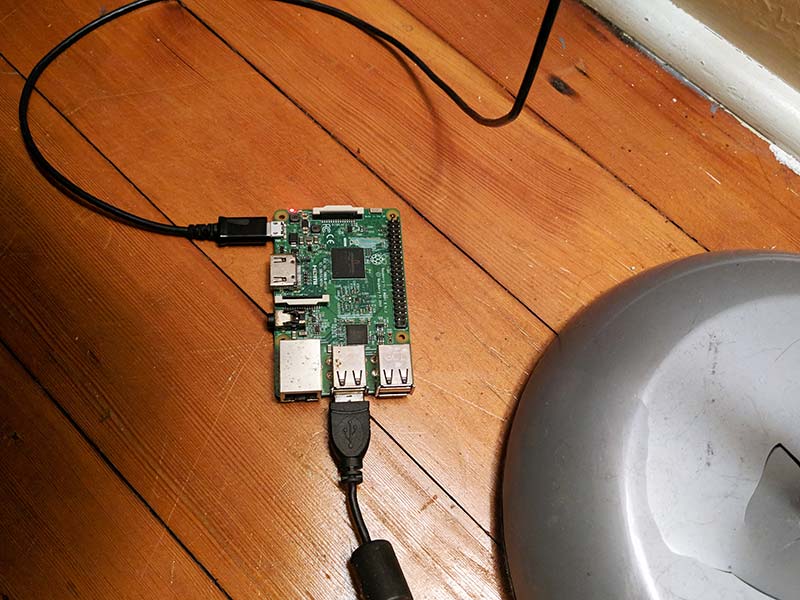
FIGURE 1. Raspberry Pi 3 Model B+.
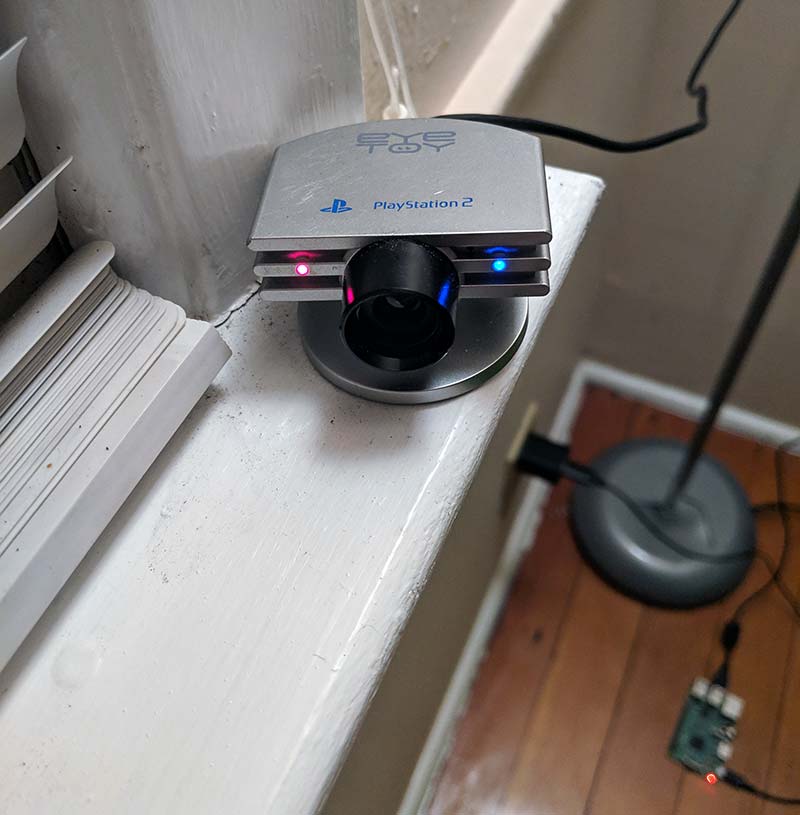
FIGURE 2. PlayStation 2 EyeToy USB camera.
This little SBC is what runs the system I’ve configured and built. What “controls” the system is the multi-class 700+ line program I’ve written in the Python programming language. The Android software is written in the Java programming language using the legacy Ant build system from the command line. If I can do it on the Linux command, I will!
I don’t have anything against GUIs (Graphical User Interfaces); it’s just that I feel I have more control from the command line rather than dealing with unnecessary layers of abstraction.
This system monitors motion above and below specified thresholds that you set on the command line when you initiate the program. I do this through a crontab. The crontab runs a daemon that monitors the number of motion detection processes running. If too many are running, it could cause the framework to lock up.
There’s a heartbeat system in place to monitor events like this, but I’ll cover that later. The daemon is run once a minute because that’s the lowest amount of time that cron allows you to run entries. It also monitors if there are no processes running or just the correct amount.
There are two threshold values that can be specified when it comes to motion detection: the minimum and maximum threshold. The reason the minimum threshold is set is because the camera will cause spikes in the image differential count. These spikes almost never go above 500, so that’s why the default values for this configurable variable are set to just that.
There’s a lot of false positives depending on where you have the camera facing and where it’s placed. I live off a main road in my town and my house is on the corner. So, the light from cars will cause false positives quite often.
I try to counter this issue with the maximum image differential value which has a default value of 1500. Someone moving in your home will generate values well above 1500, so the default values are more than fine for anyone who doesn’t want to reconfigure the system.
The MotionDetection system is able to tell if there’s motion by comparing two grayscale images inside of an infinite while loop. It takes a picture before it enters the loop, then takes another picture when it enters the loop. Both pictures go through image processing routines I have written.
If there’s a pixel in the newest photo that differs from the original, then the threshold variable is incremented. If there are enough pixels that differ, then the intrusion framework is activated, and the picture is sent via email along with a notification message. If the difference in pixels is less than the specified threshold max, then the first photo taken replaces the second photo taken, and a new photo is taken on the next iteration to replace the old new photo (first photo taken).
The image processing and conversion routines are very complex and is not something I’m going to cover in this article. There’s a link to the code for my GitHub repository in the Resources which shows these processing and conversion routines. I’m also willing to answer any questions you have pertaining to this article or if you would like a more in-depth explanation about the routines.
The system not only monitors motion and affords the capability of remotely viewing the live feed, but also manages the data that the MotionDetection system creates. The pictures that MotionDetection takes are named captureX.png (X being a numerical value). The picture naming is done using an incremental function (Figure 3) that finds the picture with the highest number in the directory, increments that number by one, and then returns that value.
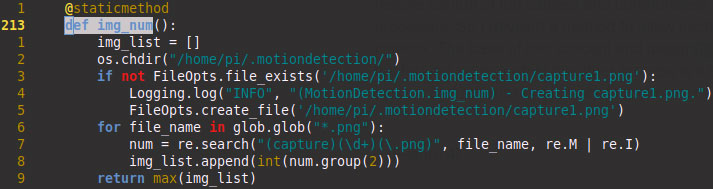
FIGURE 3. Incremental naming method.
This value is then passed to the function responsible for taking the pictures and saves the newest photo with this new number appended to the end of the name before the extension, i.e., capture39.png, capture40.png, capture41.png, etc.
These pictures are never overwritten or automatically deleted and will remain in the MotionDetection directory until you manually delete them or the DataManager system automatically compresses, emails, and then deletes the associated data. This feature is optional, but it’s in place because if the data is left to accumulate, the system’s space will fill over time, and could potentially cause lagging and/or or a system lock. This is what ended up happening to me, so I wrote the DataManager software to prevent it from happening again. The DataManager system also allows you to specify the size of the file at which the data managing routines will run.
Viewing the Motion Detection System’s Feed
Let’s discuss the second part of this system which is the ability to remotely view the camera’s live feed from the Android app. Introducing the remote viewing capability made the project infinitely more complex, mainly because of the conflict in the physical control, handling, and locking of the camera.
Both the motion detection and streaming features require control of the camera. Unfortunately, I couldn’t simultaneously give access to both processes. So, I devised a method to allow each process to independently lock and control the camera.
The base of this concept and design (Figure 4) is to have a master process that owns the locking system while the other process is a slave that requests permission of the locking system. It then returns control back to the master process once it’s finished.
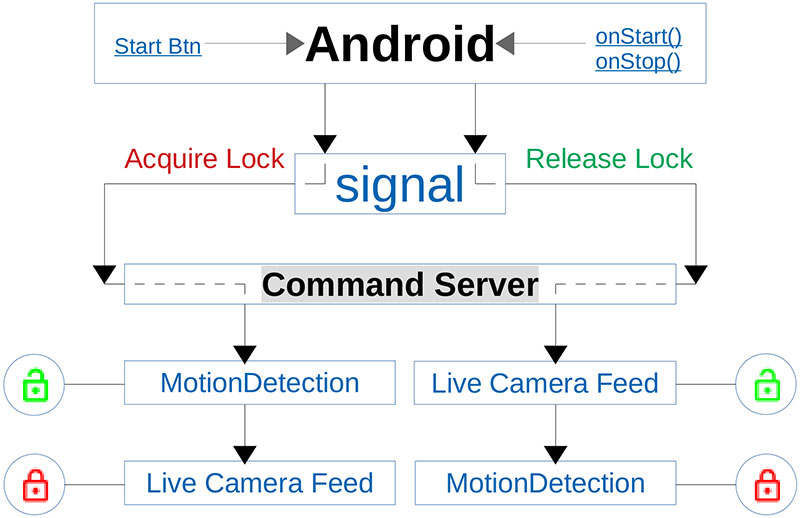
FIGURE 4. System control handler flowchart.
The integration of this system control handler was achieved by writing and employing a server on the RaspPi alongside (in the same file) the MotionDetection framework that handles remote commands coming from the Android app. All incoming commands are simultaneously distributed among the concurrent processes through shared queues that allow the processes to check the command in the pipe and act accordingly. This allows the motion detection process to release the lock on the camera if it sees that a request for lock control has been made.
The streaming process will also see this command in the pipe and can now lock the camera. This feature was a bit tricky to develop and successfully implement because I had to make sure that all processes ran consecutively in order for it to work correctly.
This was done by locking the processes and releasing them at very specific times because only one process at a time could acquire the lock. If this isn’t done properly, then the processes will most likely run out of order and could become quite the mess — which it did in the early stages of development!
The heartbeat software runs as an entirely separate entity and monitors the state of both the command handling and streaming servers. If enough connections are made within a short amount of time, that could prevent any new connections. The heartbeat program runs every two minutes by default, but this is a configurable option.
Each time the heartbeat server pings the MotionDetection framework, it receives a copy of the MotionDetection’s PIDs. The heartbeat software then stores the PIDs in case it can no longer reach the servers. If this ever happens, the heartbeat program will kill the MotionDetection framework and MotionDetection will automatically be restarted by the crontab daemon.
The MotionDetection System Control Handler
Let’s touch on the system control handler a little more. When you want to view the camera’s live feed, you open up the APK and press the start button. This sends a signal (string) to the command server running on the RaspPi which stops the motion detection process.
It first releases the lock on the camera, then releases the process lock to allow the streaming server to acquire the process lock. You are free to view the feed until you either hit the stop button on the APK or the app is closed. When either of these events occur, the Android application will send another string letting the command handling server know that it’s finished with both the camera and process locks.
If any of you are familiar with the Android activity life cycle, you might know what onStop(), onPause(), and onDestroy() are (Figure 5).
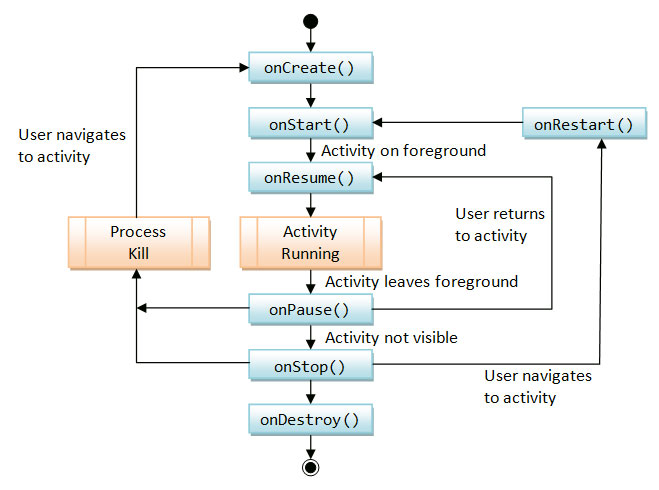
FIGURE 5. Android activity lifecycle.
When you close either the app, the phone, or when the phone falls asleep, these actions call one of the three life cycle functions I just mentioned. I wrote some code to override these methods which “automatically” sends a signal (string) to the command server on the RaspPi letting it know that it can now release control of the camera.
The framework I have developed was (and is) much more than just software and required a lot of configuring on the system level. The OpenCV package requires a lot more than just issuing a few commands to install OpenCV through your package manager.
I had to compile multiple packages just to get OpenCV to compile. I needed a specific version of OpenCV, and this version required newer versions of multiple packages like GCC, MPFR, MPC, CMAKE, FFMPEG, and quite a few others. They had to be built in a specific order and compiled with specific flags.
This was far from smooth sailing, but I always love compiling things, so this was a ton of fun even though it was very tedious and a lot of work. I spent lunch breaks at work compiling (Figure 6). I spent lots of nights on my couch after work compiling. I even compiled in between work assigned software projects during my work day.
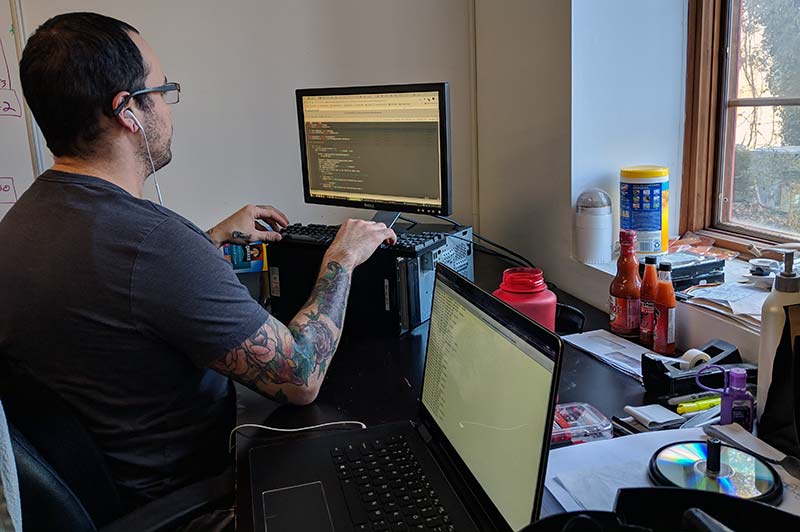
FIGURE 6. Me compiling while working. (Photo courtesy of my co-worker, Adiel Corchado.)
I installed a firewall as well to make sure my system doesn’t get compromised and limit attacks as much as possible. The firewall I’m using is called iptables and it can be a pain to configure and perfect, but it’s very solid and highly configurable.
The only downside is that it can have a very steep learning curve!
The firewall isn’t completed as of now and I’m still working on a few things, but the system itself is very stable and highly configurable.
Time to Shut Down
I had a lot of fun creating this system but it was very challenging and time-consuming. It’s taken almost 18 months to build a stable framework.
I would love to see readers attempt to replicate my system. The difference here is that you’ll have the code that I didn’t have when I first started, so you’ll mostly be building and configuring rather than programming.
Even if you don’t want to attempt to replicate the MotionDetection system, I would still love to hear your feedback on this project. Shoot me an email at [email protected]. You can also let me know if you’d like a free image of my system. NV
Resources
Video demonstration
https://www.youtube.com/watch?v=ZDyZsqIcBnk&t=2s
GitHub public code repository
https://github.com/amboxer21/MotionDetection
Downloads
What’s in the zip?
Source Code
