There’s a deep sense of satisfaction that results from developing, building, testing, and ultimately using a circuit of your own design. It’s the creative process, after all, that attracts most electronics enthusiasts. Given the expense of components and tools relative to the price of finished electronics products, it’s difficult to rationalize the investment in time and energy simply to have a working device. However, whereas anyone can afford an electronic gadget, few can address the myriad challenges associated with the circuit development process.
Conceptualization
First, there is the challenge of conceptualization. For example, let’s say you need a headphone amplifier. You’ll have to develop some sort of functional specification, even if only an informal one. You’ll have to decide whether the amp will be used with a low-fidelity iPod®, an electric guitar or other instrument, or an audiophile-quality tube system. Given your expertise, time, and budget, you’ll have to decide whether to buy a kit, follow an article in Nuts & Volts, or design the amp from scratch.
Design
With a fleshed-out conceptualization in hand, the next step in the process is design. Assuming you’re starting from scratch and like to work with operational amplifiers, a reasonable approach is to select the appropriate device from an online component selection tool like Jameco's.
Using one of these tools, it’s a simple task to pick an op-amp based on factors such as price, performance, noise level, failure rate, availability, and power supply requirements.
If price and availability are your primary concern, then you might consider the ubiquitous, inexpensive (35 cents), modest performance LM386 op-amp that works well with an inexpensive, single-ended power supply. If your goal is a low noise, high performance headphone amplifier, then you might consider the TPA6120 op-amp ($4.50) that works best with a double-ended power supply.
With the key active elements of your design defined, it’s a straightforward task of searching your library and the web for schematics of commercial products, the work of other enthusiasts, and design suggestions from manufacturers. The caveat is that it’s important not to assume a schematic or project on the web or magazine is correct. Do your homework. Look for follow-up issues of a publication for corrections, and study official product sheets for details such as supply, bypass, and thermal management issues. You might find a great amplifier design, only to discover that the power supply is woefully under-designed. And even if the design is appropriate for a particular application, it may not be appropriate for your needs. You may plan to operate the amp near your HF amateur radio gear and require an extra level of EMI emission control. (Or your line power may be particular noisy.)
Component Selection
Given a design — that is a full schematic — the next challenge is component selection, based on issues such as cost, viability, availability, performance, efficiency, and size. Consider something as simple as the power transformer for the amplifier power supply. Assuming an audiophile-quality amplifier, should you spend $28 for a compact toroidal transformer or $12 for a split bobbin transformer that’s less efficient and has more flux leakage? On the other hand, if your design is based on an LM386, then an inexpensive wall type supply may be sufficient.
There’s the issue of surface-mount or through-hole components. Surface-mount components may result in a more compact amp, depending on your circuit board design capabilities. However, working with surface-mount components requires more finesse and equipment than does working through-hole components. In the end, you may be forced into at least a hybrid surface-mount/through-hole design, simply because many op-amps and other active components aren’t available in DIP packages.
Passive component selection is another challenge, especially with precision circuits. Relatively expensive, low-noise, stable metal film resistors are probably a better choice than common carbon film resistors in an audiophile-quality amplifier. Similarly, garden-variety electrolytics may do for a low-end amplifier, but low impedance, high ripple current capacitors may be more appropriate for a low noise amplifier. There’s a significant price penalty, however.
This price-versus-performance issue applies to everything from connectors — gold plated versus tin-plated — to the volume control. You can go with an inexpensive carbon log potentiometer ($1.89), an inexpensive ALPS step attenuator ($45), or a DACT audiophile-quality step attenuator ($189). Step attenuators — which are made with switched fixed resistors — have a nice feel and largely avoid the scratchy noise associated with a typical potentiometer. But there is the issue of diminishing returns.
Component selection is usually a compromise, even when you know what you want. You might work with an online database and catalog for hours, only to reach the end of your component shopping list to discover that a key component either isn’t available or must be purchased in lots of 10, 100, or 1000. Then you search another site and find the component is available in the quantity you need. Do you start over with or incur an extra shipping charge and order from both suppliers? Or do you reconsider your design and use a component that is available from the first company?
Furthermore, how many ‘spare’ components should you order? If you’ve worked with surface-mount components, you know what I mean. An inappropriately timed blast from a hot air pencil can send a component flying across the room. Do you really want to spend an hour searching for an eight cent capacitor?
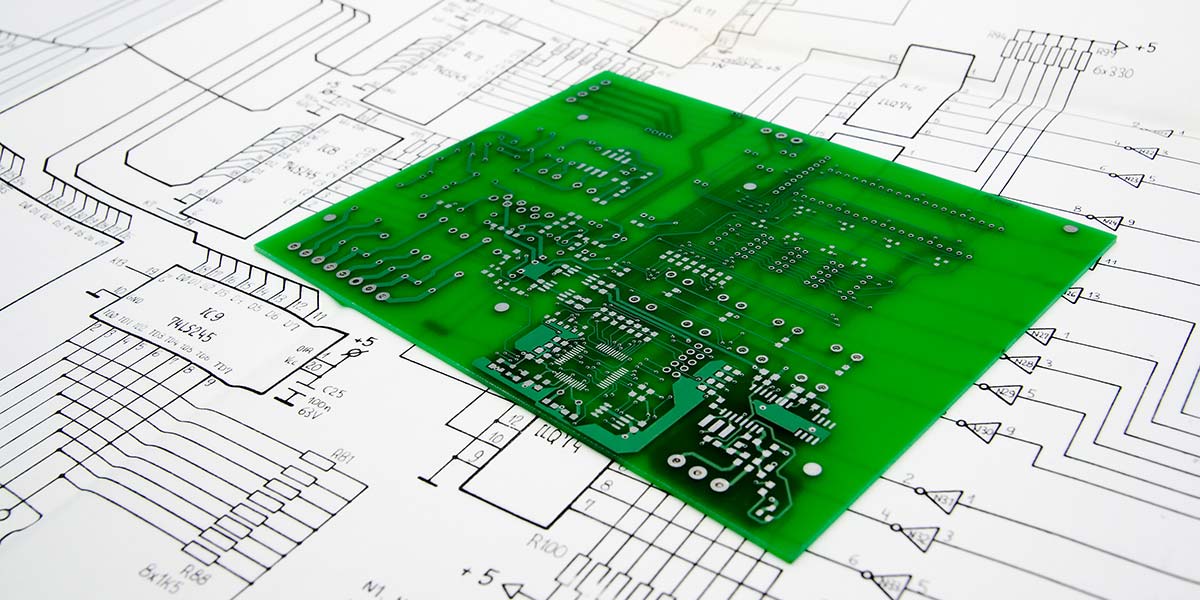
Layout
The complexity of your project may dictate a printed circuit board over a breadboard. If so, you’ll have to select from among the half dozen or so board development systems and design your boards. (I like ExpressPCB for simple projects and Eagle for complex layouts.)
Back to the headphone amp example, given the design constraints, you’ll have to decide whether to use a single board or the more expensive option of using a separate board for the power supply. In either case, you’ll also have to determine whether to mount the power transformer on the board or directly on the chassis.
Starting Over
Circuit development is about making a series of prototypes. The endpoint is never perfection, but something close enough that you can live with it — and feel good about sharing it with others. I’ve been developing circuits for decades, and have learned that, despite my best efforts, a circuit is a prototype until at least version two. Sometimes it’s as simple as forgetting to specify a trace-free zone around the bolt holes of a circuit board. Sometimes it’s a complex ground loop problem that requires a new layout.
If you’re new to the development process, start with a project from Nuts & Volts, or just one of someone elses design, and gradually work your way up to creating your own. Enjoy the journey. NV