Are you an audiophile with a yearning to build kits reminiscent of the old HeathKits? If so, then this high-end tube amp kit may be what you’ve been waiting for.
If you’re looking for an inexpensive high-powered audio amp capable of delivering hundreds of watts of raw power into a set of low-sensitivity speakers for your next house party, then this article isn’t for you. Go to Amazon and pick up a pocket-sized class D amp with remote and built-in Bluetooth for $50 and crank it up. I own one of those amps and they’re great for the application.
Full Disclosure
Thanks to Christian Magee at TubeDepot for making the kit and tubes available for me to assemble and test. I separately purchased a $40 capacitor upgrade and slightly more expensive Genalex Gold Lion PX 300Bs at $165 each and a pair of 12AU7s for $25 each.
I’m a long-time client of TubeDepot. They’re my go-to source for vacuum tubes. If Christian hadn’t sent me this kit to review, I would have probably ordered this or one of the other amp kits on my own.
I also own a few “audiophile” amps as measured by weight or cost, including a tube amp. I save it for quiet times, such as a small gathering of friends over for dinner, when I can appreciate the subtle differences between tube and solid-state amplifiers. I have friends that have amazing collections of vinyl records that they play exclusively through tube amps and speakers that cost more than my first car.
If you’re one of these people or have thought about “going tube,” then you should keep reading. I think you’ll appreciate the value proposition of this eight watts per channel single-ended stereo amp based on a pair of 300B or 2A3 triodes.

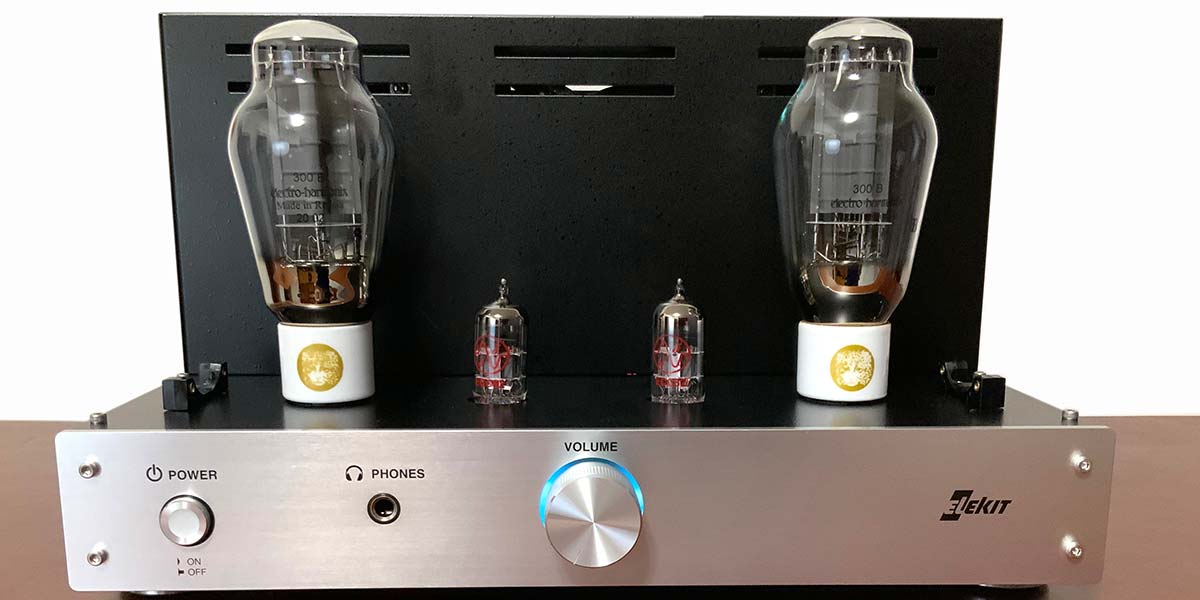
Figure 1. EleKit TU-8900 stereo audio amplifier kit with EH 300B tubes installed. Note the blue glow around the volume control, signifying 300B tubes are detected.
The stereo amplifier kit without tubes is available from my favorite tube supplier, TubeDepot for $1,495. You’ll need a pair of 12AU7s or 12BH7A dual triodes ($26-$500) and a pair of either 2A3 ($100) or 300B triodes ($240-$19,995). That’s right, a pair of WE 300Bs with engraved bases in the original boxes cost nearly $20K. Clearly, like fine wine, you can go crazy with vintage tubes.
For this review, I kept the cost down by going with a pair of $13 JJ 12AU7s and a pair of $120 Electro-Harmonix 300B EH Gold Grid tubes for a total of about $1,775. Note that the eight watt output per channel assumes a pair of 300Bs. The less expensive 2A3s will produce about 3.5 watts per channel.
TubeDepot offers over a dozen other tube amp/preamp kits, from a $300 headphone amp for your iPhone to a $2,000 upscale version of this amp.
The EleKit TU-8900 300B/2A3 SE Power Amp Kit
I’ve kept this review modular and to the point, starting with my final impressions.
The Bottom Line
I like it. As a kit, it’s a winner. Thanks to the pictorial manual with life-sized components and boards, it’s a quick and fun build. However, as kits go, this one is expensive. This isn’t your one hour blinking LED project. In the world of audio, quality is always expensive. This is a quality kit. I’ve assembled dozens of kits, including complex transceivers and power amplifiers from HeathKit. This kit is every bit as good as any of those kits.
As a tube amp, it’s another win, in part because of the excellent headphone out. The value proposition is good, considering you’re getting a kit and a quality amp. Can you find a cheaper amp from Asia already built and tested? Sure. Can you find a kit with this quality build for less? I doubt it.
If you’re looking for a fun, well-executed kit and you appreciate (and are willing to pay for) the nuances that a tube amp offers, then this kit may be for you.
The Design
This amp uses a Class A single-ended tube output and is designed to work with a preamp or other high-impedance source. In theory, at least, Class A tube amplifiers when properly biased and with a bit of negative feedback can produce the clearest, cleanest tone. One downside is that the tube is always working at maximum plate dissipation. It’s always on. This contrasts with the dual tube Class B or AB amplifier. Plate dissipation and overall power draw increases with input signal. Because of the switching between pairs, B or AB amps are often said to produce more noise.
In my experience, a Class AB amp can be cleaner than a Class A amp, depending on design. However, when it comes to listening to music, class of amplifier matters less than implementation. I can say that this Class A amp design is clean. It doesn’t add too much “tube” sound to the music.
At this point, an audiophile might wax on about color, airiness, sound stage, etc. Fortunately, I’m no audiophile. However, I know what I like, and I’ve owned or listened to some higher end systems. What I can say is that this amp performs admirably. The limitations are a function of the tube, not the support infrastructure. What more could you ask from an amp?
Specifications
I’m not big on specifications because the system with the best specifications can sound like a garbage truck backing into an alley when it’s improperly configured. With that caveat, here are the published specs:
- Power Output (eight ohm load, THD 10%): 2 x 8W (300B x 2 + 12AU7 x 2) or 2 x 3.5W (2A3 + 12AU7)
- Speaker Impedance (toggle switch selectable): 4-16 ohms
- Headphone Impedance (shorting tab selectable): 8-600 ohms
- Input Impedance: 50K
- Frequency Response (-3 DB): 7-90,000 Hz (with negative feedback enabled); 12-45,000 Hz (with negative feedback disabled)
- Tubes: 2 x 300B or 2A3, 2 x 12AU7 (ECC82) pr 12BH7A (tested 300B/12AU7, with negative feedback)
- Configuration: Class A, single-ended, self-biasing
- Heater/Filament Power: DC
- B Power: MOSFET ripple filter, one per channel
- Power Consumption: 65W (2A3s) to 100W (300Bs)
The Build
I started the clock when I first opened the triple-boxed 33.6 lb package from FedEx shown in Figure 2.
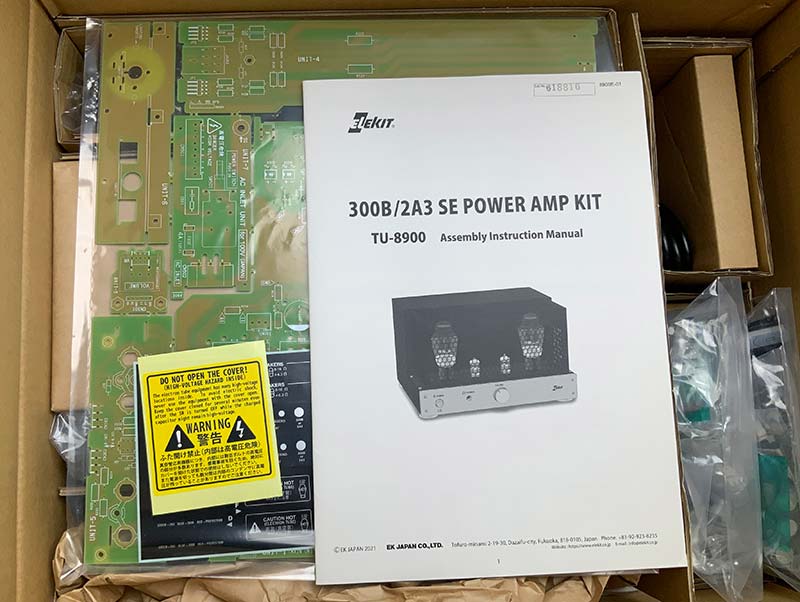
Figure 2. The kit comes packaged securely; one heavy-duty box within another. As shown here, the PCBs and parts are sealed or packaged in plastic.
Seven hours later, I was ready to test. I’m a moderately advanced kit builder, so adjust your expectations accordingly.
For skill level, I’d say if you can follow pictures and know how to use a soldering iron, you’re good to go. For testing and actual use of the amp, however, I wouldn’t give this kit to anyone under, say, 13, without close adult supervision because of the high voltages involved.
High points of the build include the unboxing of the heavy metal, boards, and components, and then reading the entire manual (Figures 2-6).
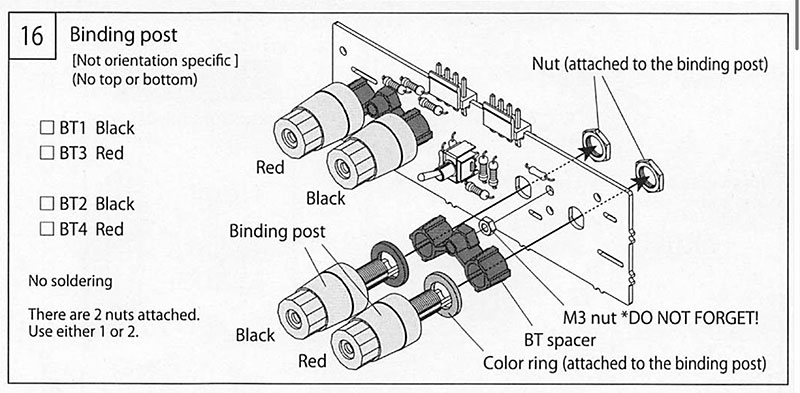
Figure 3. Step 16 from the instruction manual. If you can follow this illustration, then you can follow any other step within the instruction manual.
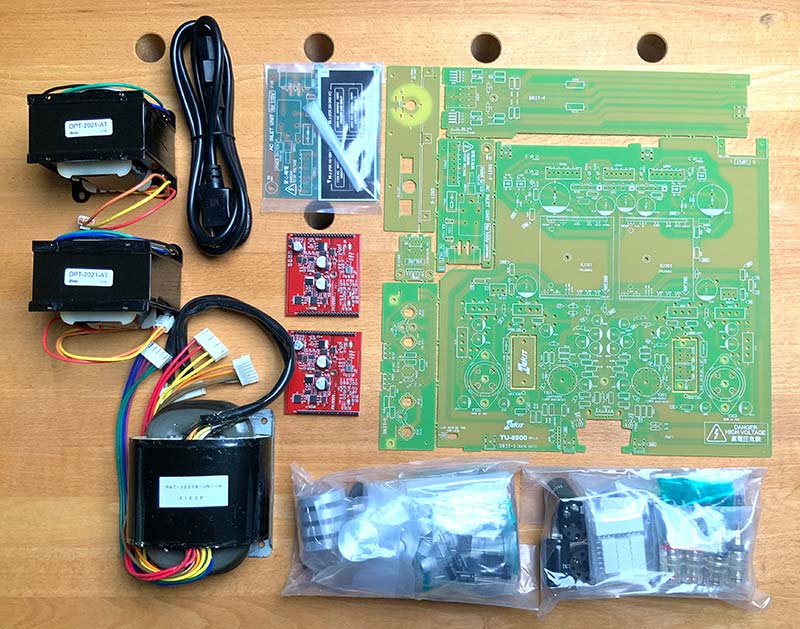
Figure 4. Everything but the chassis is laid out on my workbench. Heavy iron to the left; main circuit board to the right. Parts in plastic bags below. The red PCBs are made in Japan.
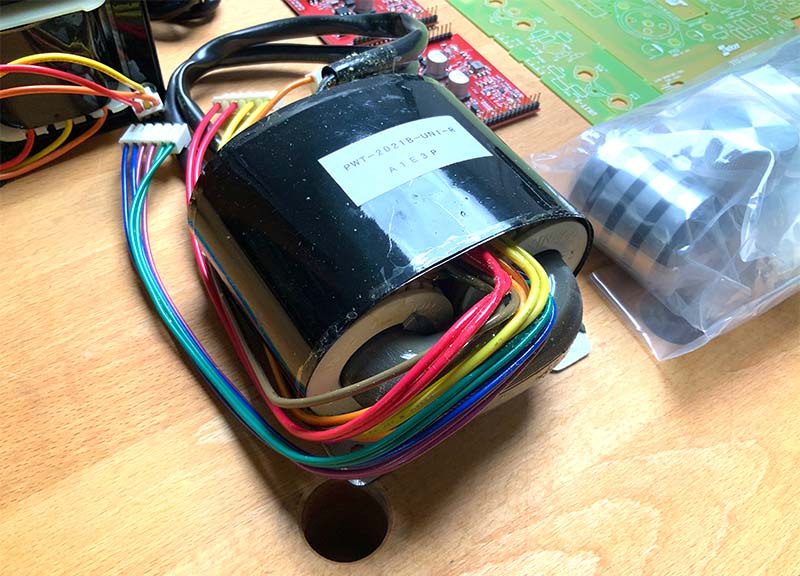
Figure 5. The power transformer. That’s a lot of iron for the amp’s 100W power requirement.
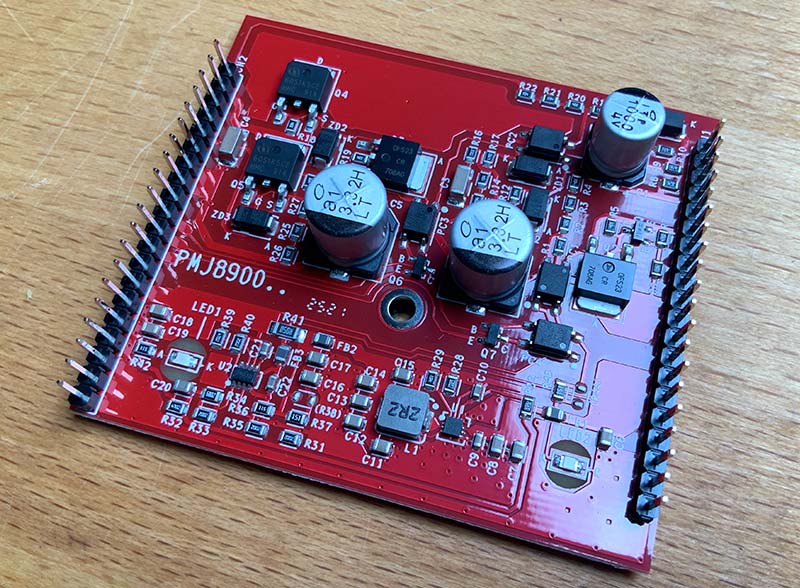
Figure 6. One of two fully assembled modules that control the tube bias and voltage setting for specific tubes, speed of startup, and overcurrent protection.
Note the instruction manual with full-sized illustrations, such as the speaker out board shown in Figure 3.
I then carefully snapped the sub circuit boards from the large board and filed down the sharp barbs remaining (Figure 7), then sorted the parts into a few aluminum muffin tins (Figure 8).
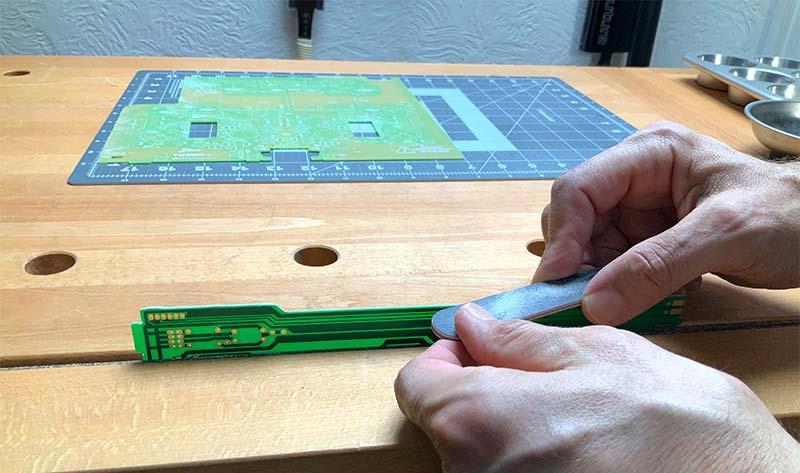
Figure 7. Taking off the rough edges of PCB pieces with an emery board so that I won’t get cut later during assembly.
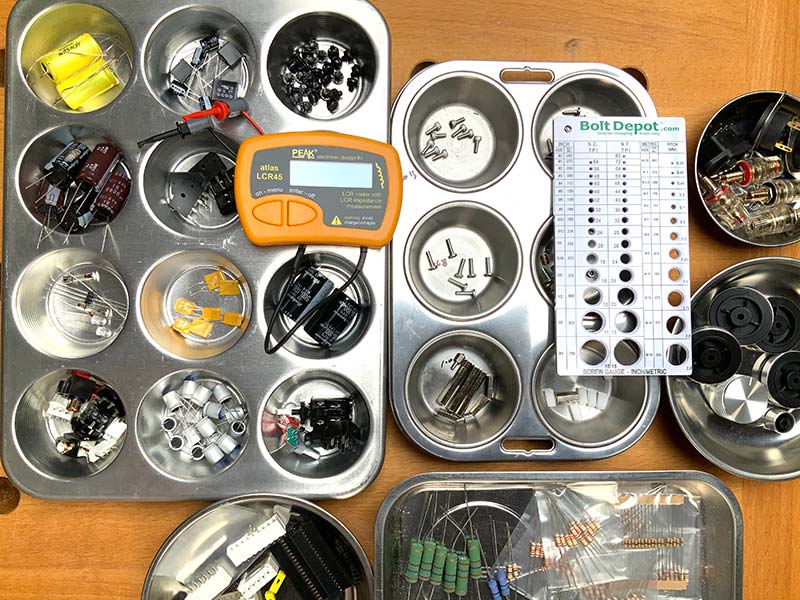
Figure 8. Laying out parts in aluminum muffin pans and magnetic bowls. An LCR meter is great to identify capacitor values and the screw gauge helps identify hardware.
You’ll find working with the smaller board goes smoother if you use a board holder that allows you to flip between sides easily (Figure 9).
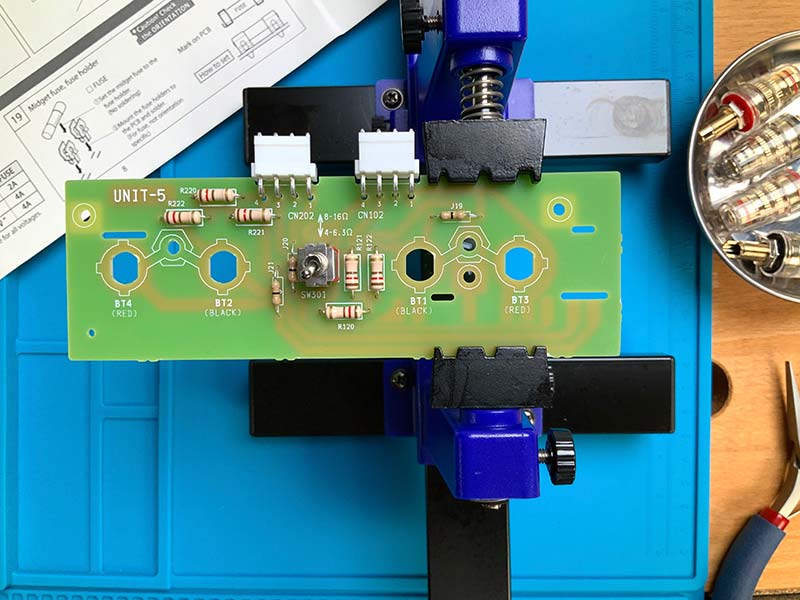
Figure 9. Inserting components into Unit 5, which is the output panel. The center switch enables you to select four or eight ohm output.
I’m also in the habit of checking my work with an inexpensive electronic microscope (Figure 10) as each board is completed.
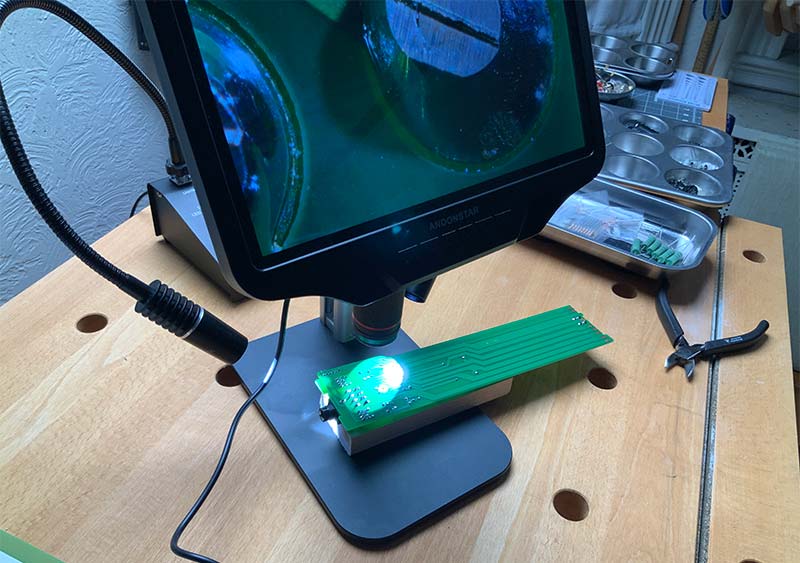
Figure 10. Using a 200X microscope to check solder joints.
With all the boards populated (Figure 11), the next step was to attach the sub boards to the main board as in Figure 12.
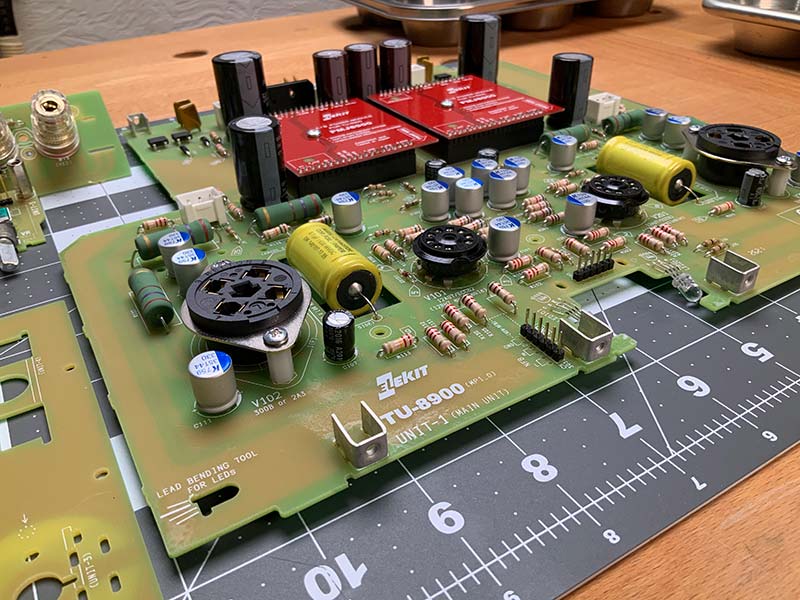
Figure 11. Populated main board.
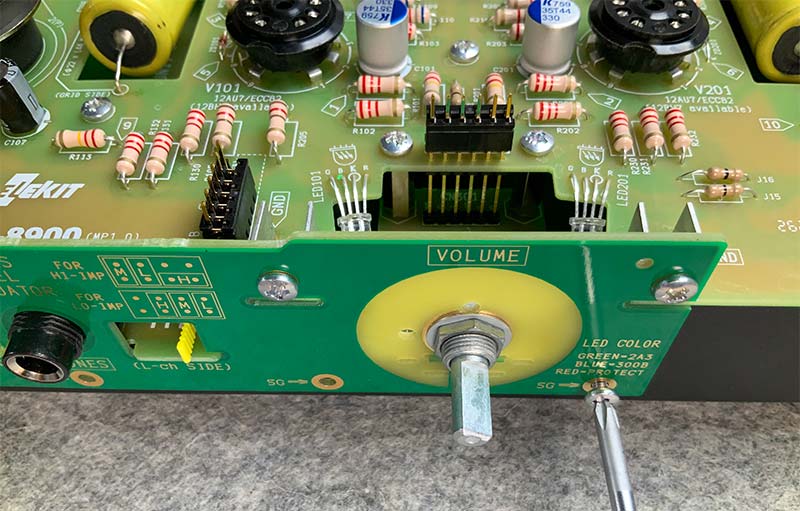
Figure 12. Attaching front panel control board for volume control and headphones out. Note the headphone output impedance selector to the right of the output jack.
Secure the large tube sockets (Figure 13).
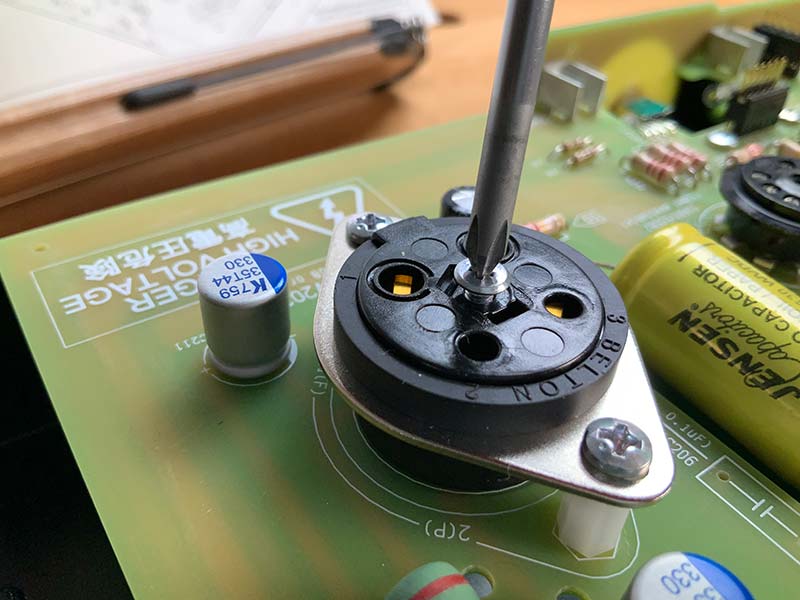
Figure 13. Securing a 300B/2A3 tube socket.
Given the problems resin can cause to circuit boards, I use rubbing alcohol or similar solvent to remove any solvent between the traces (Figure 14).
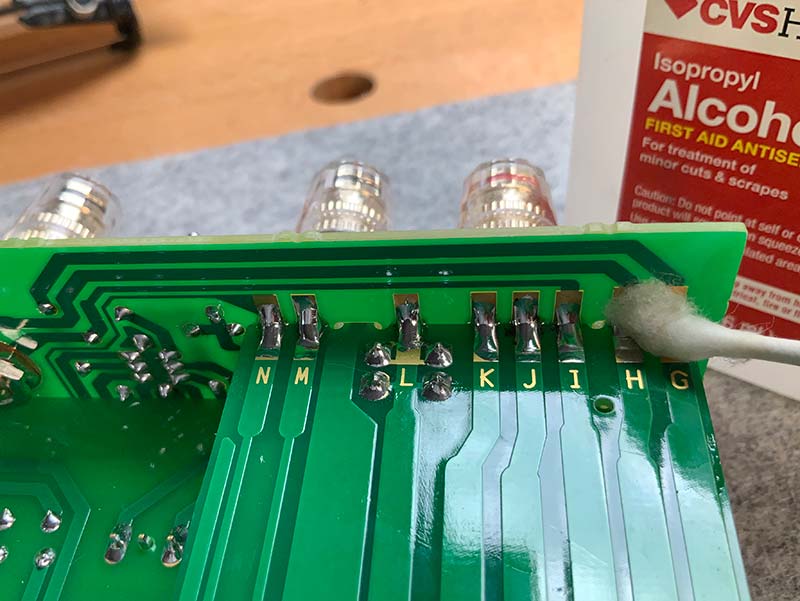
Figure 14. Removing flux with rubbing alcohol.
With the electronics complete, the next steps are to assemble the chassis, drop in the circuit board, and hook up the heavy metal (Figures 15-20).
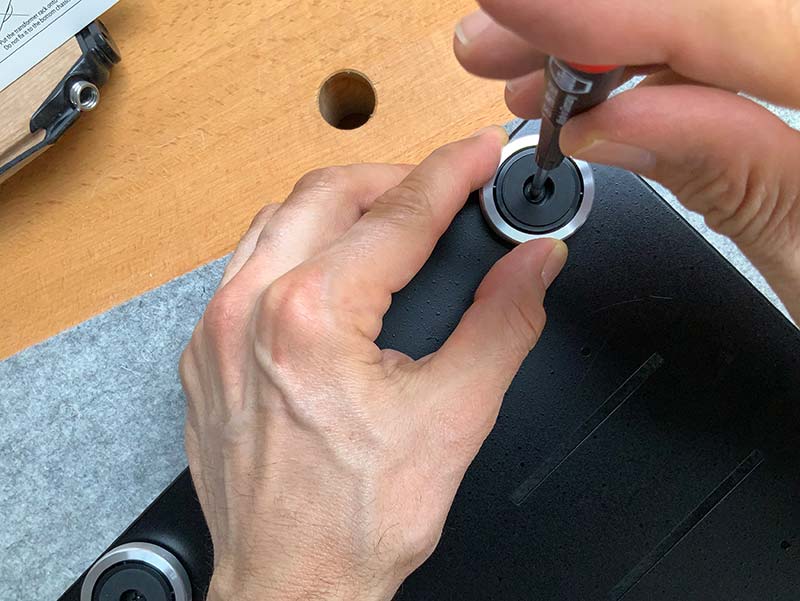
Figure 15. Attaching feet to the chassis bottom.
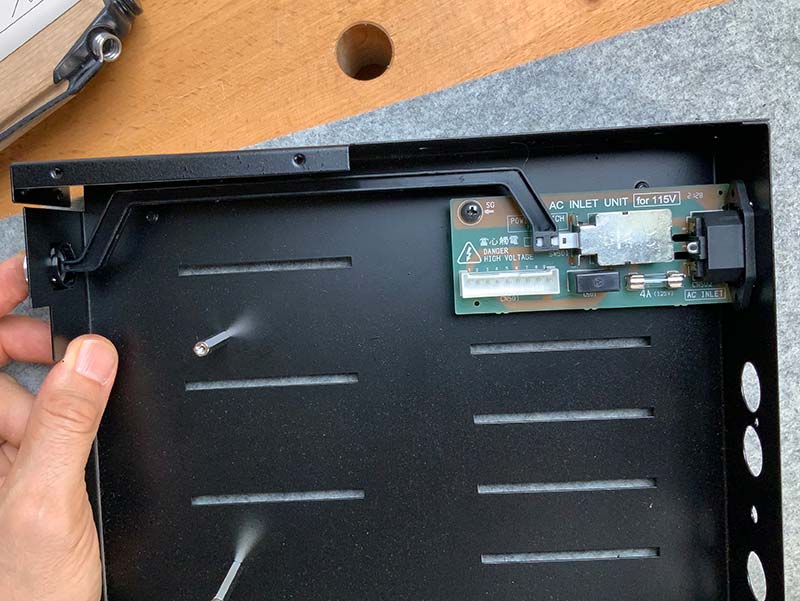
Figure 16. Attaching the on/off switch module to the chassis.
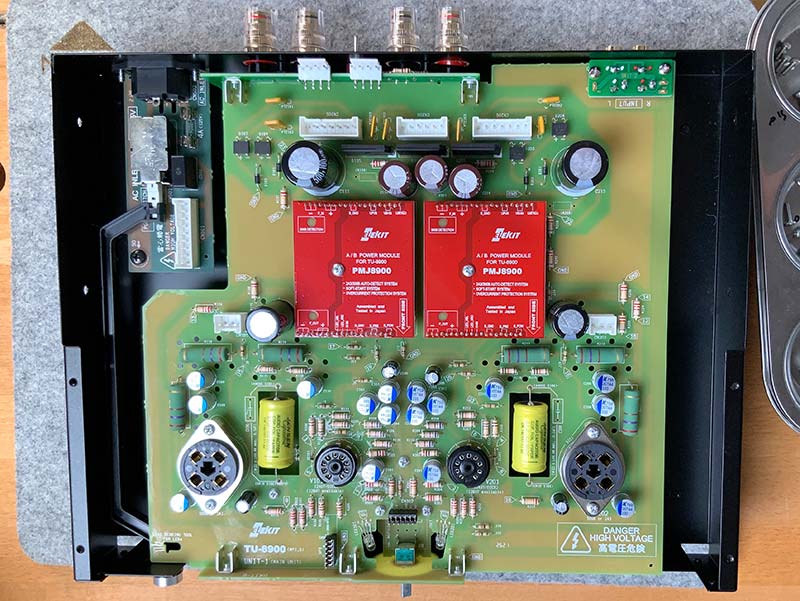
Figure 17. Mounting the main board into the chassis.
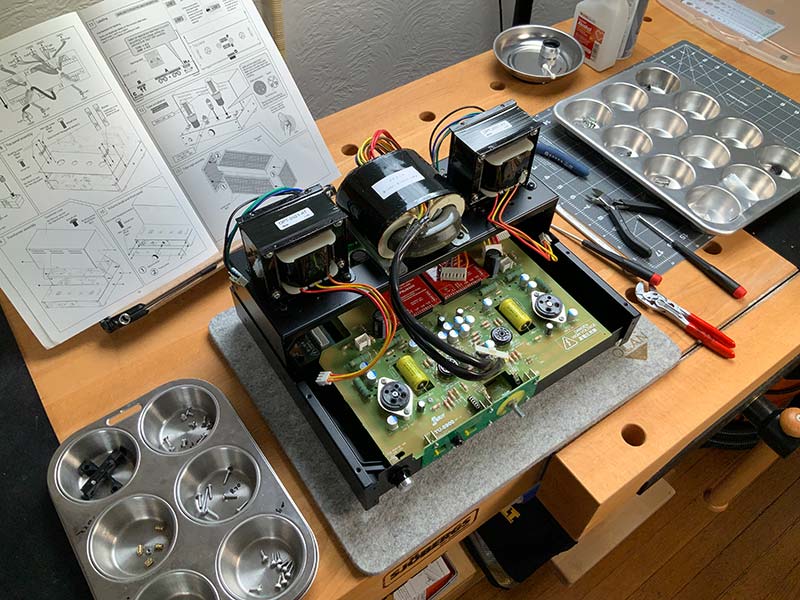
Figure 18. Adding the heavy metal: the power and two audio-out transformers.
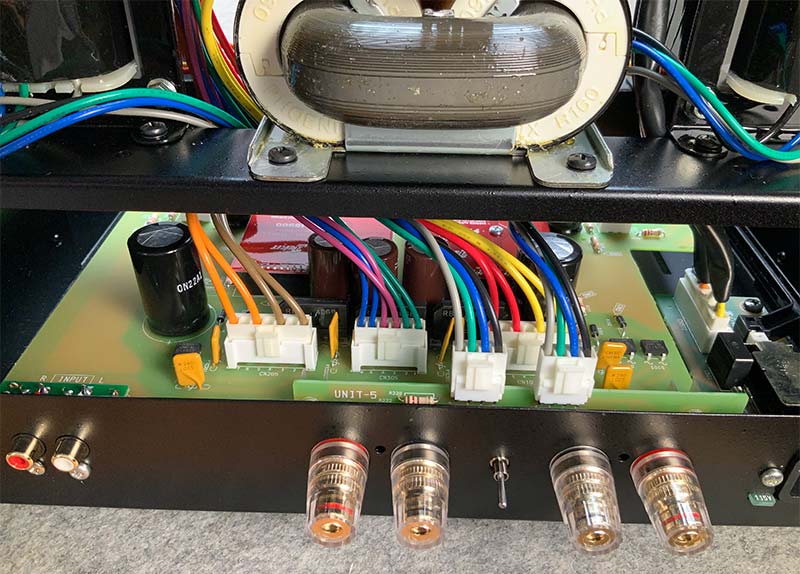
Figure 19. Rear view of the chassis, with speaker out jacks, impedance switch (center), and audio input jacks (left). Note the power and audio transformer connections on the motherboard.
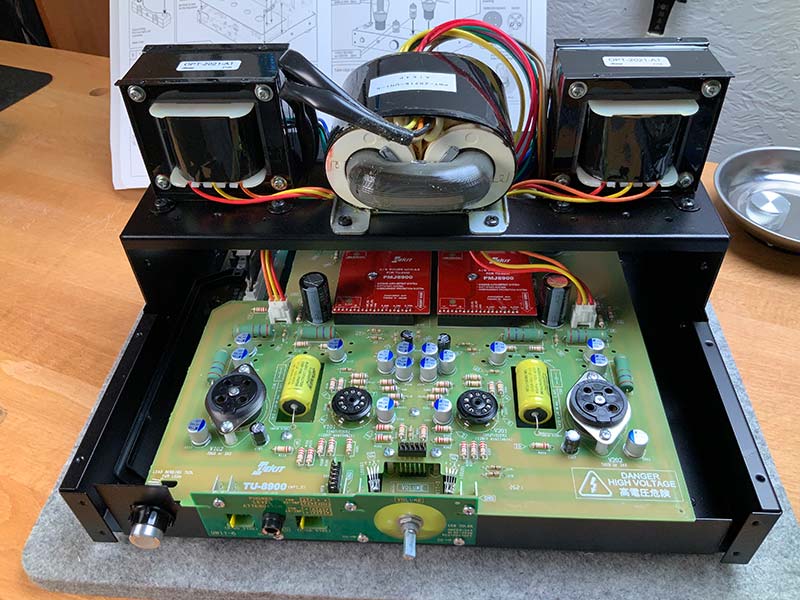
Figure 20. Front view of the chassis, with on/off button, headphone impedance selection pins, headphone jack, and volume control.
After assembling the kit, I brought the amp to one of my workstations and slowly brought up power and monitored power draw (Figure 21).
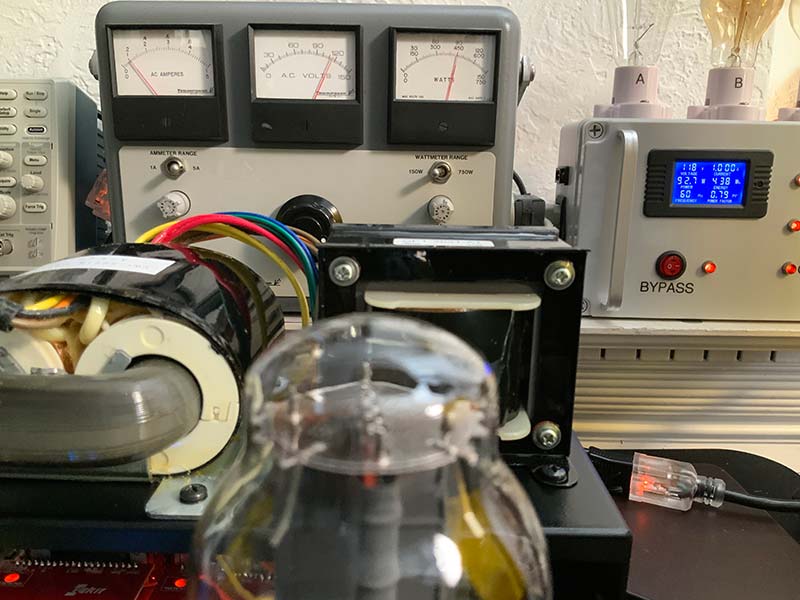
Figure 21. Initial burn-in. Note the use of a line isolator, a variac, a current limiter, and a two channel/eight ohm dummy load.
I checked the indicator LEDs on the PMJ8900 cards and the front panel lights; all indicated the amp was configured for 300B tubes.

Figure 22. PMJD power modules showing 300B tube detection. Note test points printed on the circuit board.
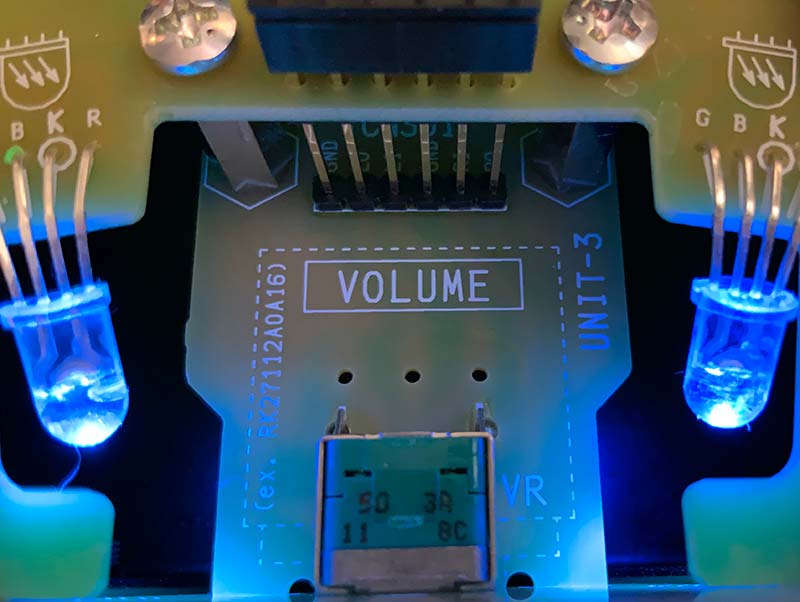
Figure 23. Color LED showing blue light signal that 300B tubes are detected.
I then tested the amp with a scope, dummy load, and signal generator (Figures 24-25).
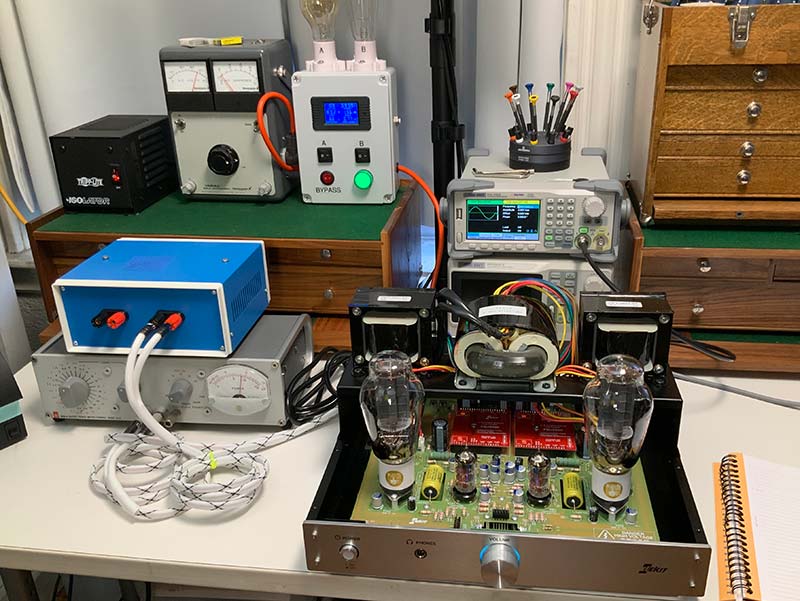
Figure 24. Power output test setup. Line isolator, variac, current limiter, signal generator, dummy load for one channel, and power meter for the other.
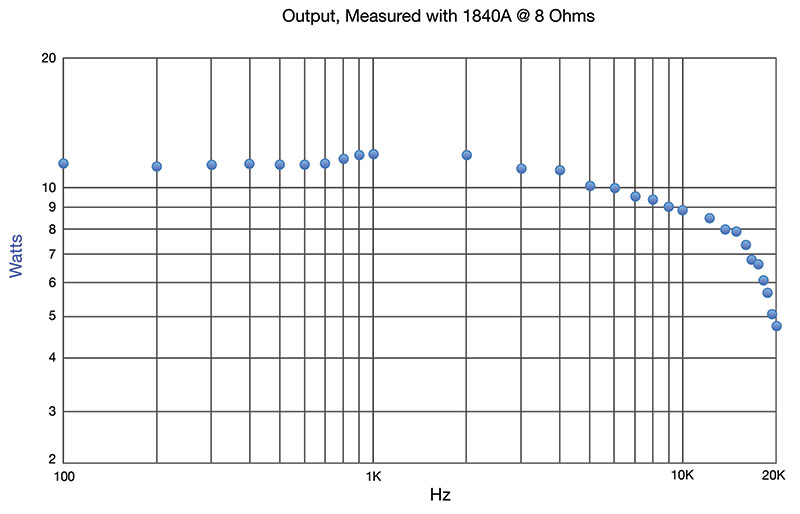
Figure 25. Power vs. frequency plot, single channel. Log-log plot. The curve appears much flatter on a linear plot.
The graph revealed more power per channel than I expected, at almost 12W/channel vs. the published 8W/channel. At this point, I switched out the stock tubes with a modestly more expensive set that I purchased. Although the tubes were not yet burned in, I couldn’t distinguish sound from the more affordable tubes. The more expensive tubes do look more impressive with a little more artwork on the base, but I’d save your money.
Perhaps there’s a noticeable difference with the $20,000 300Bs, but I’ll never know. Finally, I screwed down all of the support brackets and sides of the amp (Figure 26) and attached the cage (Figure 27).
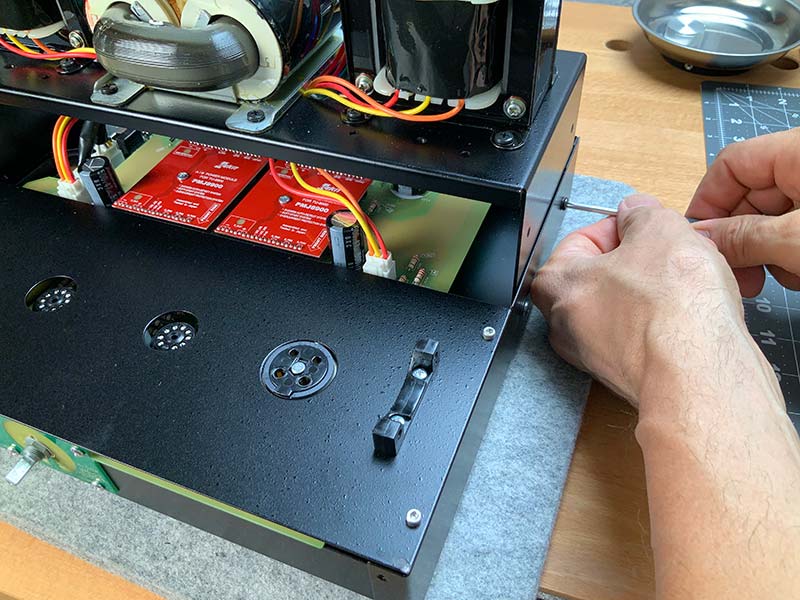
Figure 26. Securing chassis top and sides.
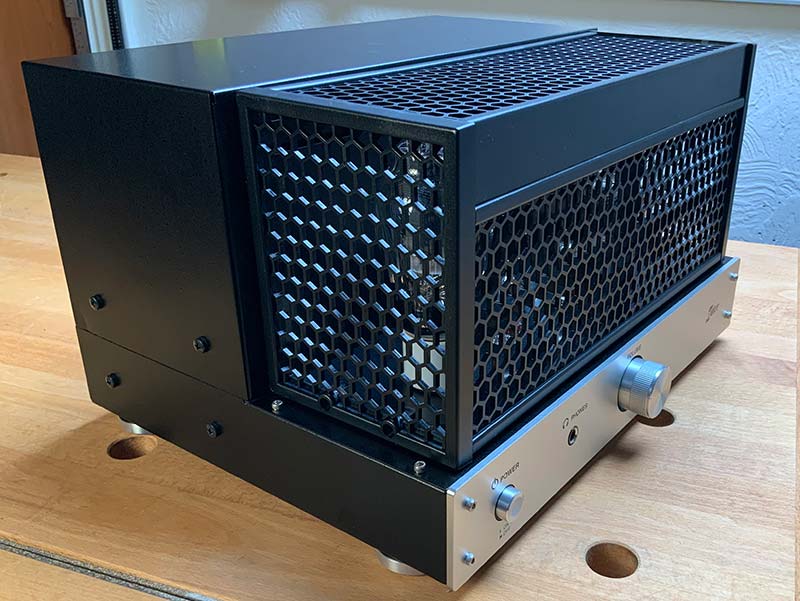
Figure 27. Completed amp with cage installed.
After a day-long burn on my workbench, I put the amp into service (Figure 28).
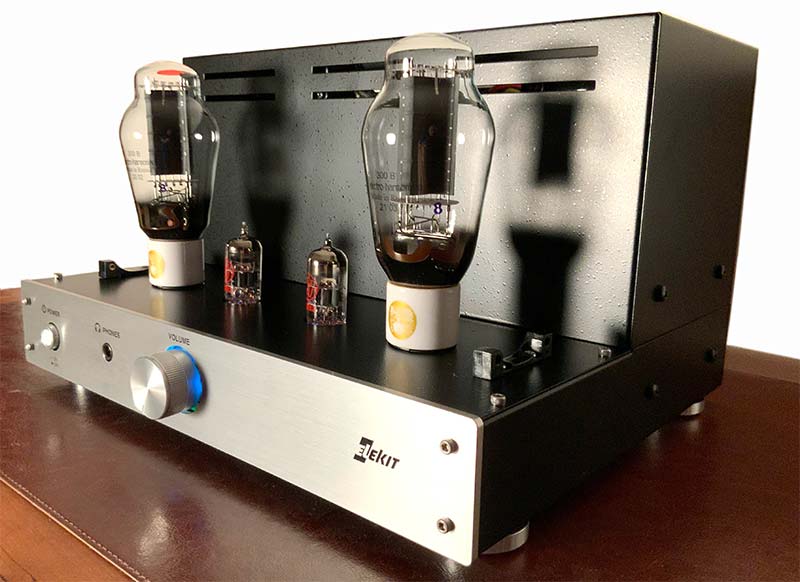
Figure 28. Cage-free amp on my bedroom dresser connected to a McIntosh C22 preamp and set of vintage Spendor BC1 studio monitors (not shown).
It’s very cool looking at night, with the tubes glowing and the blue highlight around the volume knob.
More importantly, I’ve been listening to the amp in the evening, especially through the headphone jack. I’m hooked on the amp, if only for the headphone amplification.
Unlike most other amps I’ve work with, the audio for the headphones is derived from the output of the 300Bs and not from an earlier stage. As a result, the signal path includes all the tubes and all of the nuanced ‘flavors’ that they impart to the music.
Evaluation
If you enjoy (and can afford the premium associated with) kit building and appreciate (and can afford) the nuances of tube-amplified audio, then you should consider this kit. My ratings are (1-5, with 5 being the best):
Value: 5
Fun Factor: 5
Features: 4
Aesthetics: 4
Ease of Build: 5
Build Quality: 5
Sound Quality: 5
What I Liked:
- Quality components and boards.
- Easy to follow directions.
- Headphone output from the final stage, which imparts the full tube effect to the music.
- Sound quality is airy and has the texture and stage presence that you’d expect from a pair of 300Bs.
- The kit is a blast to assemble over a weekend.
What Could Be Better:
- If you’re into cages (I’m not), then you may find the non-metal cage only okay. A metal cage is available with a more expensive version of this kit.
- A detailed schematic and description of the two preassembled PMJ8900 boards that control the 2A3/300B auto-detect, the soft-start, and overcurrent protection would be great.
- A balance control would be useful. Of course, this amp is intended to be used with a preamp with balance controls. Still, one on the amp would be useful with headphones.
- I’d prefer a simple, front panel mounted on-off switch for power. I’m not sure how the plastic switch linkage would hold up to, say, a five year old repeatedly jamming his thumb into the current button.
- The header mechanism to select headphone impedance is a bit awkward. One slip and a shorting pin could be lost somewhere inside the unit. A sliding switch would be easier to use.
There you have it. If you’re looking for a high-end tube amp kit, consider this for your next project. NV