 |
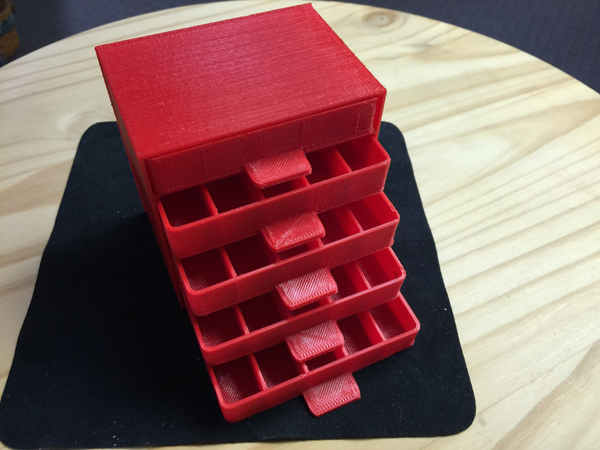
| FIGURE 1: Resistor Box |
I've found many uses for my da Vinci 3D printer, but recently saw a design on Thingiverse.com that piqued my interest. It was a small storage box with drawers (refer to Figure 1). Since then, I've seen many different storage boxes for electronics including pill boxes and large plastic cases with drawers, but one thing was always wrong with them. Either they didn't fit all the parts I had or they required lots of inserts to make the drawers fit the parts. Why couldn't someone just design a box especially for electronic components? With my 3D printer, I realized I could.
I started with a design from Thingiverse.com and imported it into Tinkercad design software (which is free at Tinkercad.com). I then went to work making drawers that fit what I wanted. My thought was to make a box to contain all the parts for one design. Then, when I want to build that design, I could just pull out the box and go to work.
The first box I created held leaded devices like resistors and capacitors, but it could just have easily held strips of surface-mount components. The difference was it took up way less space and I could print any arrangement I wanted. Because the boxes were so small, I could glue them together for even more customization. I had one larger parts drawer that I purchased at Home Depot and stored all the parts to build a few Microchip PIC based CHIPINO modules, but the size was far larger than I needed. So, I decided to create custom drawers that could hold everything from the circuit board all the way down to the individual LEDs and 1/8 watt resistors. When I was done, it saved an incredible amount of space.
 |
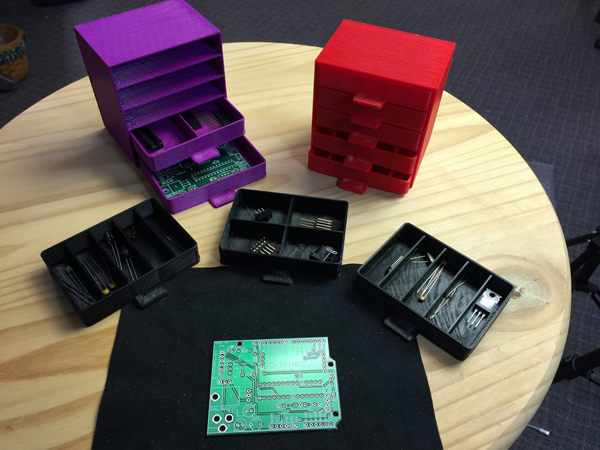
| FIGURE 2. Large drawer storage vs. small drawer storage. |
The purple box shown in Figure 2 contained four different drawer layouts. I was able to fit enough components in the drawers for at least five CHIPINO modules.
Figure 3 shows some of the drawers. One held just the circuit board, while the larger 28-pin PIC16F886 and 28-pin DIP sockets were in a separate drawer that was divided into two sections. I then made a four-section drawer that held some of the larger components. The final two drawers had five sections each to hold resistors, diodes, regulators, capacitors, and many other parts. In the end, all the parts were contained in one small box with five drawers.
 |
| FIGURE 3: CHIPINO module storage box. |
The other advantage to this setup was I could customize the box for more drawers or wider drawers as needed because I owned the files and could print anything I needed on my printer.
I could also use a little super glue (or better yet, acetone) to fuse the boxes together to make my own custom size set of drawers. If I need one large drawer, I could do that too. If I need a handy way to carry the boxes instead of gluing them together, I can get a wood case like the one in Figure 4 that I picked up from Michael’s craft store for $4. It has handles on the side for carrying, and large openings for drawers. I 3D printed some large drawers that fit the bottom row and then put the small box of drawers in the upper slots. This way, I could keep designs stored away in an organized manner, rather than just components.
This is only limited by your imagination because you can customize the storage boxes any way you want once you have a 3D printer.
Another option is to 3D print the part number in the bottom of the box. That way, when the slot is empty, you know exactly what was in there. You could just put a paper note or sticker in the bottom instead, but 3D printing the part number is free and it will never get lost.
Now, add to this all the screws, nuts, and stand-offs you may have in your collection of electronic components. If we used those large box drawers for all the various components, we’d have more boxes than space. Because of that, I have all the hardware collected in one drawer. Then, I have to sort through it to find the part I need.
Being able to quickly build a custom drawer size that is much smaller allows me to organize the various hardware and take up less space.
I can also use different color plastics to make the drawers and boxes. Red can be resistors, blue for capacitors, black for hardware, etc. The options are endless.
I’ve gotten to the point where I spend half my time sorting through all the various storage containers and boxes that hold my large collection of electronic parts rather than building electronic projects. So, over time, I hope to 3D print a whole new storage system for my lab. It should take up a whole lot less space.
I put my original drawer design up on my Thingiverse account so anybody can download the files and print them. I also made the designs public on Tinkercad so anybody can modify them to fit their specific needs.
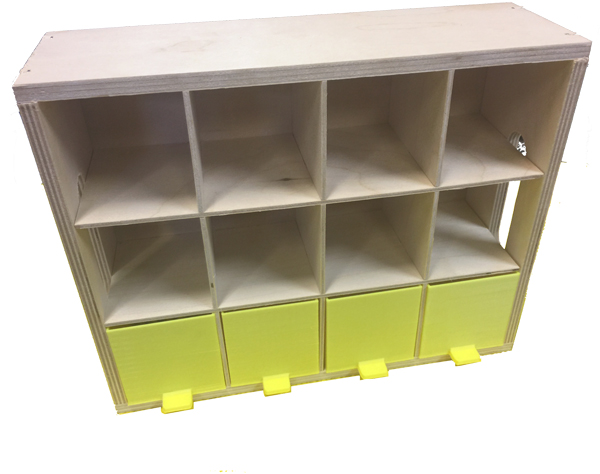 |
| FIGURE 4: Wood storage box from Michael's craft store. |
I have a YouTube video showing other 3D print projects. You can see them at www.youtube.com/user/beginnerelectronics.
If you have a 3D printer question or project idea, send me an email at [email protected] and I’ll try to help. NV
Resources