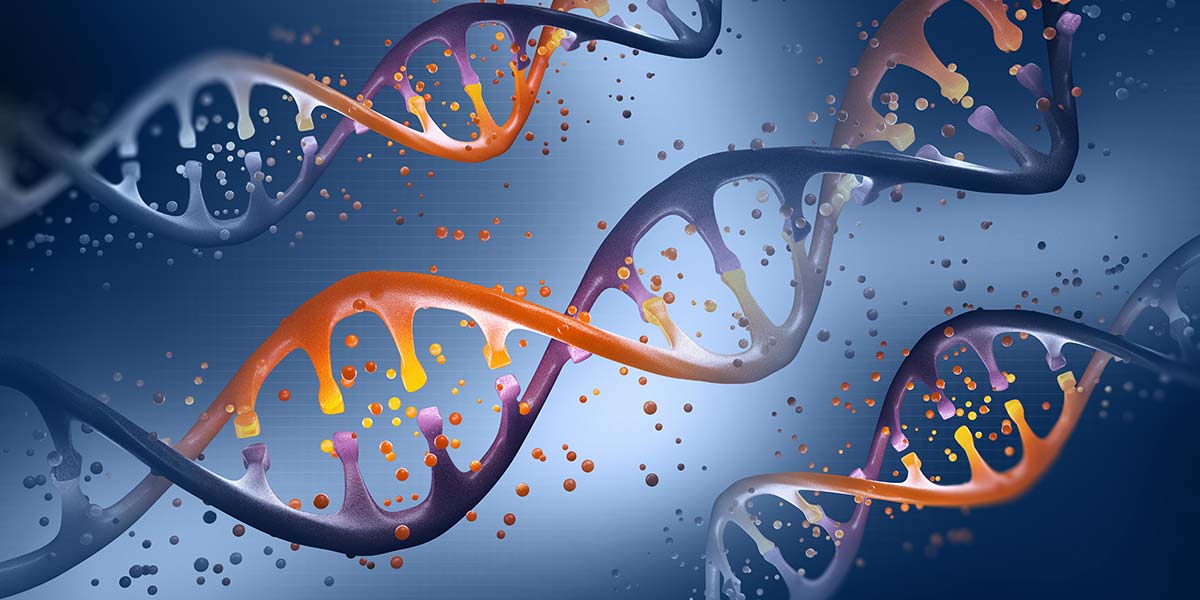
In this DIY Biotech article, we’ll explore how you can modify E. coli bacteria to produce proteins of your choice through genetic engineering: the direct manipulation of an organism’s genes using biotechnology. We’ll also review and tear down the DNA Playground: an affordable all-in-one hardware platform that’s simple enough for middle-school students to use to genetically engineer bacteria.
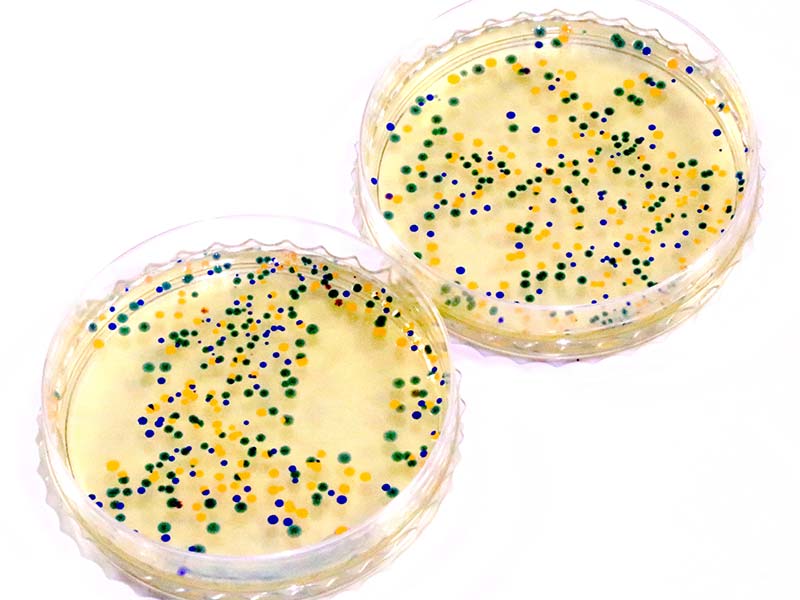
PHOTO 1. The desired outcome of our genetic engineering experiment: petri dishes colonized by antibiotic-resistant E. coli that express a color dye gene.
INTRODUCTION
DNA — whether in the nucleus of a skin cell on your body or in a single-celled organism (such as the ubiquitous E. coli) — codes for proteins. The goal of genetic engineering is to modify this DNA coding so that new proteins are created, ranging from medicines such as insulin to toxins that selectively kill beetles.
In the experiments described here (based on $33 genetic engineering kits), we’re going to insert DNA into a single-celled organism which is a non-virulent strain of E. coli. Instead of a toxin or medicine, we’re going to genetically engineer E. coli to create a readily-observable innocuous color dye.
There are a number of sources for the biological consumables used in genetic engineering experiments. The source for this article is Amino Labs (Amino.bio): a Canadian startup company with roots at MIT. Unlike some other sources for biologicals, Amino Labs does not require proof that you’re a teacher or a researcher at an institution.
This exploration of genetic engineering also features a hardware system sold by Amino Labs: the DNA Playground. The shoebox-sized hardware isn’t necessary, but it makes genetic engineering accessible to anyone who can operate an Easy-Bake Oven. I purchased both the $33 kits and the $300 DNA Playground hardware directly from Amino Labs.
Even if you elect to purchase consumables and hardware from other sources, it’s worth your time to visit the Amino Labs website to view tutorials on genetic engineering and other resources. There is also an inexpensive UDEMY.com course — handsonbiology — that features Amino Labs products and processes. This course is free with the purchase of the DNA Playground hardware.
THE SCIENCE
Key STEM Concepts
The key STEM concepts explored in this article are:
- DNA codes for proteins.
- Cellular DNA can be modified by inserting a new DNA string or plasmid DNA into the native DNA string, and this modification can result in new or modified protein(s).
- Plasmid DNA insertion is facilitated by a temporary increase in cell membrane permeability, which can be induced by manipulating the cellular environment.
- Plasmid DNA that codes for antibiotic resistance as well as other protein(s) allows for the selection of a successfully engineered cell.
You may recall from previous articles in this series that a virus can infect a cell by splicing their plasmid DNA into a cell’s native DNA. In this regard, in the following experiment, we are emulating some of the functions of a virus.
Agar
We’ll be growing E. coli on agar: a pure, seaweed-based gelatin. We’ll be working with petri dishes filled with pure agar, as well as with agar mixed with the antibiotic ampicillin.
E. coli
E. coli is a common single-celled bacterium. Some strains of E. coli can be deadly if ingested. Others — such as the strain K-12 used in this and other commercially-available genetic engineering experiments in the K-12 educational level — pose no health risk to healthy individuals, even if ingested.
Ampicillin
The antibiotic ampicillin kills E. coli bacteria by blocking the process of cell wall synthesis during replication. E. coli that have been successfully transformed with a DNA plasmid that codes for ampicillin resistance can grow on agar mixed with ampicillin. Because DNA that codes for ampicillin resistance accompanies plasmid DNA that codes for other desirable proteins, ampicillin resistance serves as a marker for successfully engineered cells.
Transformation
Coaxing the plasmid DNA into an E. coli requires a temporarily porous cell membrane. The cell membrane can be made competent or porous by suspending the E. coli in a transformation buffer: a solution with a high concentration of calcium.
Transformation of the E. coli by plasmid DNA involves mixing the plasmid DNA with competent E. coli and then administering a thermal shock. This shock involves a carefully timed sequence of 0°C, 42°C, and back to 0°C.
EXPERIMENTAL DESIGN
The experimental design (which is detailed in the manual accompanying the kit) is to create both selective (agar + ampicillin) and non-selective (agar only) plates for growing E. coli. Next, non-selective plates are used to grow fresh E. coli. Recall from previous articles that fresh, rapidly growing bacteria take up plasmid DNA much better than old, dormant bacteria.
Next, the E. coli are made competent with a transformation buffer and then transformed with a precisely timed temperature shock treatment.
EQUIPMENT REQUIRED
- DNA Playground or equivalent
- Microwave oven
The DNA Playground is a compact, integrated genetic engineering lab in an approachable design. Packaged in a playful yellow and white plastic housing (as shown in Photo 2) is a temperature-controlled heating area for up to four 1.5 uL tubes, a cooling area for four 1.5 uL tubes, and a color touchscreen controller/display.
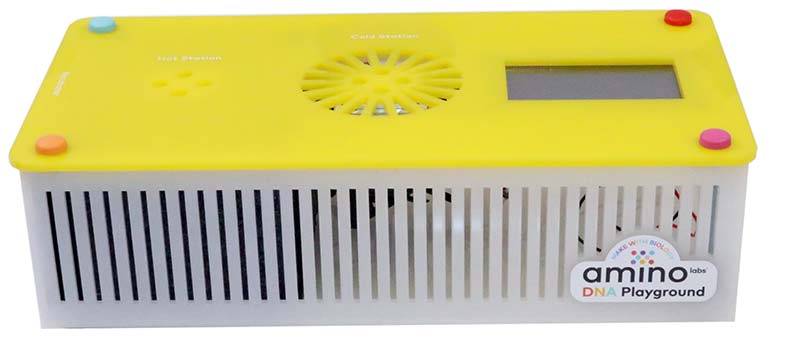
PHOTO 2. DNA Playground top view showing hot area (left), cold area (center), and color touch screen controller/display (right).
Photo 3 shows the incubator component of the DNA Playground. The incubator chamber can maintain up to four small (6 cm) petri dishes or two standard 10 cm petri dishes at 37°C.
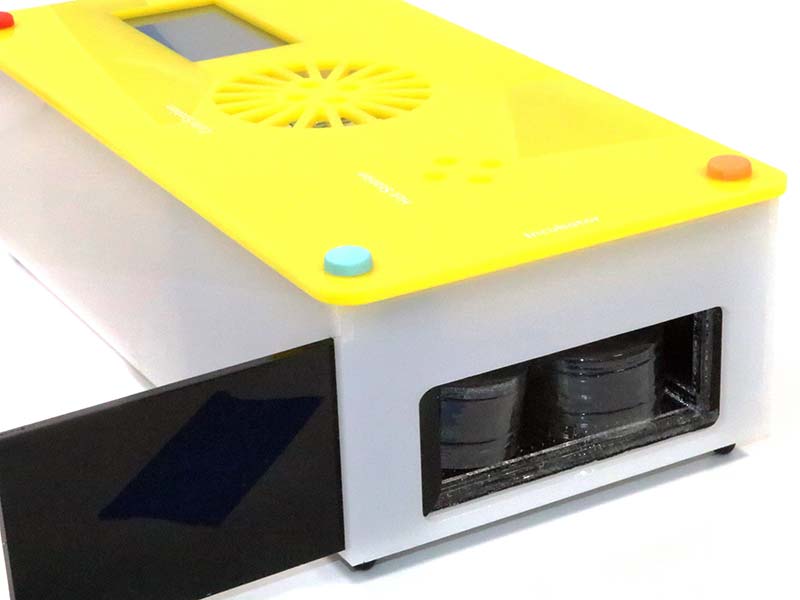
PHOTO 3. DNA Playground left rear side view showing incubator chamber and sliding door.
Lacking the DNA Playground hardware, you could purchase a hot plate and beakers, full-sized incubator, ice bath, accurate thermometer, and timer. However, the cost of a full-sized desktop incubator is at least as much as the DNA Playground. A more reasonable approach is to identify a warm place in your home to take the place of the incubator and use hot water from your kitchen sink for the hot water bath.
The advantages of the DNA Playground hardware are repeatability and standardization. In a classroom with multiple DNA Playground units, it’s easy to compare results across devices. Similarly, the computer-controlled temperature sequences are easily repeated.
The microwave oven is required to heat the water to make agar. It’s possible to use a double boiler instead, but a microwave oven is much faster, easier to use, and safer.
CONSUMABLES
Amino Labs Genetic Engineering Kit
The Amino Lab Genetic Engineering kit (Photo 4)
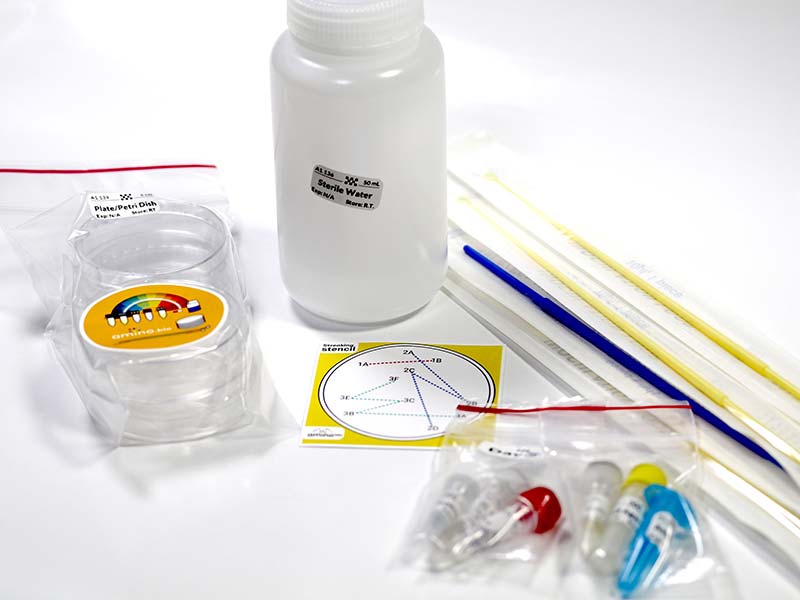
PHOTO 4. Amino Labs Genetic Engineering kit.
contains the following consumables:
- Nalgene bottle with 50 ml sterile water for making agar gel
- Ampicillin capsule to make agar + ampicillin gel for petri dishes
- Petri dishes (five) to grow and hold the E. coli
- Nitrile gloves for safety
- Plate streaking stencil to guide placing E. coli on the agar dishes
- 1 ul and 10 ul plastic loops for smearing E. coli on the agar dishes
- Plasmid DNA that codes for dye proteins and ampicillin resistance
- Calcium transformation buffer
- Agar powder to mix with hot sterile water
- E. coli cells (standard and control)
- Recovery media to help E. coli recover after the thermal shock
Note that the E. coli must be refrigerated at 4°C and the DNA plasmid stored at -20°C or lower. A home refrigerator/freezer will do for a week or two. Just make certain small children can’t get to the small 1.5 uL tubes. There is probably more of a health risk from ingesting the tubes than from their contents.
THE EXPERIMENT
The experiment outlined here is detailed in the manual accompanying the kit. In addition, there is a freely accessible simulation of the experiment available online at the Amino Labs website. There are five basic steps:
1. Create Agar Petri Dishes
Using the microwave, heat the container of sterile water to boiling. Add the agar powder and carefully mix to create liquid agar. Half-fill two petri dishes with pure agar and set aside. Next, dissolve the ampicillin in the remaining agar and half-fill the remaining three petri dishes. Only transformed E. coli will grow in the ampicillin + agar plates.
2. Grow and Streak E. coli
Perhaps the most difficult step in the experiment is streaking the agar petri dishes with E. coli, as illustrated in Photo 5.
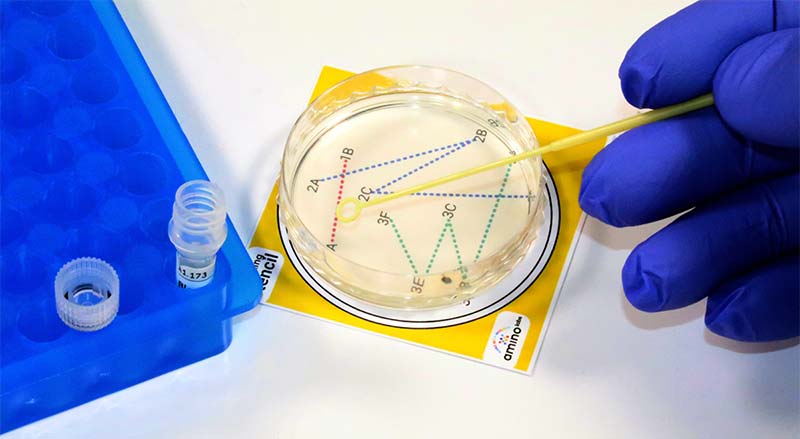
PHOTO 5. Streaking agar petri dish using stencil.
With each of the five petri dishes in turn, take a 10 uL loop, dip it in the tube of E. coli, and follow the first line of the stencil pattern. Next, take a clean loop and drag it through the first line of E. coli. Repeat with a third loop, dragging a clean loop through the second line of E. coli. Place the plates in the incubator, set to 37°C, and store overnight. Photo 6 shows the touch screen interface to the incubator, with the 37°C button in orange.
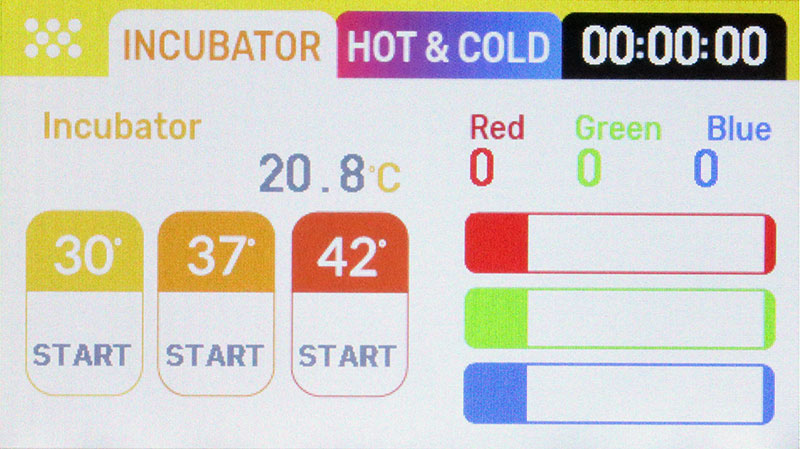
PHOTO 6. Incubator interface.
The idea of streaking is to grow separate colonies of E. coli. Photo 7 shows the result of streaking a pure agar petri dish with E. coli.
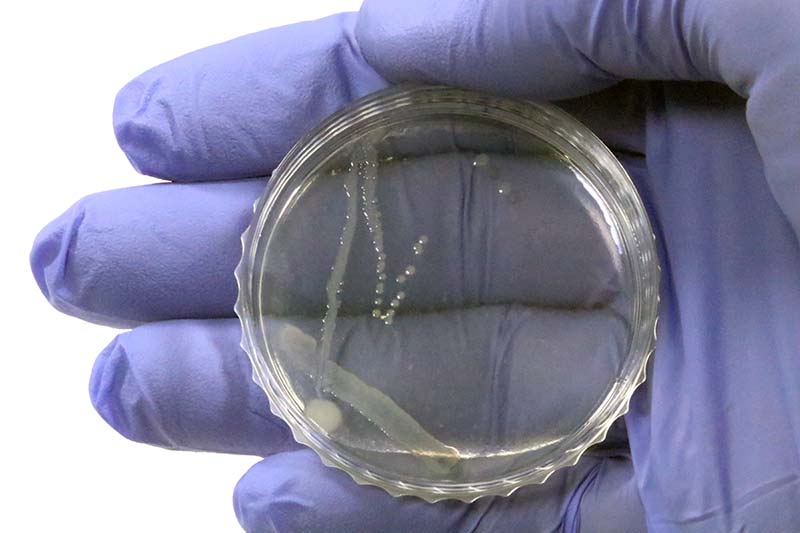
PHOTO 7. Result of streaking a pure agar petri dish with E. coli.
You can see E. coli growth corresponding to the first, second, and start of the third streak of E. coli. Streaking of the agar + ampicillin plates should result in no growth because the E. coli have not yet been transformed. The agar/ampicillin plates serve as controls to verify that the ampicillin is lethal to the K-12 strain of E. coli.
3. Make Competent E. coli
Using a loop, scoop up E. coli from a pure agar petri dish and add it to the tube of transformation buffer. With the tube in the cold station of the Playground DNA platform set at 4°C, mix the E. coli and buffer solution.
Photo 8 shows the tube of transformation buffer and E. coli during the mixing process.
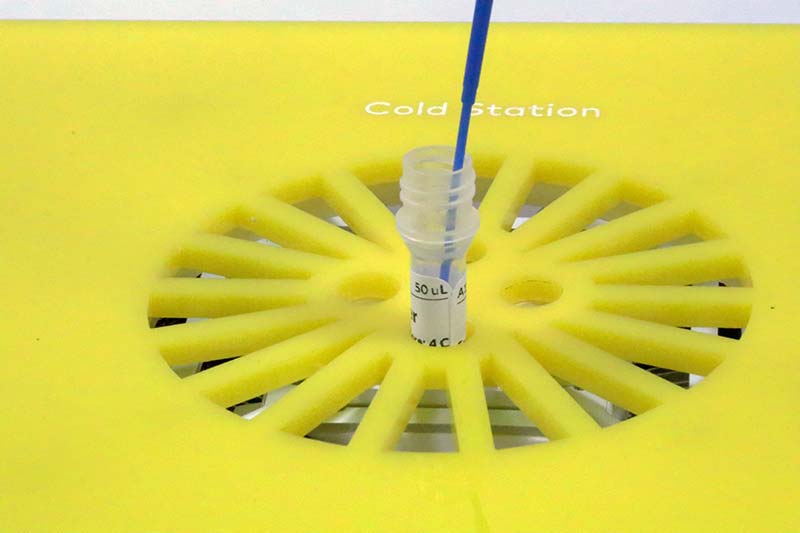
PHOTO 8. Mixing E. coli and transformation buffer in the cold station.
Photo 9 shows the Hot & Cold touch screen interface to the DNA Playground. The blue “Ice 4” button is used to keep the tube at 4°C.
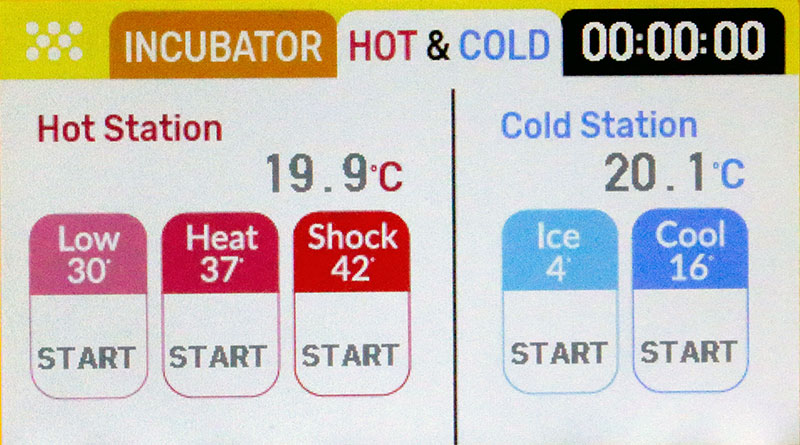
PHOTO 9. Hot & Cold Interface.
Alternatively, keep the tube of transformation buffer chilled in a bowl of ice water. Note that ice water should have a temperature of 0°C, not 4°C.
4. Transform E. coli
Using the Hot and Cold Stations of the DNA Playground, administer the temperature shock to transform the E. coli. Follow the shock treatment by mixing the E. coli with recovery media (Photo 10).
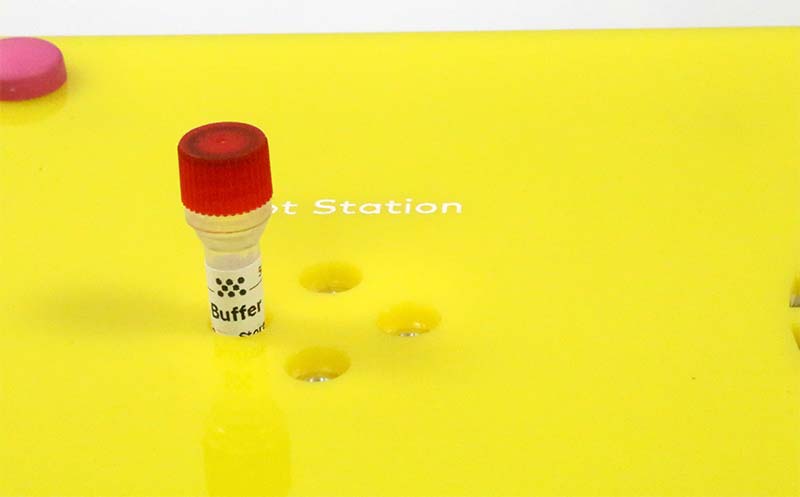
PHOTO 10. Administering temperature shock in the Hot Station.
5. Grow Transformed E. coli
Pour a few drops of transformed E. coli/recovery media on agar + ampicillin plates and spread the cells evenly on the petri dish using a sterile loop. Incubate for 24 hours at 37°C and then 30°C for the next 48 hours. Photo 11 shows the timer interface to the Playground DNA device.
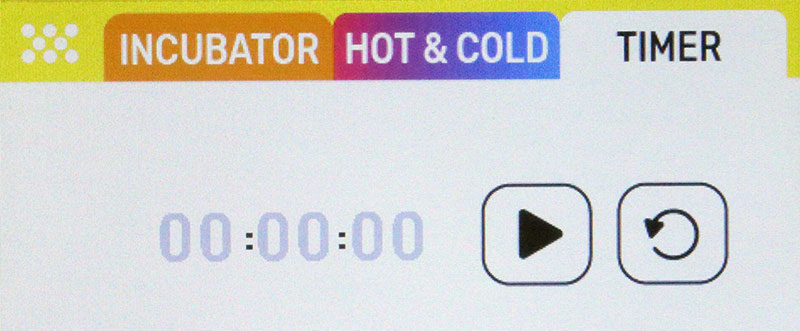
PHOTO 11. Timer interface.
You should see the results shown in Photo 12 as the dyes are expressed by the engineered E. coli.
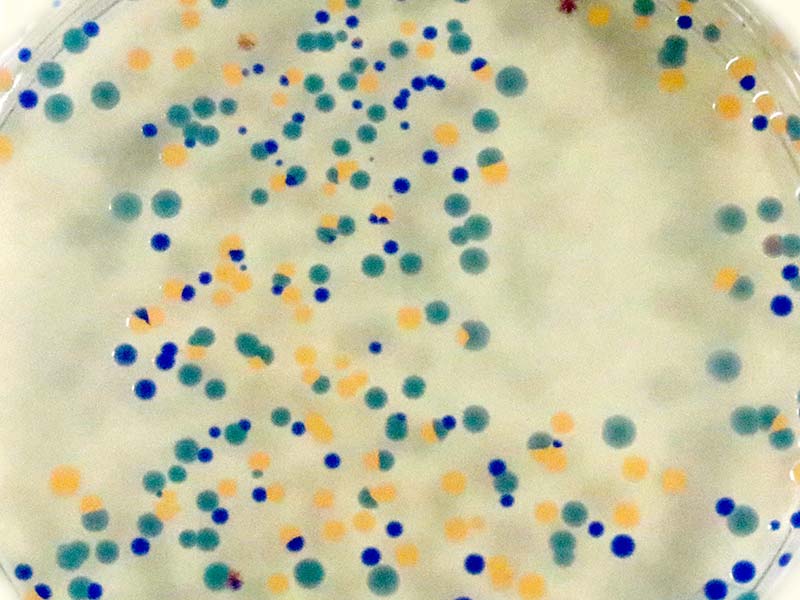
PHOTO 12. Transformed E. coli growing on agar + ampicillin plate.
Only E. coli that contain the plasmid DNA that codes for both dye and ampicillin resistance can reproduce on the agar + ampicillin petri dishes. All other E. coli die during the replication process.
THE TEARDOWN
Access to the circuitry within the DNA Playground device is so easy that the term “teardown” seems too strong. The unit is fully accessible by unscrewing (by hand) the four bolts that run through the unit.
Photo 13 shows the DNA Playground unit with the top removed.
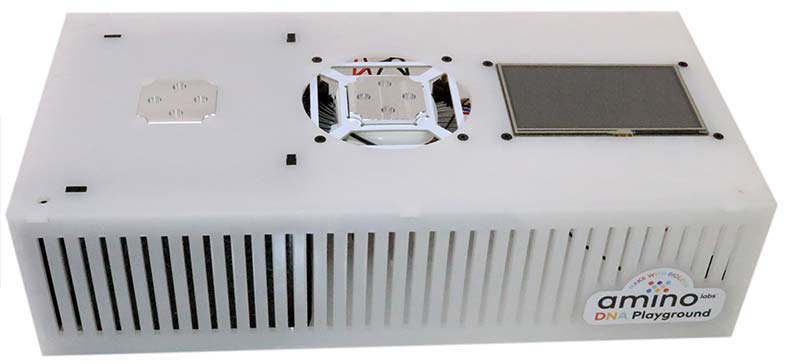
PHOTO 13. Playground DNA with top removed.
The sides are easily taken off to reveal the underside of the top, which contains all the circuitry of the unit. Photo 14 shows the two resistors used to provide heat to the aluminum block of the heat station.
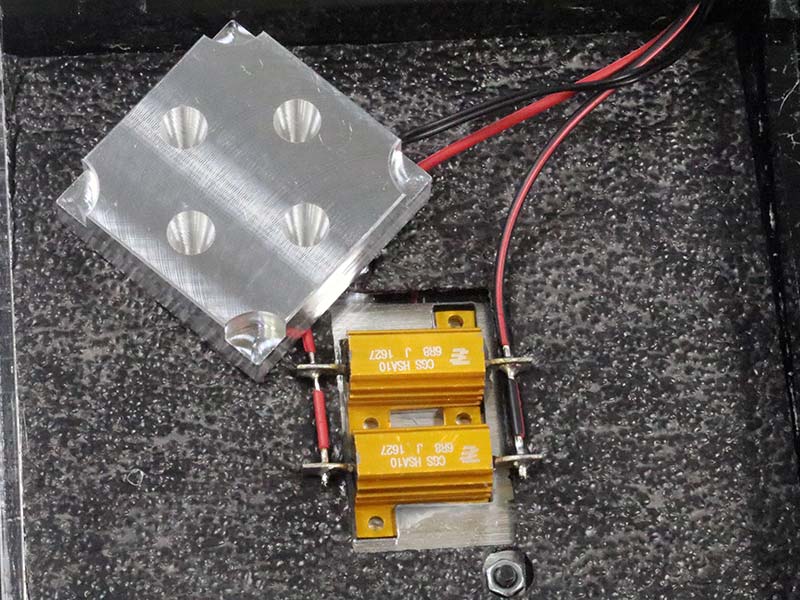
PHOTO 14. Hot Station components.
Photo 15 shows the fan over the cooling fin assembly. The assembly contains a Peltier device that provides cooling of the aluminum block that is drilled out to hold four 1.5 uL tubes.
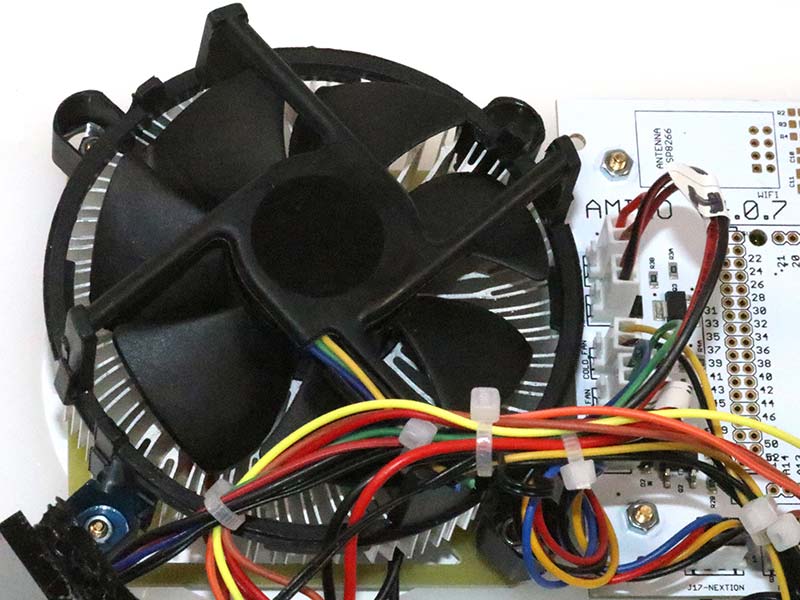
PHOTO 15. Fan over cooling assembly.
Photo 16 shows the microcontroller that’s mounted opposite the color touch screen.
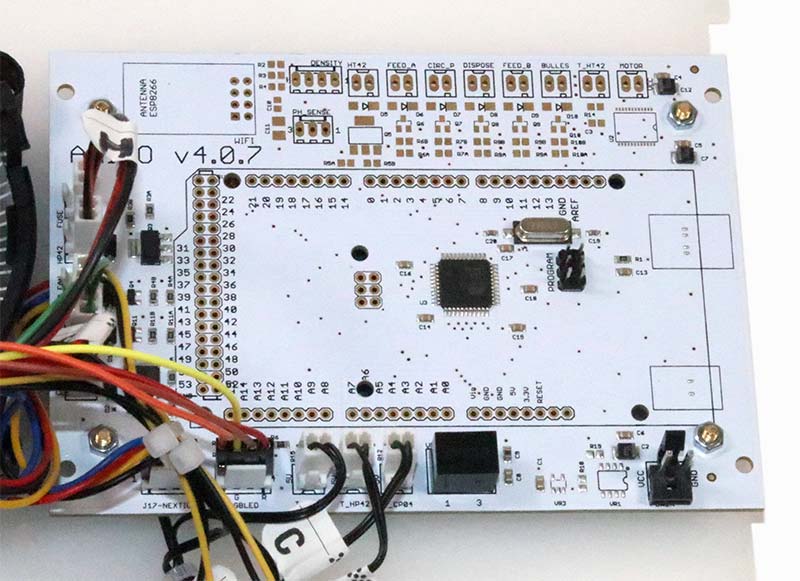
PHOTO 16. Arduino Mega-based microcontroller.
The controller is based on the Arduino Mega. You can see the prominent Atmel ATmega32U4 chip near the center of the board.
An obvious question is, would it be worth it to replicate all or some of the DNA Playground device. While you could probably put together a device for $150 or so, you would miss out on two big value adds. The first is the software. This device is intuitive and very easy to use because of the overall design, including the proprietary software and color touch screen interface.
The second value add of using the DNA Playground or some other commercial unit is standardization. Using one of the DNA Playground stations, you can easily compare results published from another lab that used the same equipment. On the other hand, if you can’t replicate results on your custom equipment, there will be a question of whether the failure is due to differences in hardware and software or to some other variable.
That said, if you’re into projects and handy with a microcontroller, replicating all the features could be a great class project. If you’re considering a more manageable project (such as implementing one or two features), then I’d focus on the cold and hot stations. They free you from operating near a sink and water source.
At a minimum, consider implementing a cold station. Keeping a bowl or bucket of ice water around is much more problematic than maintaining access to hot and warm water.
OUTCOMES
It’s hard — maybe impossible — to go wrong with this kit. If you (or your students) run through the online simulation, you’ll avoid common mistakes. Based on my experience with high school through graduate school students, the most likely failure point is using the loops on the agar plates or petri dishes.
Because of the small diameter (compared with standard 10 cm plates), the angle of the loop on the agar is steeper, resulting in a greater likelihood of the loop piercing the surface of the agar. This can lead to irregular and unwanted results. The solution is practice. By the second plate, just about anyone can successfully streak E. coli on an agar plate.
ANALYSIS & DISCUSSION
As you can see from this experiment, genetic engineering — while theoretically complex — needn’t be difficult to perform. Like making yogurt, given the ingredients, you simply have to consider the viability of the microorganisms and precisely manage the environmental triggers in order to get the desired outcomes.
The limiting factor in this experiment is access to the ingredients — especially a properly configured plasmid. In this case, we were provided with an E. coli-specific plasmid DNA that codes for both dye and ampicillin resistance.
This plasmid shouldn’t interact with normal human cells. This isn’t true for all plasmid DNA, however, as can be seen with viruses that cause disease.
A logical next step in your exploration of genetic engineering is to try some of the other kits offered by Amino Labs. I’ve purchased and used every kit they sell, and haven’t found a “dud” yet. You should then consider kits offered by others.
Also, note there is nothing proprietary about the functionality of the DNA Playground. As with bowls of ice water and hot water, the DNA Playground can be used for simple or complex genetic engineering experiments, with biologicals from any source. NV