Fifty years ago, one of my first jobs had me working for a defense contractor. My boss was an elderly chief engineer. Harry had already retired from a major private-sector manufacturing company. He was constantly pointing out “government waste” to his young engineers. One of his favorite “soapbox” topics dealt with some high-dollar parts our company was making for the US Army. Parts that could have easily been replaced with inexpensive off-the-shelf hardware.
H arry’s lessons had a lasting effect on my career. He convinced me “conserving resources” is an obligation engineers owe to society as well as to their employers. Money is a resource. Engineers (and the rest of us) should always search for the most cost-effective designs to accomplish defined objectives.
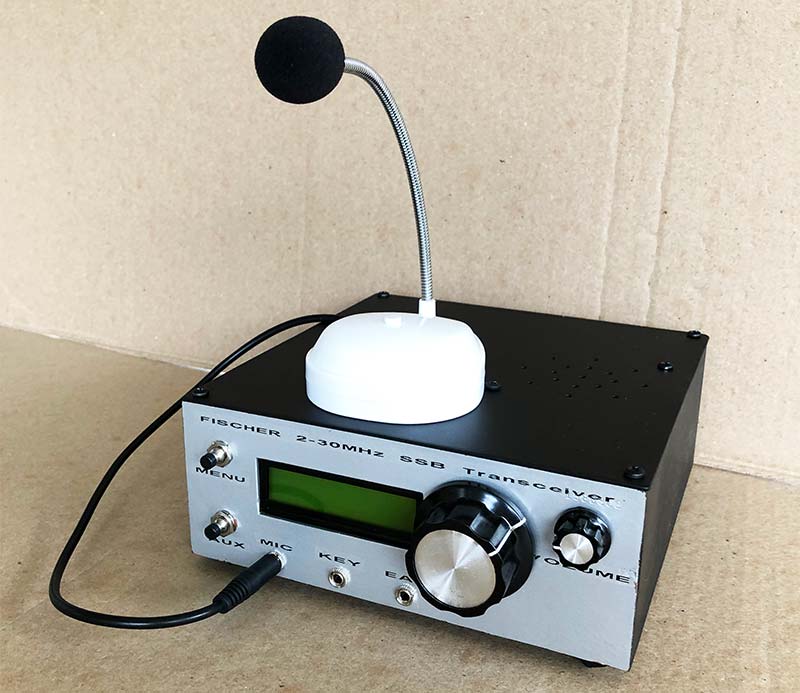
That mindset followed me into ham radio. My friend Phil Sanford AF8H is of like mind. Phil sent me a picture of a nice-looking desk microphone that started life as a $1 LED desk lamp from the Dollar Tree (Figure 1).

FIGURE 1.
Phil is a “sculptor.” In much the same way other sculptors see works of art hidden in stone, he was able to see the microphone potential hidden in that lamp. I certainly didn’t need another desk mic, but the prospect of building one from a $1 LED lamp and a spare mic cartridge was a project I could not pass up.
That same afternoon, I went grocery shopping with my wife, persuading her to stop at the Dollar Tree on the way home. They were sold out. By the time we were heading to the third Dollar Tree store, ice cream was getting soft and her patience was wearing thin. At least, I got that feeling when she snapped: “Can’t you guys afford to buy REAL microphones?” Obviously, she doesn’t share the satisfaction some of us get from building our own gear.
I decided to document the process of building my microphone. First, the two parts of the base need to be separated. The bottom is held to the top with four plastic fasteners. Figure 2 shows the bottom half of the base.
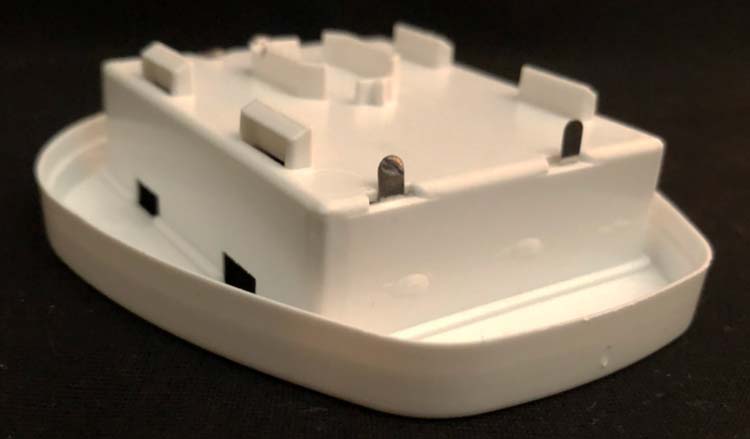
FIGURE 2.
There are two rectangular boxes with angled tops on each side of the bottom. The top half of the base has four clips that slide down those angled tops and hook under the top sides of the boxes. I separated the two halves by using small screwdrivers to pry the hooks out of both boxes on the side with a hole. Simultaneously, I reached into the hole with a pair of pliers, gripped the side, and pulled the two pieces apart. Refer to Figure 3.

FIGURE 3.
Next, I pried the LED cover off and unsoldered the two LED wires. I then used a hacksaw to cut the plastic LED enclosure from the metal gooseneck. I sawed all the way around, being careful not to cut into the wires. You’ll probably need them. The inside diameter of the gooseneck was too small for any of the wire I had on hand (Figure 4).
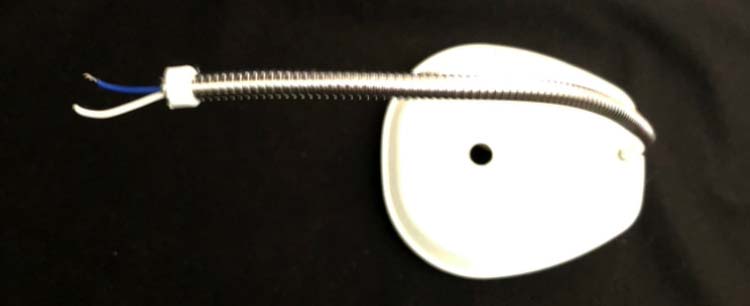
FIGURE 4.
I chose to use a PUI Audio (AOM-5024L-HD-R) electret microphone cartridge because they deliver significantly higher output than most condenser mic elements. When I checked, Digi-Key had them (P/N 668-1596-ND) listed online for around $3 each.
The higher output was important because I planned to use the mic with my MicroBITX (uBITX) SSB transceiver. Baofeng microphones supplied with Version 6 uBITX transceivers have received a lot of criticism. A common complaint has been “weak” modulation. Many operators have added preamps or replaced the factory microphones with CB “power mics.”
The PUI spec sheet recommends mounting the cartridges in metal housings for heat dissipation. I found the cartridges were just a bit too large to fit inside one of the brass ferrules used in 3/8” OD copper tubing fittings. Rolling up a piece of sandpaper to fit inside the ferrule and sanding for a few seconds creates a very tight fit which I strengthened with a drop of super glue, as you can see in Figure 5.
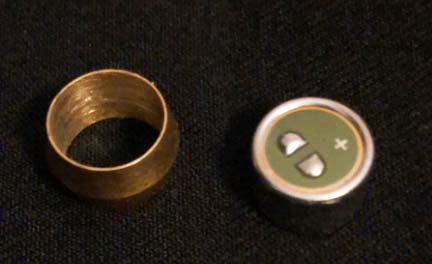
FIGURE 5.
Before the glue, I dropped the ferrule over the two wires and the gooseneck. Then, I soldered the wires to the mic cartridge. Polarity is important!
The blue wire went to the positive terminal marked (+) on the PUI cartridges. The white wire was still soldered to one side of the lamp “on-off” switch. That connection became a common ground for both the mic cartridge and Push-To-Talk switch.
The inside diameter of the brass ferrule is about 1/16” larger than the outside diameter of the plastic band left on the gooseneck where I sawed off the LEDs. I shot some silicone into the ferrule, centered it on the gooseneck, and set it aside to cure (Figure 6).
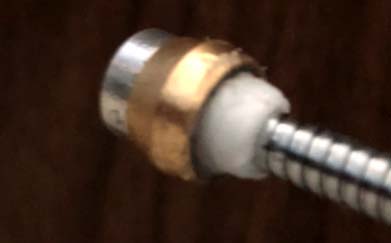
FIGURE 6.
In my application, one side of the microphone cartridge needs to be grounded and the Push-To-Talk switch also needs to be grounded to transmit. I drilled a hole just large enough to accommodate my three-conductor microphone cord and soldered the three wires to Mic+, PTT, and ground.
No one will ever mistake my $6 desk mic for a $5,000 Neumann microphone or even a $500 Heil. However, I believe it complements the MicroBITX transceiver case I crafted from printed circuit board material, and it gets “good” on-the-air reports. My late boss, Harry would be proud. Objectives met. Resources conserved. NV
Parts List
| ITEM |
PRICE |
SOURCE |
| LED Desk Lamp |
$1.00 |
Dollar Tree |
| PUI Audio Mic Cartridge |
$3.16 |
Digi-Key |
| 3/8 OD Brass Compression Sleeve |
$0.20 |
Ace Hardware Store |
| 2.5 mm Stereo Plug |
$1.06 |
eBay |
| Microphone Wind Screen |
$0.15 |
eBay |
| |
|
Grand Total $5.57 |