In addition to making breadboarding easier, the new Dr. Duino Starter Kit can be a useful tool in learning Arduino hardware and software design. Getting into microcontroller development for the first time can be a daunting undertaking and anything that can simplify the process will be welcomed by many. Plus, there are many other possibilities for how this kit can be used.
The oscilloscope is my go-to measurement instrument in every electronics project I work on, helping me debug and fine-tune hardware and software projects. In this article, I’ll show how you can get started with a simple-to-use scope you probably already have. Best of all, it’s free! When you graduate from this simple scope, you can purchase a more powerful scope using the exact same user interface. I think the free scope control software, Waveforms, is the simplest to use, most feature-rich pro-level software of any of the available options. Using a sound card as the hardware interface with Waveforms puts a simple yet powerful scope in your hands for free.
This project implements a clock/timer device with several handy features other than just a simple alarm. It utilizes a 16-bit PIC, the MPLab Code Configurator, and a serial LCD.
One thing you want to check before you start a long 3D print job is to verify you have enough filament on the spool to complete the print. You don’t want to come back to your printer at the end of a two-day run (as I have!) only to discover that the machine ran out of filament and the top part of the object is missing! This project describes a dedicated “spool scale” that provides a real time readout via an Arduino of just how much material you have left.
Meet the SW-4U: A four-position ham radio antenna switch with PC control via a USB connection. The switch is controlled by an application program running on the PC that allows you to select any of four antennas, ground all for safety, and to power the switch on and off.
There are situations where a low output impedance to A headphones is required. This article discusses three different versions of headphone amps to fit your particular application: a stereo amp powered by the power line; a battery-operated mono amp for a crystal set; and a battery-operated amp for a ceramic cartridge.
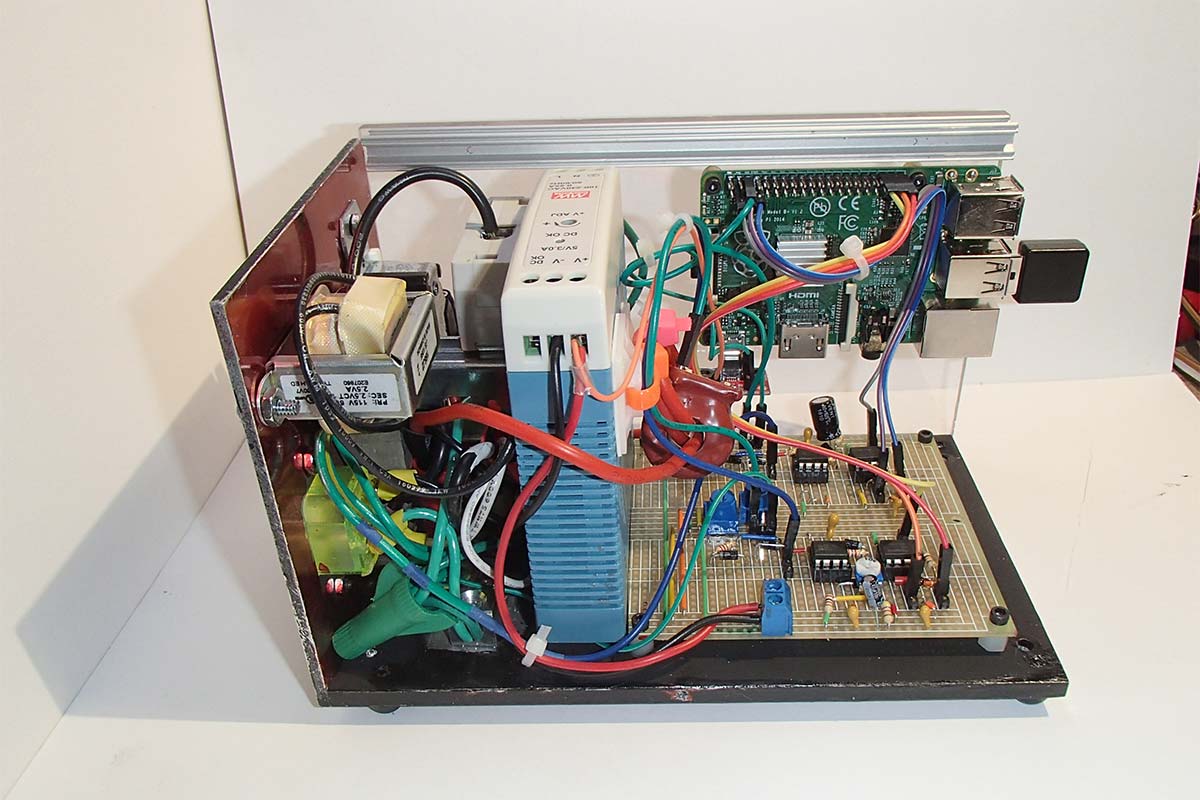
Work areas usually have multiple power strips ganged together and connected to the same outlet. Various devices are connected to these strips, including computers, lights, coffee pots, space heaters, etc. Environmentally conscious persons ask, “How much power does my work area consume?” Safety conscious persons ask, “Am I overloading my circuit?” Calculating the answers requires two basic measurements: the voltage supplied to the circuit, and the amperage consumed by the circuit. Measuring AC voltage and, particularly, amperage with a multimeter is a potentially dangerous diagnostic for laypersons.
Wouldn’t it be nice to have a self-contained volt/amp meter that displays the values on a webpage?
It took me eight months of part-time work to restore all 168 pounds of a Heathkit “H-1.” I would like to share a few of the trials and tribulations I went through to resurrect this beast.
This system monitors motion from a USB webcam on a Raspberry Pi 3 using the OpenCV API. Once movement is detected by the system, it takes a picture of what set the motion detection software off and emails that picture to you. It also affords you the ability to remotely view the webcam from an Android application from anywhere in the world at any time.
A dummy load is a resistor used to load any radio frequency generator/amplifier to simulate an antenna for testing purposes. It’s used to allow full power output while testing or experimenting without radiating a radio frequency signal. Here’s one you can build for less than $5.